Great Planes Tracer 46 Kit - GPMA0400 User Manual
Page 24
❏
9. Cover the first fuse side with Great Planes Plan
Protector and fit and glue the second side together over the
first, making two identical fuse sides.
❏
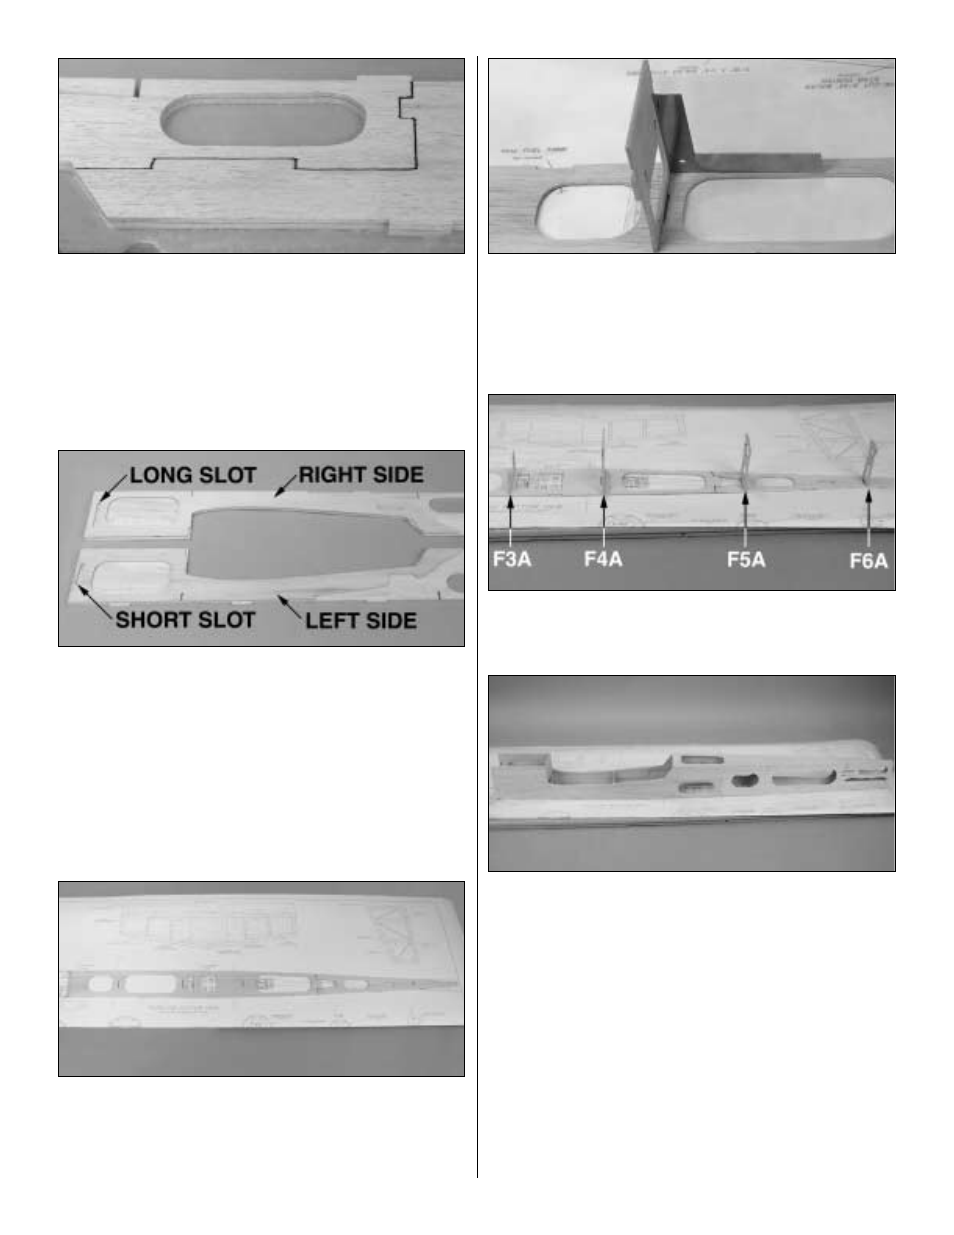
10. Position the fuse sides exactly as shown. Glue the
die-cut 1/8" ply left fuselage side doubler (L) to the left
fuse side. Glue the die-cut 1/8" ply right fuselage side
doubler (R) to the right fuse side. Note: The left fuse side
doubler is the one with the short slot and the right side fuse
doubler is the one with the long slot.
❏
11. Align the die-cut 1/8" balsa forward and aft fuse tops
together over the plan and pin in place. Glue the fuse top
pieces together with thin CA, making a fuse top. Note: Make
sure the fuse top is positioned upside-down so the forward
edge aligns with the aft edge of the firewall on the plan.
❏
12. Glue former F2 vertically in the front of its slot in the
fuse top. Be sure the F2 doubler you installed in step 6 is
facing forward.
❏
13. Drill 3/16" holes in formers F4A and F5A at the
punch marks.
❏
14. Glue the die-cut 1/8" ply formers F3A, F4A, F5A and
F6A vertically in the rear of the slots in the fuse top.
❏
15. Fit the fuse sides and die-cut 1/8" balsa fuse bottom
in place.
❏
16. Using a square, make sure both sides of the fuse are
perpendicular to the building surface. Using your square to
double-check that the sides are vertical before gluing each
former, glue formers F6A, F5A, F4A, F3A and F2 to the
fuse sides, top and bottom. Note: Do not glue forward of F2
until instructed to do so.
❏
17. Starting at F2 and working aft, glue the fuse sides to
the fuse top.
24