Great Planes Tracer 46 Kit - GPMA0400 User Manual
Page 22
❏
20. From one piece of 30" tapered balsa aileron stock,
cut a 4" and a 2" length. Cut 4" and 2" lengths from the
other 30" aileron stock.
❏
21. Glue the two 4" pieces to the inboard TE of each
wing panel, with the inboard ends aligned at the centerline
of the wing.
❏
22. Glue the 2" pieces to each wing tip, aligning them
with the outboard edge.
❏
23. Cap both wing tips with leftover 1/16" balsa sheet.
Sand to the shape of the wing.
❏
24. Sand the LE so the top and bottom are flush with the
LE sheeting. Note: Be careful not to sand into the sheeting.
❏
1. Trim both pieces of the aileron stock so they have
1/16" clearance on both ends when positioned in place.
❏
2. Mark the hinge locations on the ailerons and wing and
cut the hinge slots the same as was done on the tail.
❏
3. Bevel the LE of the ailerons to a “V” shape as shown
on the wing cross-section.
❏
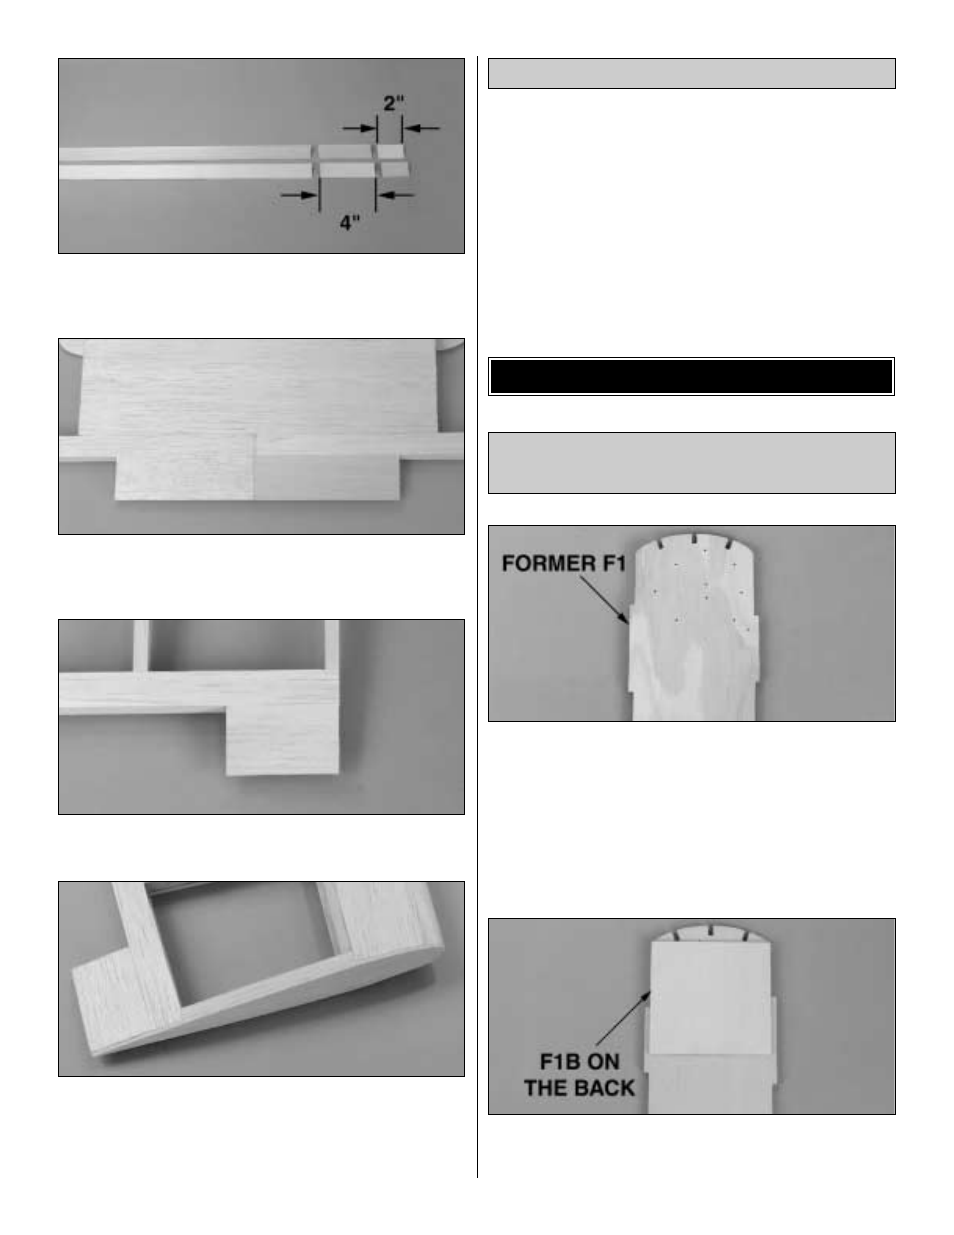
1. Place one die-cut 1/8" ply former F1 on the work
surface with the front (punch marked) side facing up. Epoxy
the second F-1 to the first with 6-minute epoxy, again with
the punch marked side facing up. Make sure the edges all
the way around are aligned. Wipe away any excess epoxy
before it cures. Note: If the firewall formers are warped,
simply clamping them together may not “cancel out” the
warps. It is best to clamp the formers to a table or a flat
board until the epoxy cures.
❏
2. Glue the die-cut 1/8" ply F1B to the back of the F1
formers with medium CA. From now on this assembly will
be referred to as the firewall.
Assemble the Fuselage
Formers and Sides
BUILD THE FUSELAGE
Hinge the Ailerons
22