Great Planes Tracer 46 Kit - GPMA0400 User Manual
Page 16
❏ ❏
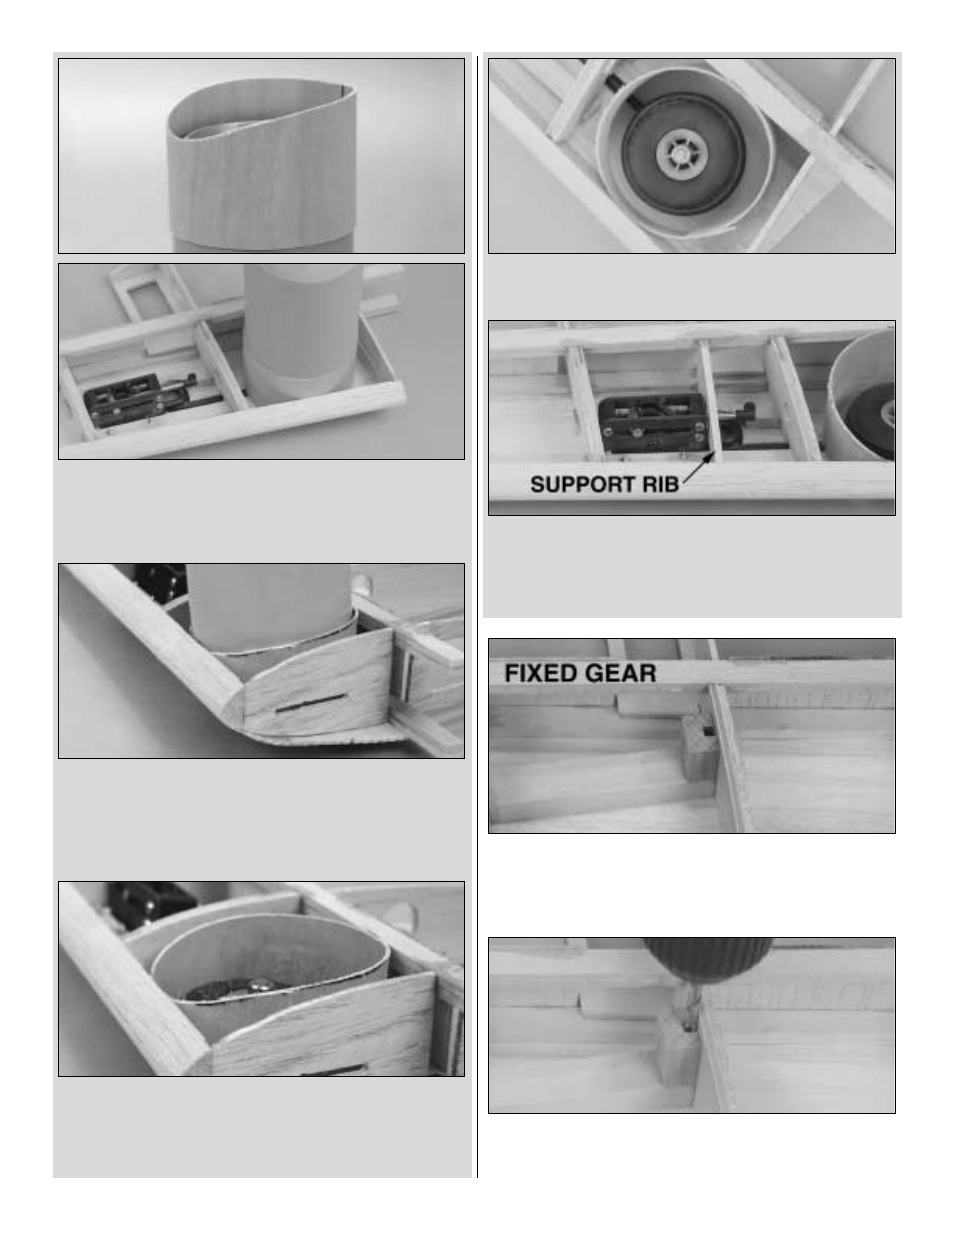
33. Shape one end of the wheel well so that when
slid in place it makes contact with the sheeting all the
way around.
❏ ❏
34. While holding the well in place, mark a cut line
around it so that the top sheeting will just touch the well
when it is glued in place. Remove the well from the can
and cut around the line.
❏ ❏
35. Double-check the shaping of the well by looking
at it from the inboard end of the wing. When satisfied with
the fit, glue it to the sheeting, centering it between ribs 3
and 4. Note: Leaving the can in the well will help the well
hold its shape as it is being glued.
❏ ❏
36. Trim the bottom LE sheeting from within the
wheel well.
❏ ❏
37. Epoxy the die-cut 1/8" ply retract support rib
in place.
If this is your first wing panel, go back to step one and
build the left wing half over the left wing plan.
❏ ❏
38. If you are installing fixed gear, turn your wing right-
side-up and epoxy the 7/16" x 5/8" x 3/4" maple grooved
torque block to the rib 3 doubler and the landing gear rail,
with the groove facing the doubler as shown in the photo.
❏ ❏
39. Drill a 5/32" hole through the landing gear rail and
bottom sheeting, using the groove in the torque block as
a guide.
16