Build the fuselage – Great Planes Spitfire 40 Kit - GPMA0179 User Manual
Page 20
❏ ❏
7. Draw a centerline on the LE. Shape the LE of the
aileron to a “V.”
❏
8. Repeat steps 1 through 7 to build the other aileron.
Note:
be sure to build a left and right aileron.
❏
9. Using the same techniques as the stab, hinge the ailerons.
❏
1. Cover the fuselage side view of the plans with Great Planes
Plan Protector.
❏ ❏
2. Pin a die-cut 1/8" ply
forward fuse side FFS over the plan.
❏ ❏
3. Pin the die-cut 1/8" balsa
aft fuse side AFS over the plan.
❏ ❏
4. Using two 1/8" x 1/2" x 24" balsa sticks, cut, fit and glue
the
fuselage side sticks in place, building a right fuse side.
❏
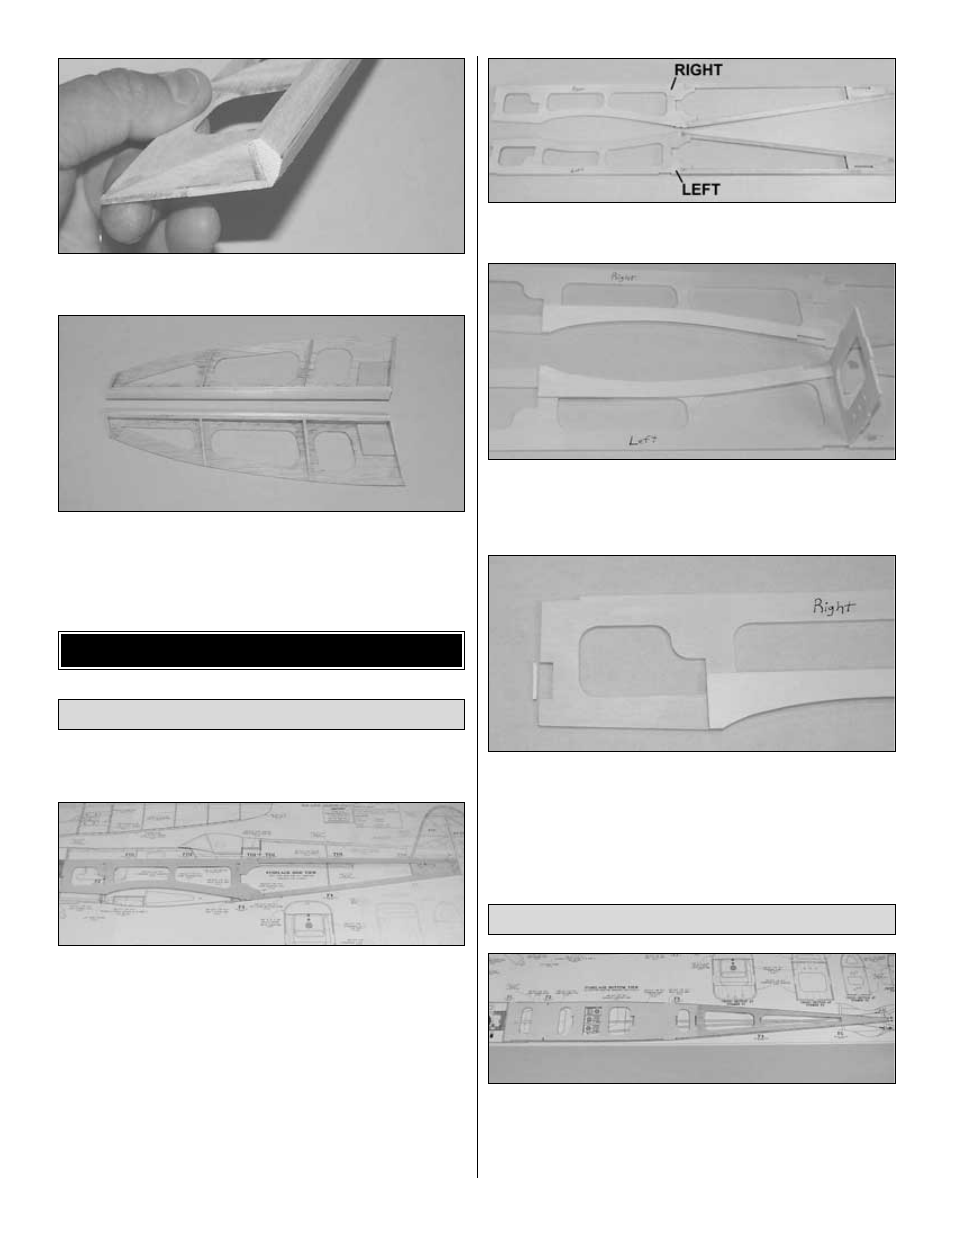
5. Remove the T-pins from the right fuse side. Write “RIGHT”
on the forward fuse former. Cover the right fuse side with Great
Planes Plan Protector.
❏
6. Repeat steps 2 – 4, building the
left fuse side over top of
the first.
❏
7. Flip the left side over so it is a mirror image of the right,
as shown in the photo. Label the inside of the left side “left.”
❏
8. Glue the die-cut 1/8" ply
fuse doublers FS to the inside
of the right fuse side, using the die-cut 1/8" ply
former F3 to
properly position FS. Repeat for the left side.
Note: Do NOT
glue F3 in place at this time.
❏
9. Trim the right-thrust notch from the right fuse side as shown
in the photo by cutting between the aft edge of the slots.
❏
10. Lightly sand the outsides of each fuse side.
❏
1. Position and glue the die-cut 1/8" ply
forward fuse top
FFT and the die-cut 1/8" balsa aft fuse top AFT over the plans.
Note: Remembering that the plans are a bottom view, be sure
to position the forward fuse top as demonstrated on the plans
to allow for the right thrust built into the aircraft.
Assemble the Fuselage Box
Assemble the Fuselage Sides
BUILD THE FUSELAGE
20