Assemble the wing – Great Planes Spitfire 40 Kit - GPMA0179 User Manual
Page 10
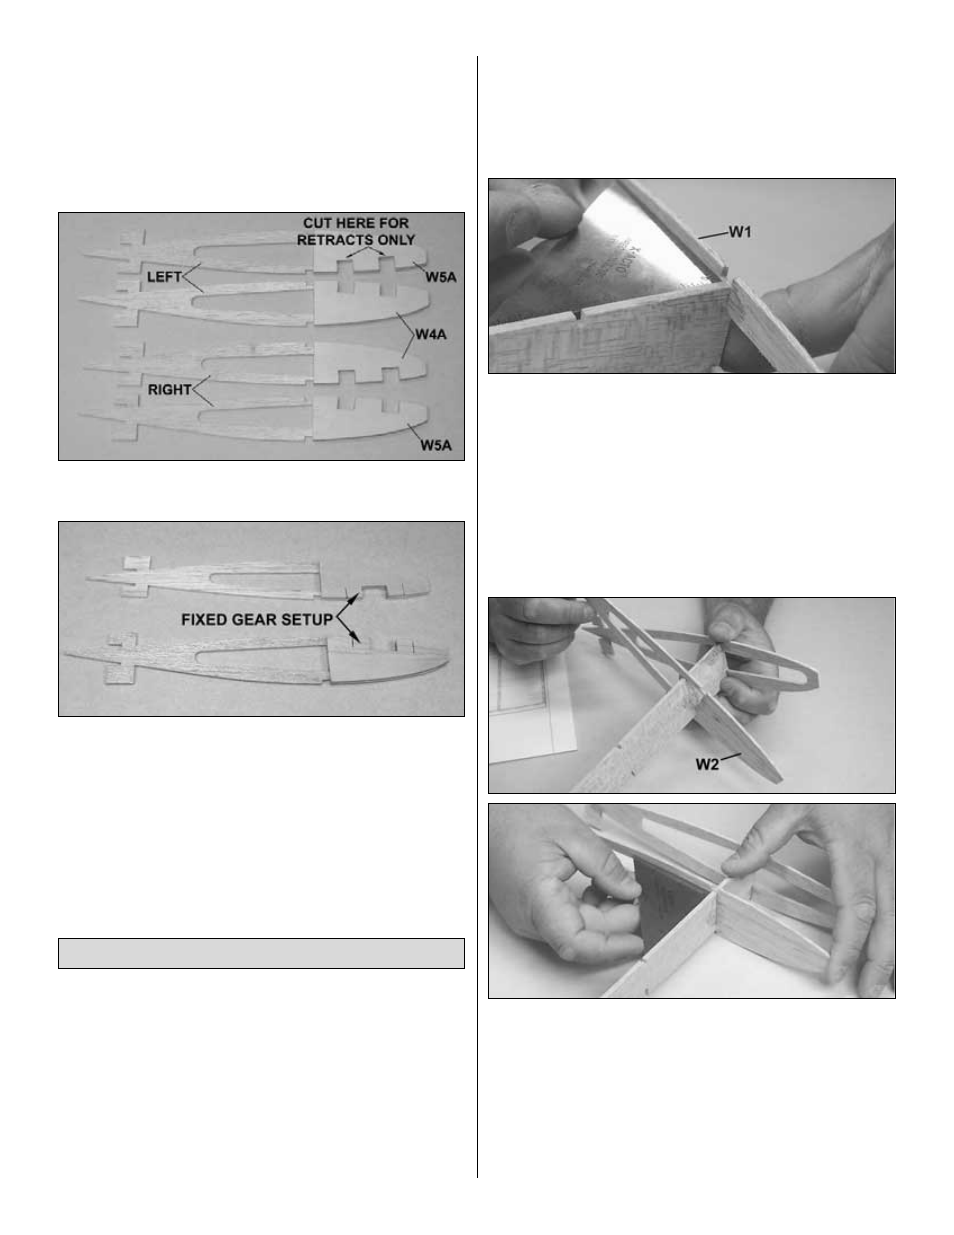
At this time, you must decide if your model will have fixed or
retractable landing gear. The parts used are identical, but the
cut outs made will vary based upon which type of landing gear
will be installed. Carefully read and follow the instructions which
match your landing gear type.
❏
2. Select the two die-cut 1/8" ply wing rib doublers W4A
and W5A.
If you are using retracts,
cut out the 2 individual notches in the
ply doublers as shown in the photo.
If you are using fixed gear,
cut out the single notch in all four ply
doublers, two of which are shown in the photo.
❏
3. Select the two die-cut 3/32" balsa wing ribs W4 and W5.
Position the W4 ribs mirrored to one another and glue the W4A
doublers onto the outboard sides of W4. Position the W5 ribs
mirrored to one another and glue the W5A doublers onto the
inboard sides of W5. Label the ribs left and right. Cut the
notches from the W4 and W5 ribs, using the notches in W4A
and W5A as guides.
We’ll begin by building the left wing upside-down over the left
wing bottom view plan. Remember that the wing is being built
upside-down as you work. Also keep in mind that we will refer
to the “bottom” or “top” as being the aircraft’s actual bottom or
top at all times.
Note that one wing panel on the plan demonstrates fixed gear
mounting and the other demonstrates retractable gear
mounting. If you are using retracts, you will still build your left
wing over the left wing view, but refer to the right wing view for
retract equipment mounting. If you are using fixed gear, you will
still build your right wing over the right wing view, but refer to the
left wing view for fixed gear mounting.
❏ ❏
1. Cover the left wing panel plan with Great Planes Plan
Protector.
❏ ❏
2. Select the die-cut 3/32" balsa wing ribs W1 through W9
and the die-cut 1/8" main web. Position and glue W1 onto the
web, making sure that the web aligns with the bottom of the
spar notch and is square to the rib, as shown in the photo.
Note: It is possible to put the ribs onto the web upside-down,
but the spar notches will not align if you do so. Be sure to
double-check every rib’s direction as you build. Also, it is
CRITICAL that the ribs be locked tight against the web and
square to the web.
❏ ❏
3. Slide ribs W2 and W3 onto the web and lock in place
as shown in the photos. Confirm they are square, fully locked
against the web and right-side-up, and glue in place. Confirm
the W4, W5, W6 and W9 ribs you have are for your left wing
(doublers W4A and W6A are on the outboard side and W5A
and W9A are on the inboard side of the ribs). Position and glue
ribs W4 through W9 onto the web.
❏ ❏
4. Position one 1/8" x 1/4" x 30" basswood top spar over the
plans, aligning the outboard end with the outboard edge of W9.
Assemble the Wing
10