Great Planes Spitfire 40 Kit - GPMA0179 User Manual
Page 14
rubber grommets.
Note: Provide approximately 1/16" of
clearance between the servo and the sheeting.
❏ ❏
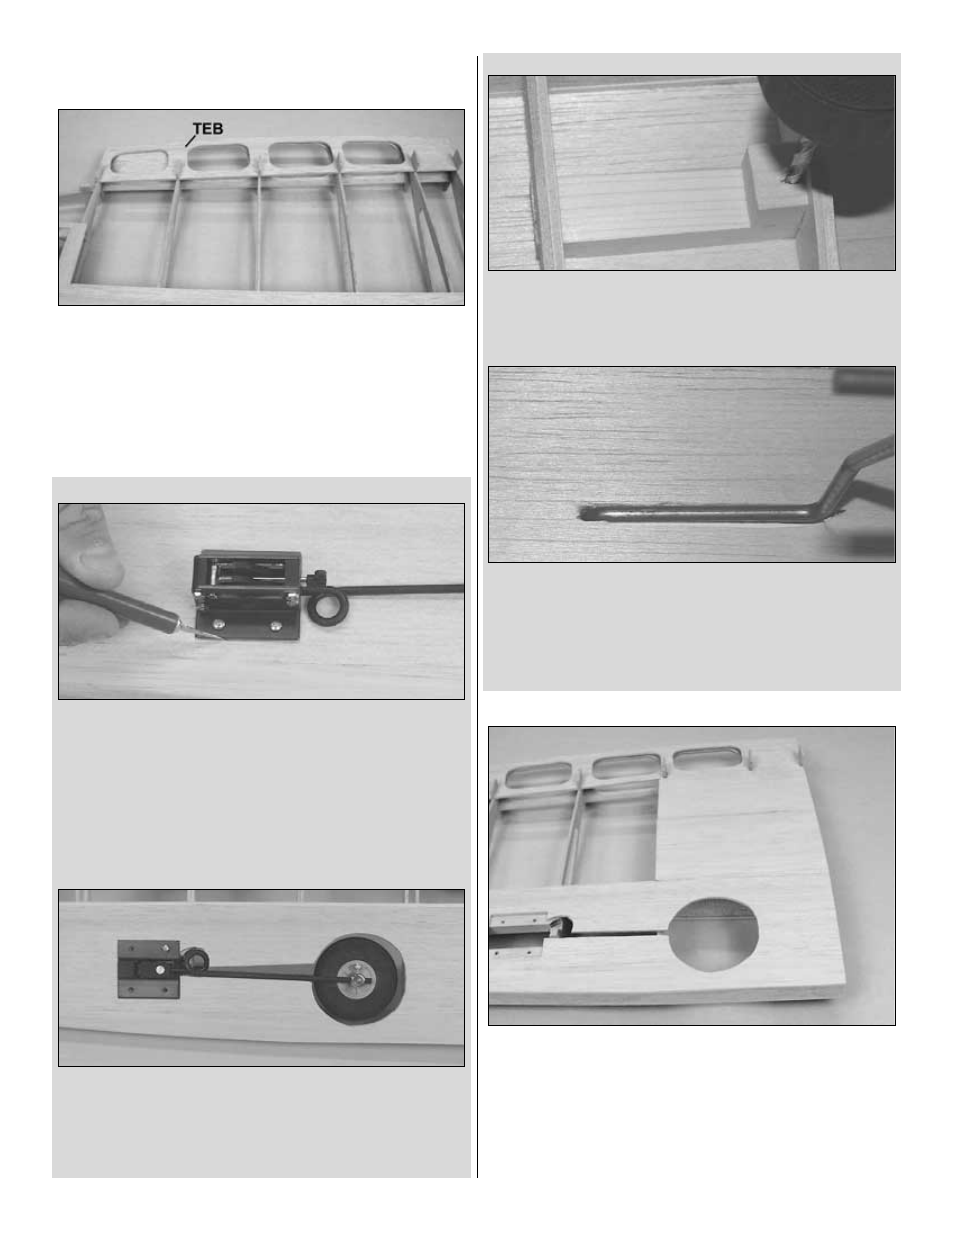
26. Select one die-cut 1/8" balsa
trailing edge bottom TEB
(TEB has 4 holes). Test fit TEB into the bottom notches in the
ribs. Sand the trailing edge slightly, if needed, to mate flush with
TET and against the ribs. Using medium CA, coat all areas
where TEB makes contact with the ribs and TET. Hold TEB in
place until the CA is fully cured.
If you are using retracts, complete steps 27R – 29R.
If you are using fixed gear, complete steps 27F – 29F.
RETRACTS
❏ ❏
27R.Turn the wing right-side-up. Using the holes in the retract
rails as a guide, drill 3/32" holes through the bottom LE sheeting.
Turn the wing upside-down. Temporarily screw the retract body to
the wing as a template for where to cut for the bottom sheeting.
Trim the sheeting around the retract body only.
Note: DO NOT cut
around the gear leg with the gear mounted upside-down.
❏ ❏
28R. Remove the retract body from the wing and remove
the cut out sheeting. Remount the retracts upright in the wing
and cut out around the retract strut.
❏ ❏
29R. Mount your axle and wheel (not supplied) to the
retract strut with the wheel centered between ribs W2 and W3.
Cut out the sheeting around the wheel, allowing 1/8" clearance
all the way around the wheel.
❏
Proceed to step 30.
FIXED GEAR
❏ ❏
27F. Turn the wing right side up. Using the torque block’s
hole as a guide, drill a 5/32" hole through the bottom leading
edge sheet.
❏ ❏
28F. Turn the wing over. Cut a slot out of the bottom
leading edge sheeting over the groove in the fixed gear rail. Fit
the 5/32" wire
main landing gear into the rail.
❏ ❏
29F. Secure the gear to the gear rail with four #2 x 1/2"
sheet metal screws and the two nylon
landing gear straps as
shown on the plan. Remove the gear and straps and set aside.
❏ ❏
30. From one 3/32" x 3" x 30" balsa sheet, cut two 5-1/2"
long pieces. Edge glue the two sheets, making one 3/32" x 5-1/2"
x 6"
center sheet. Cut, fit and glue the center sheet to W1, W2,
W3, the spar, and butted against TEB. Sand the center sheet
flush with W1.
❏
31. If this is your first time through, return to step 1 of “Assemble
the Wing” on page 10, being sure to build a right wing.
14