Join the wing panels – Great Planes Spitfire 40 Kit - GPMA0179 User Manual
Page 15
❏
1. Use epoxy to laminate the two die-cut 1/8" ply
wing joiners
WJ together.
❏
2. Test fit the joiner to the wings as follows: slide the joiner
horizontally through the right wing panel’s ribs 1 and 2. Rotate
the wing joiner vertically so it locks flush against the web. Slide
the left wing panel over the joiner and rotate the left wing panel
into place. The roots of the spars should be flush against one
another. Sand the joiner slightly as needed to gain a perfect fit.
Note: Be sure the joiner is right-side-up so your wing has
dihedral, not anhedral.
❏
3. Remove the joiner from the wings. Working over the Plan
Protector, coat the right face of the joiner and spar web with
epoxy and rotate the joiner into the right wing. Be sure the
epoxy secures the joiner flush to the web and spars. Allow the
epoxy to cure completely.
❏
4. Coat the left face of the joiner and the root ribs with
6-minute epoxy. Rotate the left wing onto the joiner, ensuring a
tight fit to the joiner and aligning the leading and trailing edges
of the root ribs to one another. Allow the epoxy to cure
completely.
❏
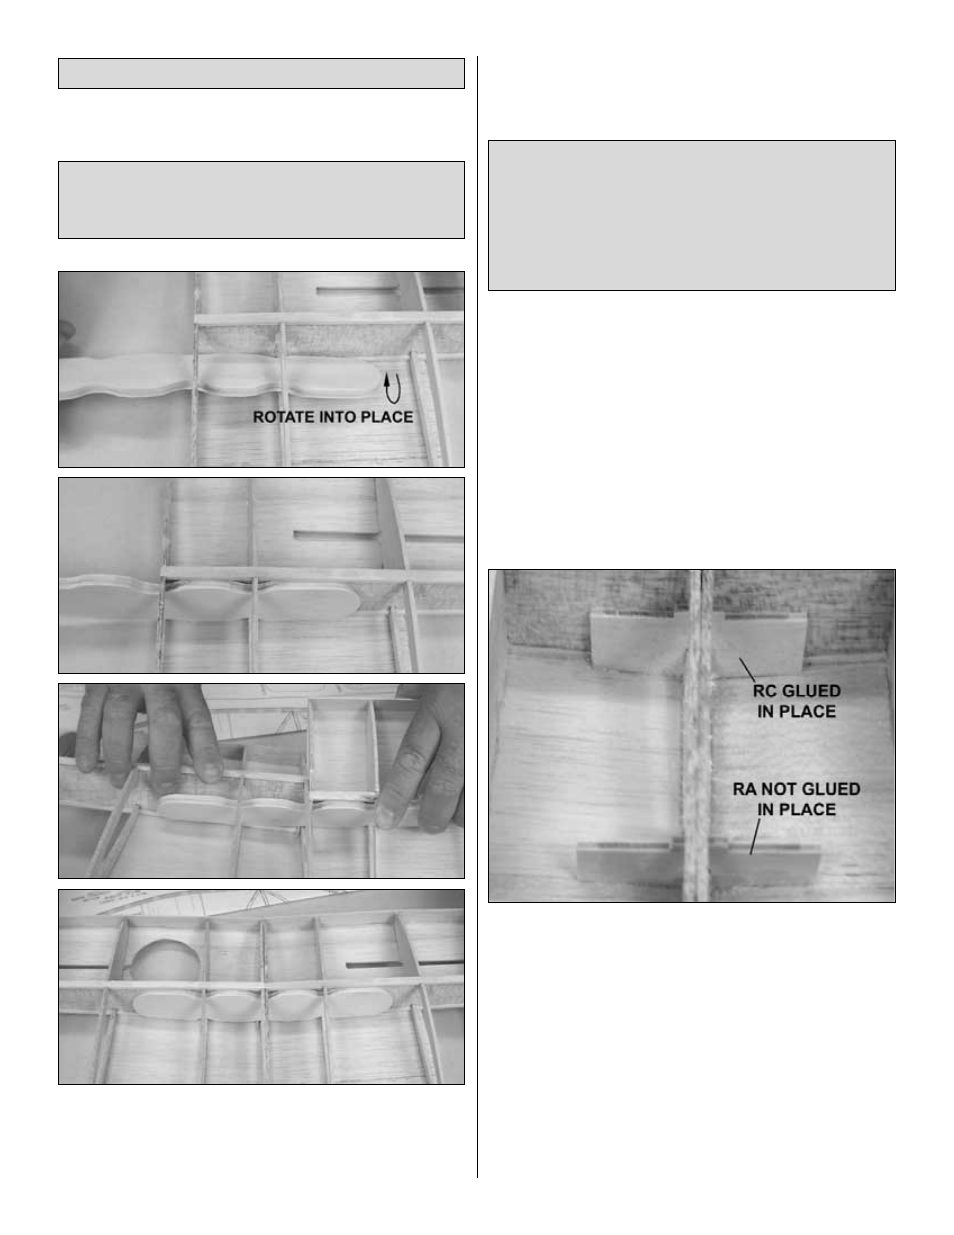
5. Select the die-cut 1/8" ply
retract servo tray parts RA, RB,
and RC. Stand RC vertical against the web, spars, and bottom
sheeting, with the tab for RB pointing up. Glue RC in place.
❏
6. Temporarily position RA as far forward as possible over
ribs W1. Position the tray, RB, onto the ribs and into the notch
in RC. Slide RA under the leading edge of RB to support it,
keeping RA vertical. Glue RA to ribs W1. Glue RB to RA and
RC.
Note: Steps 5 and 6 must be completed even if you are
using fixed gear because RA also supports the wing dowels.
I
f you are using retracts, complete steps 7R – 17R.
If you are using fixed gear, skip to “Complete the
Wing Panels” on page 17.”
Note: In case you should ever have to repair your wing, the ideal
dihedral angle is 13-1/2 degrees. This is easily measured by
placing one wing panel flat on the workbench (right-side-up).
The tip of the second wing panel should be 5-1/2" off the work
surface. Please note that 5-1/2" is ideal with a perfect fit. Your
wing’s dihedral may vary by as much as 1/4" on each side (1/2"
total) without it negatively affecting the aircraft. A tight, proper fit
is more important than an exact tip measurement.
DESIGNER’S NOTE: We know what you’re thinking. “This is the
craziest joiner I have ever seen! WHAT were you thinking?” Bear
with us. You’ll soon see how this unusual shape helps to pull the
two wing halves together.
Join the Wing Panels
15