Great Planes Spitfire 40 Kit - GPMA0179 User Manual
Page 11
❏
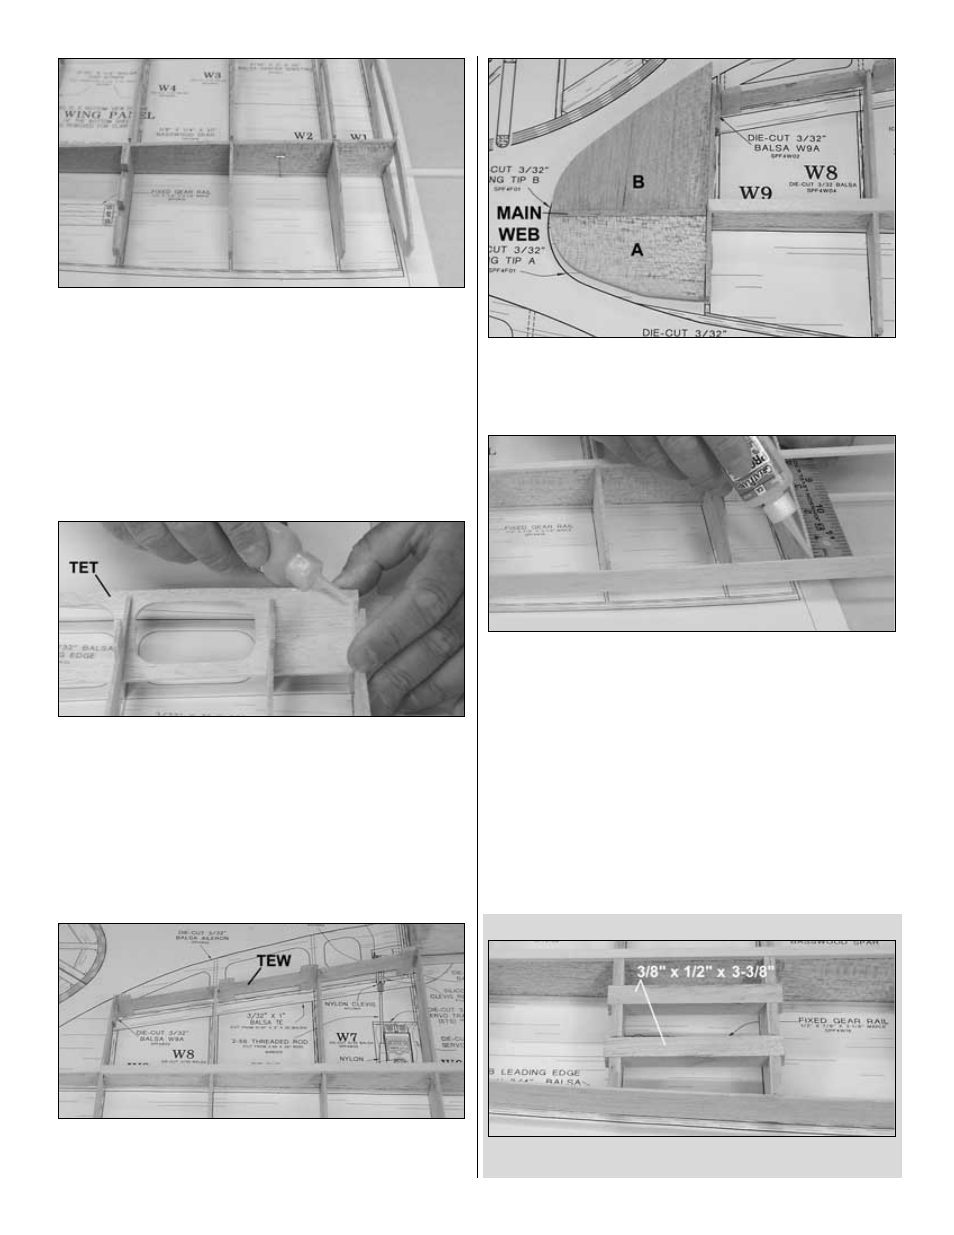
5. Position the ribs/web assembly you began in step 3
upside-down on the plans, locking the spar into the ribs. Glue
the spar to the web and ribs with thin CA. Pin along both sides
of the spar in at least 2 locations to make sure the spar stays
straight.
Note:The top half of the rib is distinctly more curved
and should be toward the work surface, and the gear support
cut outs are away from the work surface.
❏ ❏
6. Test fit one 1/8" x 1/4" x 30" basswood
bottom spar into
the ribs, again aligning the outboard end with the outboard
edge of W9. Lay a bead of medium CA along the spar, then glue
it into the ribs and onto the web.
❏ ❏
7. Select one die-cut 1/8" balsa
trailing edge top TET.
Test fit TET into the top slot of the ribs (remembering the wing
is upside-down). Slide TET out of the ribs, and sand a taper on
the trailing edge, using the cross-section on the plan as a
guideline.
Note: TET and TEB are very similar, but TET has 3
holes; TEB has 4.
❏ ❏
8. Slide TET back into the top notches in the ribs with the
beveled edge toward the bottom of the wing (remembering that
the wing is upside-down). Lock it tight against the ribs, then pull
it flush against the top of the wing ribs and glue to each rib.
❏ ❏
9. Position and glue one die-cut 1/8" balsa
trailing edge
web TEW to W6, W7, W8 and W9 over the plans, keeping it
straight and tight against the trailing edge of W7 and W8.
❏ ❏
10. Select one each die-cut 3/32" balsa
wing tip A and B.
Lock the tabs into W9 and align the outboard ends with the
main web. Glue the wing tips to the web and W9.
❏ ❏
11. Select one 1/16" x 3/4" x 30" balsa
sub LE. Position one
end centered on wing tip A with excess extending past the flat
area on the wing tip. Position the other end centered vertically
on W1, allowing the excess to overhang W1. Working slowly,
glue the sub LE to the wing tip, then to ribs W9 through W2.
Note: Do not glue to W1 at this time.
❏ ❏
12. Note that the main web may have twisted W1. Using a
ruler or straight edge, be sure W1 is straight from trailing to
leading edge, then glue to the sub LE.
If you are using retracts, complete Steps 13R – 17R.
If you are using fixed gear, complete Steps 13F – 15F.
RETRACTS
❏ ❏
13R. Select two 3/8" x 1/2" x 3-3/8" maple
retract gear
rail. Position them in ribs W4 and W5 and glue in place.
11