Great Planes Spitfire 40 Kit - GPMA0179 User Manual
Page 13
trailing edge on the center of the main spar. Coat the forward
half of the main spar with medium CA and press the LE sheet
down firmly in place, holding in position until the CA cures.
Carefully roll the sheeting back from the ribs and lay a bead of
medium CA along the ribs and the sub LE. Weight the sheeting
onto the ribs and sub LE and allow the CA to cure.
Note: If
using retracts,
do not glue the sheeting to the retract rails. If
using fixed gear,
DO glue the sheeting to the fixed gear rails.
❏ ❏
20. Lift the wing off the work surface. Trim and sand the
LE sheet flush with the sub LE and everything flush with W1.
❏ ❏
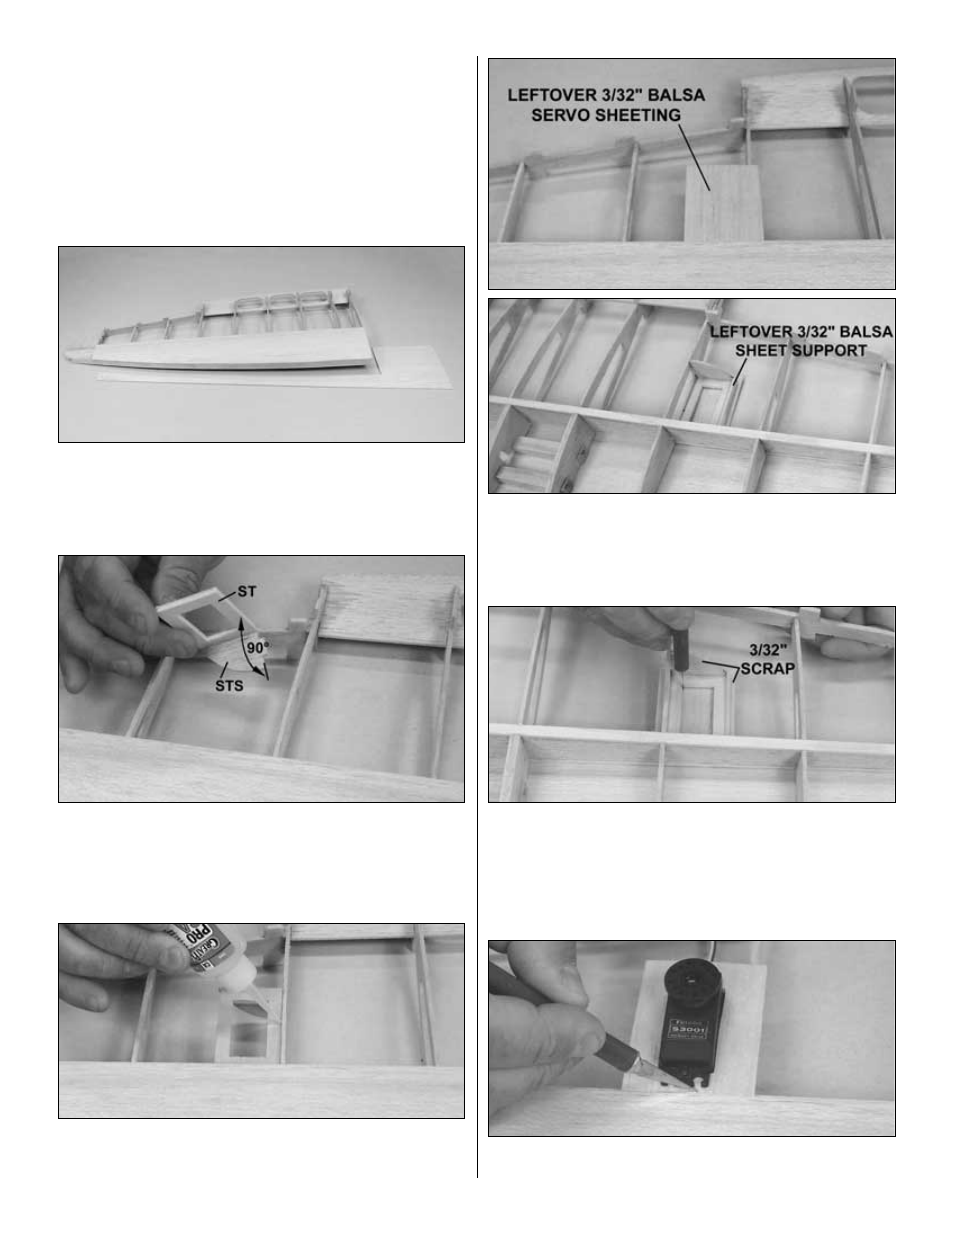
21. Glue the die-cut 3/32" balsa
servo tray support STS
perpendicular to the die-cut 1/8" ply
servo tray ST as shown in
the photo.
❏ ❏
22. Position ST flush against the top of the bottom spar
and W6, locking STS into the lightening hole in W6. Glue ST
and STS to the spar and W6.
❏ ❏
23. Using a piece of leftover 3/32" balsa, make servo sheeting
over the servo tray. Glue the servo sheeting to the spar, W6 and
ST. Turn the wing right-side-up. Using another piece of leftover
balsa, cut and glue a sheeting support from ST to the servo
sheeting.
❏ ❏
24. Cut the opening for the servo in the sheeting, using the
servo tray as a guide.
Hint: While the wing is right-side-up, use
a hobby knife to cut just the corners of the servo opening. Turn
the wing upside-down again, and use a straightedge to cut
straight lines between the 4 corners you marked. Remove the
piece of sheeting.
❏ ❏
25. With the wing upside-down, fit the aileron servo in place
and trim the sheeting around the servo, leaving room for the
13