Great Planes Cherokee Kit - GPMA0180 User Manual
Page 5
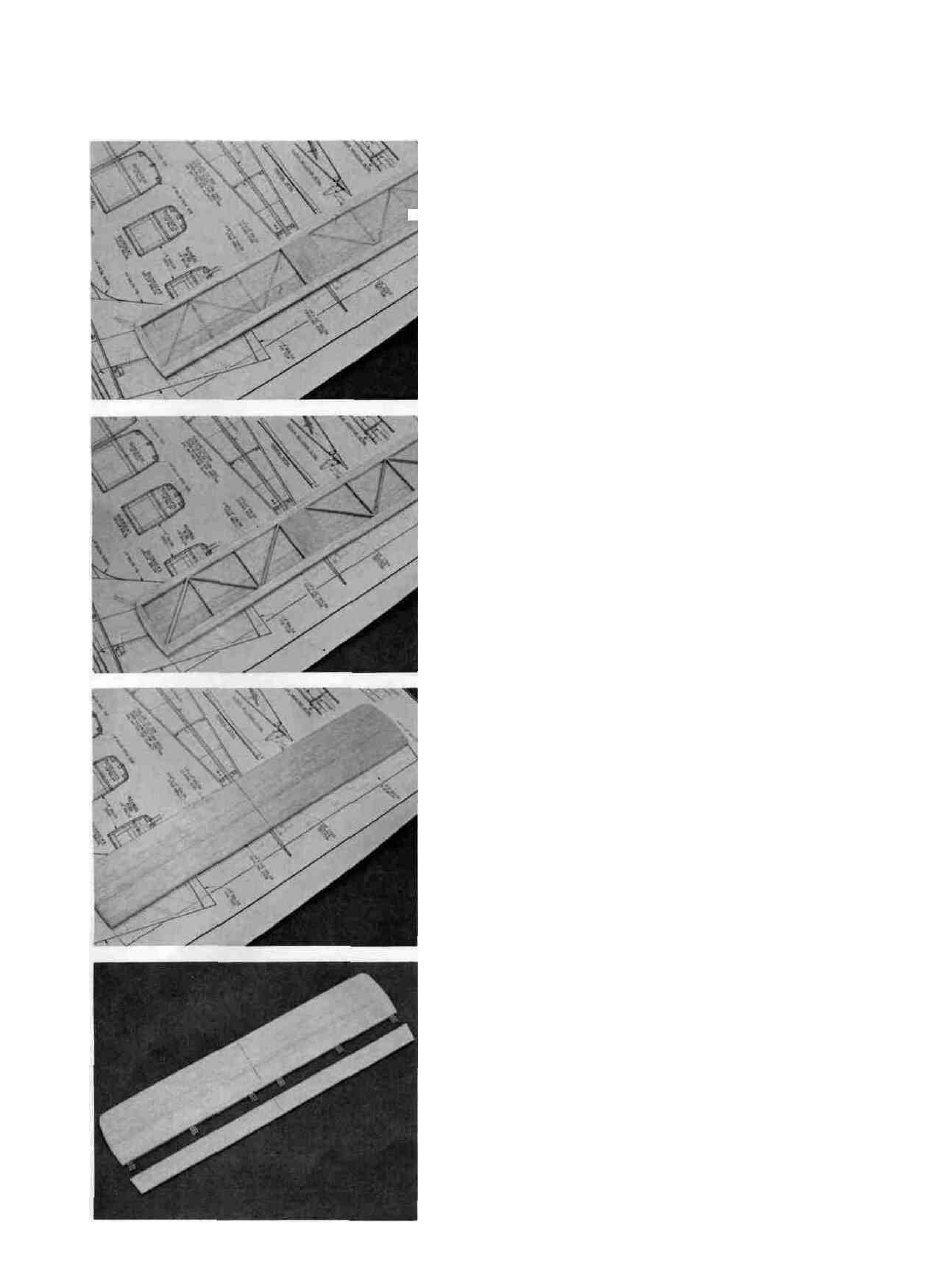
6. D GLUE THE CENTER SECTION AND THE 1/4" x 1/2"
BALSA PIECES TO THE BOTTOM SHEETING
Pin the Balsa Bottom Sheeting over the plan on a flat
' surface. Glue the 1/4" Balsa Center Section piece to the Bot-
tom Sheeting. Now glue in the Tip pieces, the Leading Edge
and the Trailing Edge piece.
7. D GLUE STABILIZER RIBS TO THE BOTTOM
SHEETING AND STAB PARTS
Custom cut the Stabilizer Ribs from 3/32" x 1/4" x 36"
stock. Glue the Ribs on edge to the Bottom Sheeting and the
1/4" parts. When the glue is dry, sand the top surface of the
parts slightly with a sanding block or T-Bar so the Top Sheet-
ing will mate correctly.
8. D GLUE THE TOP SHEETING TO THE STABILIZER:
FINAL SAND
Glue the 1/16" Balsa Sheeting to the top of the Stabili-
zer. Make sure you glue the sheeting to all the Stabilizer
parts. A slow cure epoxy is recommended. Place some
weight on the sheeting to hold it in place so you build a
straight, flat Stabilizer. When the epoxy is dry, sand the
edges of the sheeting smooth and even with the rest of the
Stab. Draw a centerline from the Leading Edge to Trailing
Edge. You will use this line to align (line up) the Stabilizer to
the Fuselage later. Also sand the Stabilizer Leading Edge
and Tips to the Rounded shape shown on the plans. The
Trailing Edge is square; do not round.
9. D MARK AND CUT THE HINGE SLOTS IN THE
STABILIZER AND ELEVATOR
Draw centerlines down the Stabilizer Trailing Edge
and the Elevator Leading Edge. Cut the hinge slots. Trial fit
the hinges. Final sand the Elevators while they are temporari-
ly hinged to the Stabilizer. Sand the Elevator Tips to the Stab
contour. Round the Elevator Tips and Trailing Edge as you
did with the Stabilizer Leading Edge. Remove the hinges and
sand the Elevator Leading Edge to a "V".
5