Great Planes Cherokee Kit - GPMA0180 User Manual
Page 20
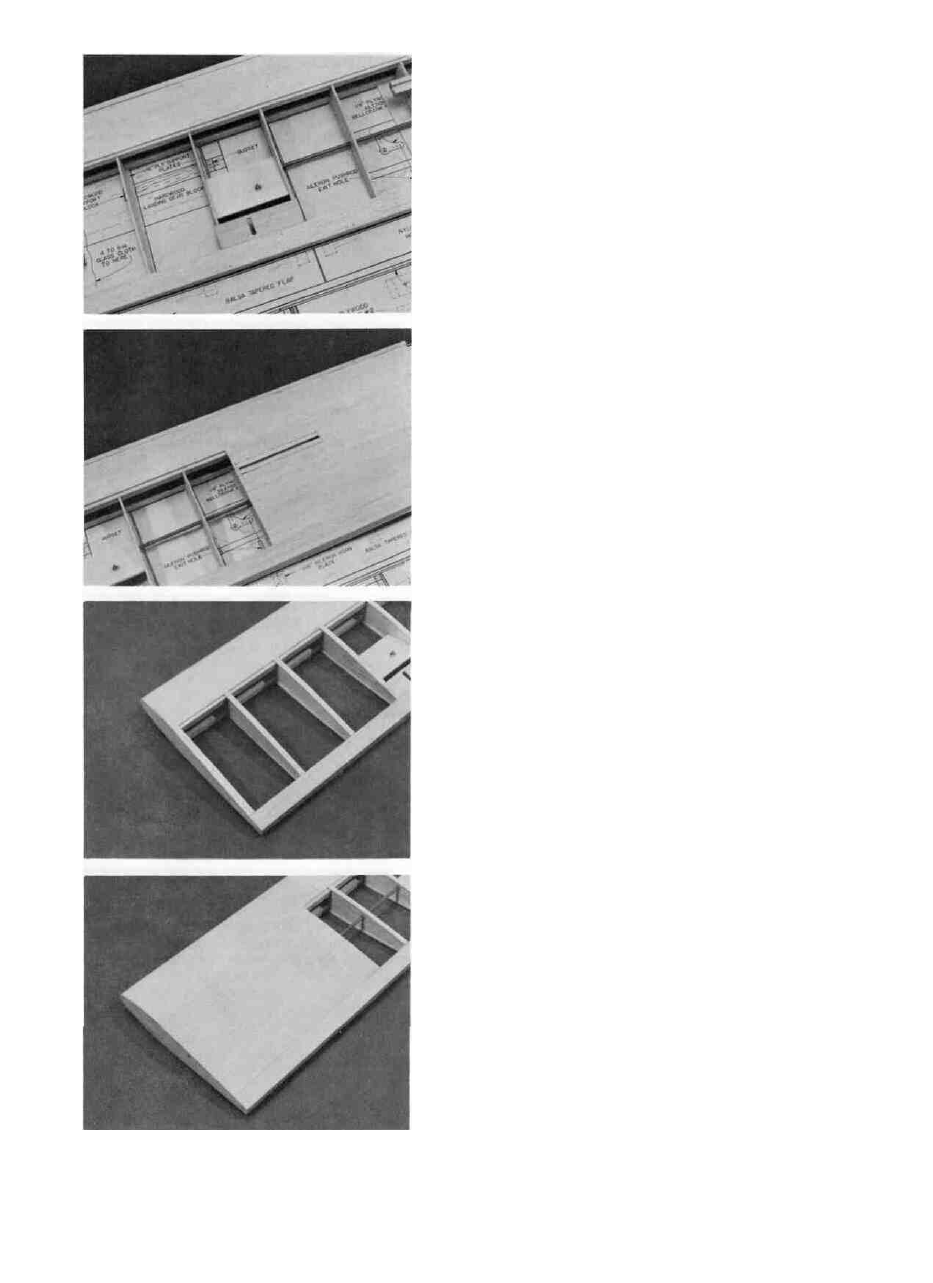
19. D ADD THE 3/32" BALSA AILERON EXIT PLATE
Glue the Balsa 3/32" x 1" x 3-3/8" Aileron Pushrod
Exit Plate to Ribs #6 and #7 and the Trailing Edge Sheeting.
Cut a slot in this Plate for Aileron Linkage clearance. Line
up the slot with the end hole in the nylon Bellcrank.
20. D ADD THE 3/32" BALSA BOTTOM CENTER
SECTION SHEETING
Use 3/32" x 3" x 11-7/8" Balsa provided. Cut and
glue the sheets as you did with the Top Sheeting. Cut out
the area in the front piece of Center Section Sheeting for
Landing Gear Block Clearance. The Block should be flush
with the Sheeting when you are finished.
21. D ADD THE BALSA 3/32" x 1/4" BOTTOM
CAP STRIPS
Remember the outboard Cap Strip is flush with the
outer edge of Rib #10. Also the Cap Strips on Ribs #6 and
#7 stop at the Balsa Aileron Pushrod Exit Plate.
22. D TRIM BOTH ENDS OF THE WING PANEL;
FINAL SAND
Trim and sand the wing parts even with Rib #1 and
Rib #10. Final sand the panel by rounding the Leading
Edge as shown on the plan and sand the Trailing Edge and
Trailing Edge Sheeting slightly at the rear so all parts are
even.
23. D BUILD THE LEFT WING PANEL NOW
Follow steps 2 through 22 and build the left panel
the same way you built the right panel except the left wing
panel is built upside down over the plans. The gear notches
in Ribs #3 and #4 are up and the Landing Gear Blocks are
glued in before any sheeting is added. Glue in the 1/8" Ply
Bellcrank Plate and the Balsa 3/32" Aileron Pushrod Exit
Plate before you turn the wing over and before you add the
Cap Strips. Check that these parts are in their correct posi-
tions for the Left Wing Panel before you glue!
20