Wing joining – Great Planes Cherokee Kit - GPMA0180 User Manual
Page 22
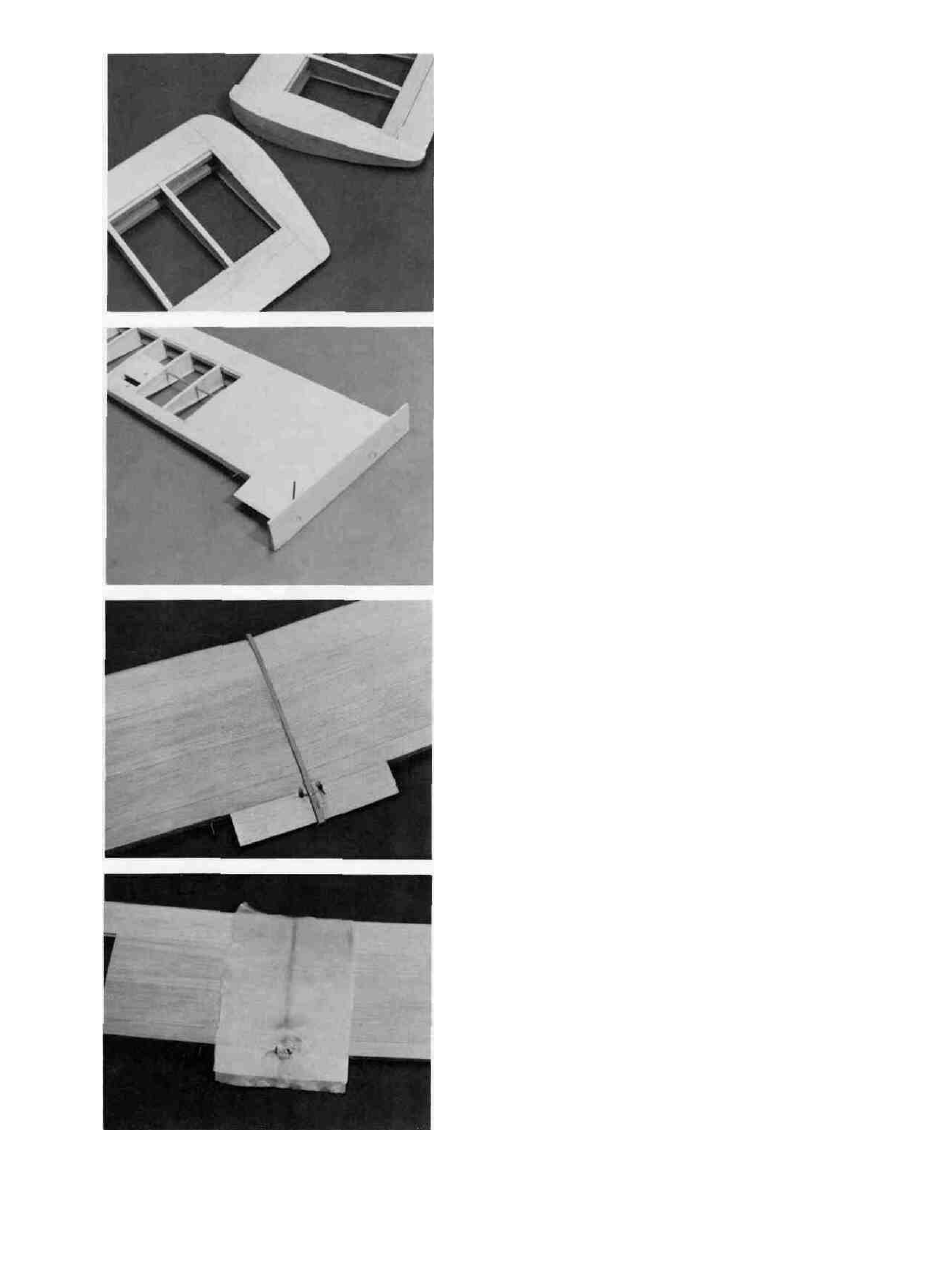
28. D GLUE THE WING TIP BLOCKS TO OUTER
RIBS ON EACH WING PANEL; FINAL SAND
Draw centerlines down Rib #10 and the Wing Tip
Block. (Draw centerlines on both sides of the Wing Tip
Block.) Center and glue the Wing Tip Block to Rib #10 by
lining up the centerlines. Sand the Wing Tip Block to
shape. Use the outside centerline to help you get the cor-
rect shape when you sand. Sand the Tips to the shape of
the Ailerons. Remove the Flaps and Ailerons when you are
finished.
WING JOINING
1. D GLUE THE TAPERED CENTER RIB WEDGE TO
ONE WING PANEL
Draw a centerline down the Center Rib Wedge and
down the outside of Rib #1 on one wing panel. With the
larger edge of the Center Rib down and the wing panel
right side up, line up the Center Rib on the wing panel. Us-
ing epoxy, glue the Center Rib to the wing panel.
2. D JOIN THE WING PANELS TOGETHER
Rough cut the Center Rib to about 1/8" oversize. Align
the Wing Panels together making sure the Leading Edges
and Trailing Edges are lined up to each other. Use slow set
epoxy and glue the Wing Panels together. Each Wing Tip
should be blocked up 2 inches for the proper dihedral. Keep
the Panels in this blocked up position until they are dry.
GLASSING THE CENTER SECTION
1. D CUT GLASS CLOTH TO FIT THE WING
CENTER SECTION
When the glue is dry, final sand the Center Rib to
match the Wing itself. Cut one piece of 4 or 6 oz. glass
cloth to fit the wing center section. One piece of cloth 6"
wide should be used. You may use one piece of cloth for
the top and one for the bottom of the wing. Fill in the holes
around the torque arms with wax from a burning candle so
resin will not stick to the torque arms, which must be
moveable for Flap control.
22