Great Planes Cherokee Kit - GPMA0180 User Manual
Page 16
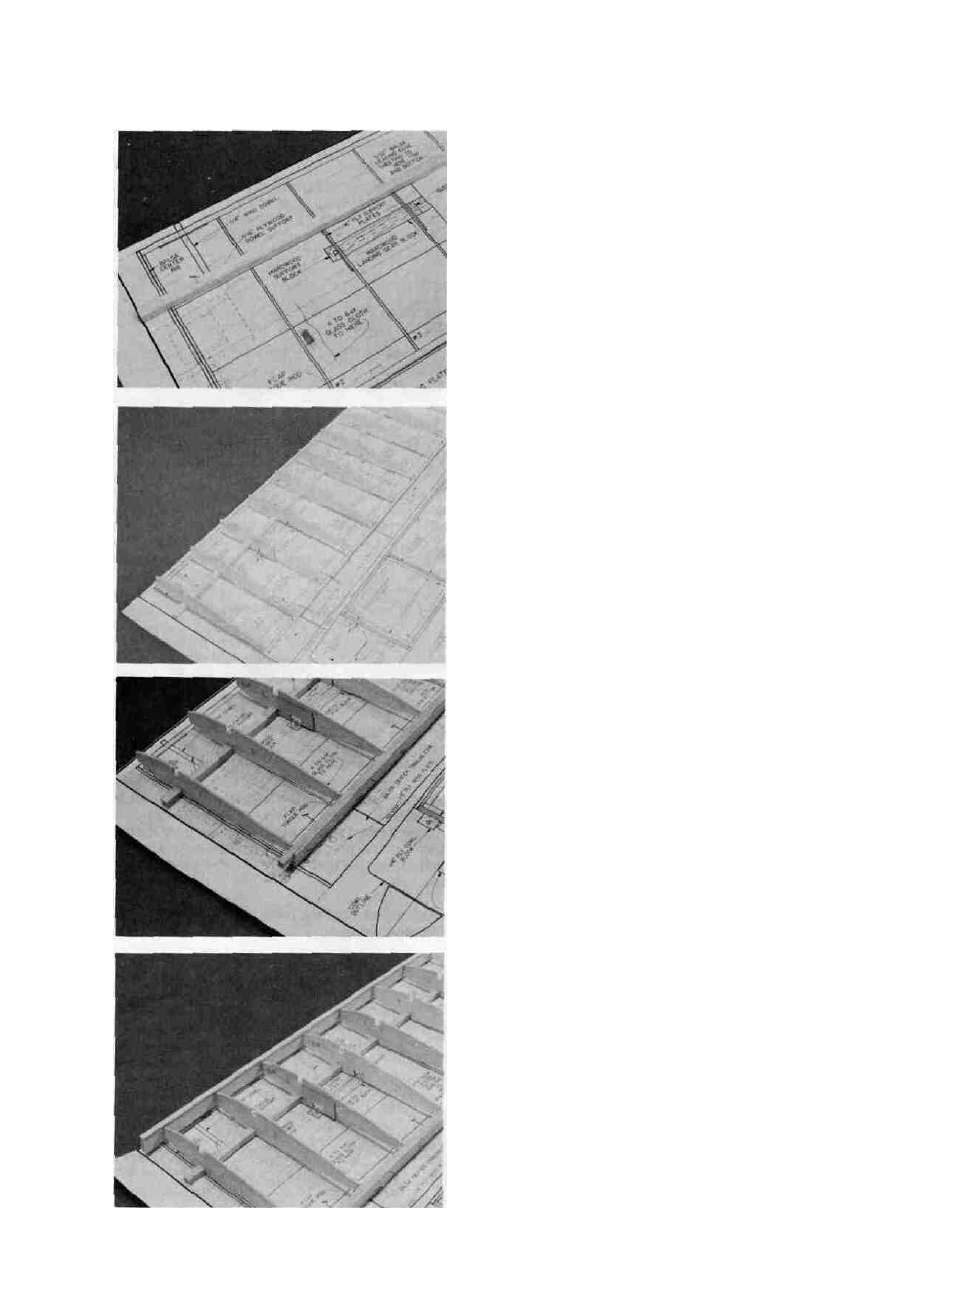
2. D PIN THE 3/8" x 3/8" x 30" BOTTOM SPAR
OVER THE PLANS
Place the wing plan on a flat surface and cover the
plan with waxed paper or kitchen wrap. Pin the Bottom
Spar in position on the plan.
3. D PLACE THE RIBS IN POSITION ON THE SPAR;
DO NOT GLUE YET!
Temporarily install all the Ribs in position on the
Bottom Spar. Make sure all the Ribs are 90 degrees to the
Spar. The Landing Gear notches on Ribs #3 and #4 should
be down. The Bellcrank Plate slots in Ribs #6 and #7
should angle down toward the Rib trailing edges. Remove
the balsa from the bellcrank wire pushrod holes in Ribs #1
4. D ALIGN AND GLUE THE 1/4" x 3/8" x 30" BALSA
TRAILING EDGE TO THE RIB ENDS USING THE
3/32" x 7/8" TRAILING EDGE BUILDING
SUPPORT PROVIDED; GLUE THE RIBS TO THE
BOTTOM SPAR
Align the top edge of the 1/4" x 3/8" Trailing Edge to
the top edge of the Building Support (the extra Trailing
Edge Sheeting piece). Use kitchen wrap between them and
pin the Trailing Edge to the Building Support. Center the
Trailing Edge on the Rib ends. Glue the Trailing Edge to
the Ribs with the Support pinned to your work surface.
Glue the Ribs to the Bottom Spar with CA. (CA glue works
very well on the wing panels. White glue has a tendency to
warp the wing.) Make sure you don't glue the Building Sup-
port to the Trailing Edge as you'll need the Support to build
the left wing panel.
5. D PREPARE AND GLUE THE 1/4" x 7/8" x 30" BALSA
LEADING EDGE TO THE RIBS
Draw a Rib Alignment Line (a straight line) on the
back of the Leading Edge about 1/8" from the top of the
Leading Edge. Align the tops of the Rib leading edges to
the line you drew and glue the ribs to the Leading Edge.
16