Great Planes Cherokee Kit - GPMA0180 User Manual
Page 18
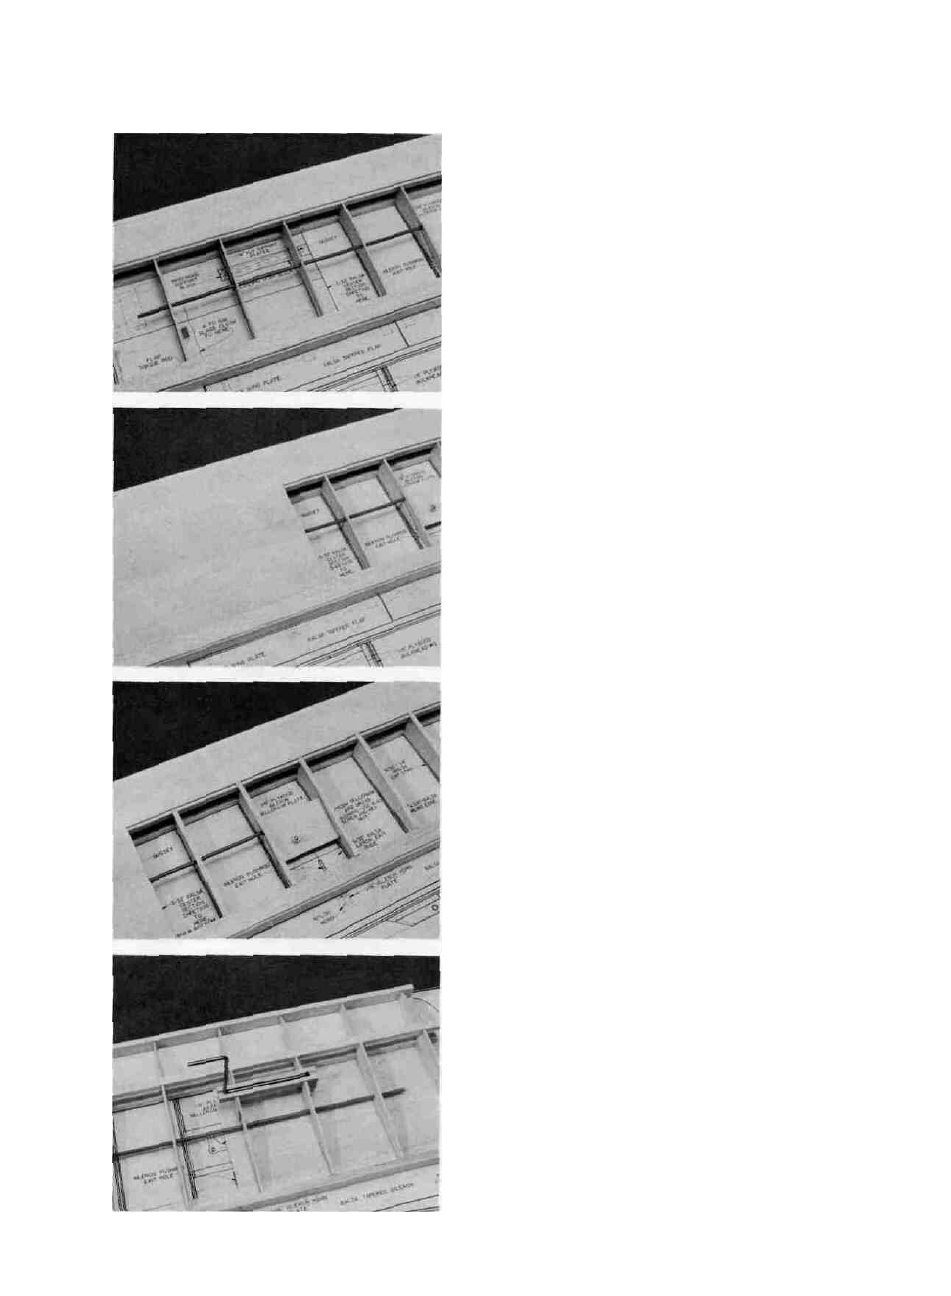
10. D INSTALL PUSHROD TUBES INTO THE
WING PANEL
Thread Outer Pushrod Tube through the small
holes in the Ribs. Cut the Tube to fit between Rib #2 and
Rib #6. Use CA and glue the Tube in place to each Rib.
11. D GLUE THE 3/32" x 3" x 11-7/8" TOP CENTER
SECTION SHEETING IN PLACE
Glue the front Center Section Sheeting in place
first, from the Leading Edge Sheeting back. Custom cut
a second piece of Sheeting to fit between the front Center
Section piece and the Trailing Edge Sheeting. Glue this
second piece in place.
12. D GLUE THE 3/32" x 1/4" BALSA TOP CAP STRIPS
IN PLACE
Custom cut Cap Strips to fit between the Leading
Edge Sheeting and the Trailing Edge Sheeting over the re-
maining Ribs. Use the Wing Panel itself to measure the
length of the Cap Strips. Note that the Cap Strip on the Tip
Rib (outer end of the wing panel) is offset so the outer edge
of the Cap Strip is flush with the outer edge of the Rib.
13. D REMOVE THE PANEL, TURN IT OVER AND
REALIGN
Pin the Trailing Edge to the Building Support piece.
Pin the wing panel to the work surface without placing
pins where they will get glued inside the wing. The wing
panel should be aligned to the work surface. Align the
panel over the plan to help keep it straight.
14. D PREPARE AND TRIAL FIT THE LANDING GEAR
BLOCKS INTO THE WING PANEL
Use epoxy and glue the grooved Support Block to
the inboard (inside) end of the Landing Gear Block as
shown on the plan "Landing Gear Mounting Detail". After
the glue dries, drill a 5/32" hole down through the Landing
Gear Block using the groove in the Support Block as a
guide. Put the Wire Gear in the block and trial fit the as-
sembly into the wing. The Gear Block should extend 3/32"
above the Rib in order to be flush with the Center Section
Sheeting to be installed later. Remove the Wire Gear.
18