Great Planes 38% Extra 330S ARF - GPMA1290 User Manual
Page 8
8
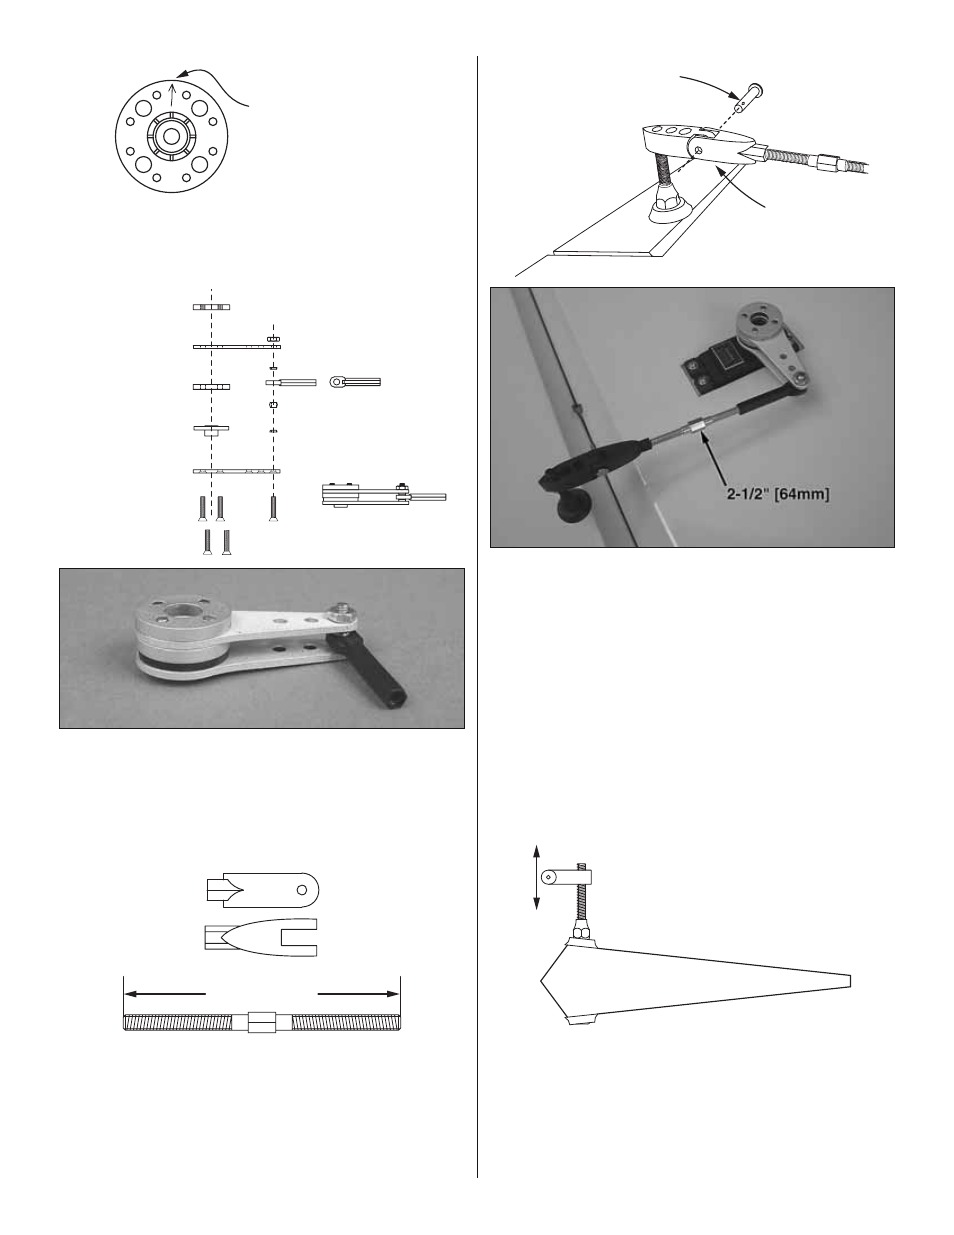
Scratch a small arrow
onto the servo wheel
so you will know which
way is forward.
❏
3. Once the correct orientation of the servo wheel has
been determined, use a hobby knife to scratch an arrow on
the wheel so you will know how to mount the arm later.
Threaded Retainer Disc
Servo Arm Assembly
4-40 Nut
Single-Sided
Top Servo Arm
Single-Sided
Bottom Servo Arm
4-40 x 7/16" [10mm]
Flat-Head Phillips Screws
(USE THREADLOCKER)
3mm Spacer
Servo Wheel
1mm Standoff
Ball Link Ball
1mm Standoff
❏
4. Assemble one of the servo arm assemblies with the
parts shown—it’s easiest to fi rst mount the ball link and
1mm standoffs to the servo arms and temporarily secure
with the 4-40 nut, then join the servo wheel and spacer.
IMPORTANT: Threadlocker must be used on the threads of
all fi ve screws.
Turnbuckle Pushrod
Pin Clevis
2-1/2" [64mm]
❏
5. Gather all the pin clevises included with this kit. Note
that only two have a “normal” thread and the rest have a
reverse thread. Test-thread each pin clevis onto the “normal”
threaded end of one of the 2-1/2" [64mm] turnbuckle
pushrods until you fi nd the two that fi t. Mark those as “N” and
set them aside.
Lock Pin
Pin Clevis
❏
6. Thread one of the reverse-thread pin clevises onto
the reverse-threaded end of a 2-1/2" [64mm] turnbuckle
pushrod. Thread the turnbuckle pushrod to the ball link on
the servo arm and connect the pin clevis to the torque rod
horn with the lock pin.
❏
7. Turn on your radio and adjust the turnbuckle pushrod
so the aileron will be neutral when the servo is centered. The
turnbuckle should be threaded equally into both the ball link
and the pin clevis.
❏
8. Connect the outboard aileron to your receiver. With the
radio on, connect the outboard servo to the outboard torque
rod arm using the same hardware as the inboard servo.
Adjust the torque rod horns up or
down to equalize the pressure from
the pushrods when the servos are
at the extremes of their throw.
❏
9. With the radio on and both servos still connected to the
receiver, adjust the position of the torque rod horns on the
torque rods so the servos will not be “fi ghting” each other
and will be applying the same pressure on the horns when
the servos are at the extremes of their throw.
❏
10. Hook up the aileron on the other wing the same way.