Shrink the covering, Assemble the wings mount the aileron servos – Great Planes 38% Extra 330S ARF - GPMA1290 User Manual
Page 6
6
6
6
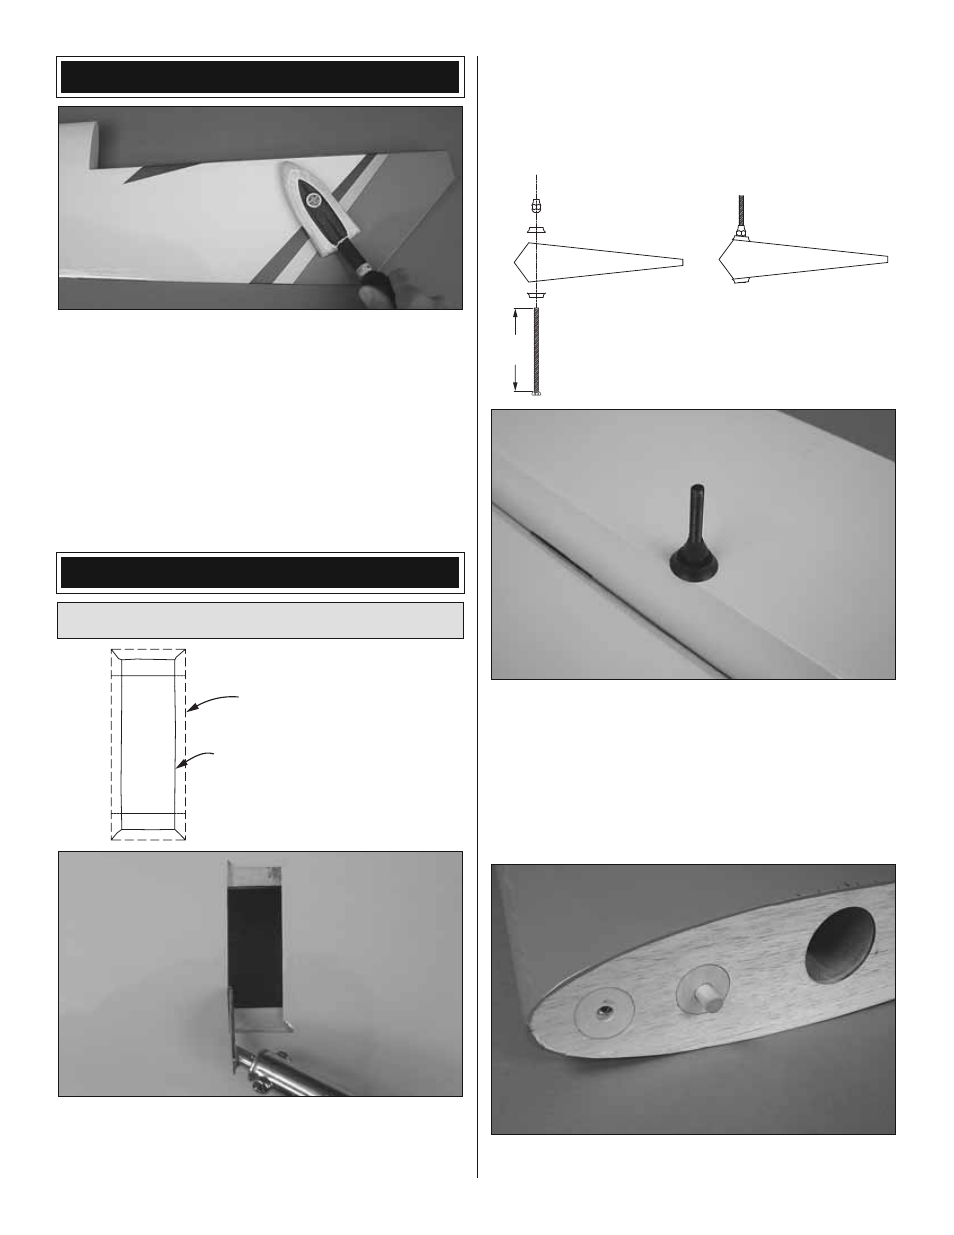
SHRINK THE COVERING
❏
1. Where necessary, use a covering iron (set to
approximately 250°F [120°C] with a covering sock to go
over any parts of the model where the covering requires
tightening. Over sheeted areas, press down on the iron to
bond the covering to the wood. If the covering expands or
bubbles, use less heat. Note: Naptha (lighter fl uid) can be
used to remove any adhesive left from the masking tape that
may have been used to hold any of the parts together.
❏
2. Make sure the elevators and ailerons are securely
hinged by pulling hard on each control surface.
ASSEMBLE THE WINGS
Mount the Aileron Servos
Servo opening in wing.
Cut the covering 1/8" [3mm]
inside the edges of the
opening. Slit the covering up
to the corners.
❏
1. Cut the covering 1/8" [3mm] inside the edges of both
aileron servo openings in the bottom of both wings. Slit the
covering up to the corners and use a trim iron to seal the
covering down inside.
❏
2. Also cut the covering from the holes in the top and
bottom of the ailerons for the threaded torque rods.
Torque Rod Nut
Torque Rod Washer
Torque Rod Washer
75mm Threaded Torque Rod
(Ailerons and Elevators)
3"
[75mm]
❏
3. Use a cordless drill with a Phillips bit and a 5/16" [or
8mm] wrench or pliers to hold the plastic torque rod nut
and mount two 3" [75mm] threaded torque rods into each
aileron with a torque rod washer on both sides.
❏
4. Use epoxy to glue two 10 x 30mm hardwood wing
dowels into the root end of each wing.