Hook up the ailerons – Great Planes 38% Extra 330S ARF - GPMA1290 User Manual
Page 7
7
❏
5. Connect a 12" [305mm] servo extension (HCAM2711
for Futaba) to one of the aileron servos and 36" [915mm]
servo extension (HCAM2726 for Futaba) to the other aileron
servo. Secure each connection with 1-1/2" [38mm] pieces
of heat shrink tubing cut from one of the 3" [75mm] pieces
included with this kit.
❏
6. Tie the string in one of the wings to the servo wires as
shown. Then, pull them through the tube in the wing.
❏
7. Place the aileron servos in the servo openings of one
of the wings. Drill 1/16" [1.6mm] holes for the servo mounting
screws. Temporarily mount the servos with the screws that
came with them. Note: For some JR (or other brand) servos,
the servo mounts may require slight trimming to accommodate
the servos and larger holes may have to be drilled for larger
servo mounting screws.
❏
8. IMPORTANT: Remove the servo mounting screws
and set the servos aside (without pulling the servo leads
out of the wing). Add a few drops of thin CA to each screw
hole to harden the “threads.” Allow the CA to harden. Then,
remount the servos.
Whenever screws are mounted into wood you must harden
the holes with CA after installing, and then removing the
screws. The complete process will not be written out
every time this is necessary. Instead, you will simply be
reminded to “harden the screw holes with thin CA.”
❏
9. Mount the aileron servos in the other wing the same
way—don’t forget to harden the screw holes with thin CA!
Hook Up the Ailerons
Futaba Servo Wheel
Bottom of Hobbico
Servo Wheel
Enlarge the
holes indicated
Drill holes in
the mold marks.
Use 7/64" [2.8mm]
(or 1/8" [3.2mm]) drill
❏
1. If using Futaba servos, drill out the holes in the servo
wheel with a 7/64" [2.8mm] (or 1/8" [3.2mm]) drill. If using
different servos, use one of the aluminum servo arms that
came with this kit as a template for drilling the holes. All the
servo wheels used for the control surfaces in this model
require drilling, so if you have all your servo wheels handy
you could drill them all now, or just drill them as needed.
Note: The servo wheels that come with the CS/TS35-59, 63-
71 Hobbico Servo Horn set (HCAM1071) have mold marks
in the bottom that happen to align with the holes in the
aluminum servo arms. Double-check to make sure the mold
marks align with the holes in one of the servo arms. Then,
drill 1/16" [1.6mm] pilot holes at the marks. Enlarge the pilot
holes with a 7/64" [2.8mm] (or 1/8" [3.2mm]) drill.
Your radio system will be required for the next step,
so gather your transmitter, receiver, battery and
on/off switch.
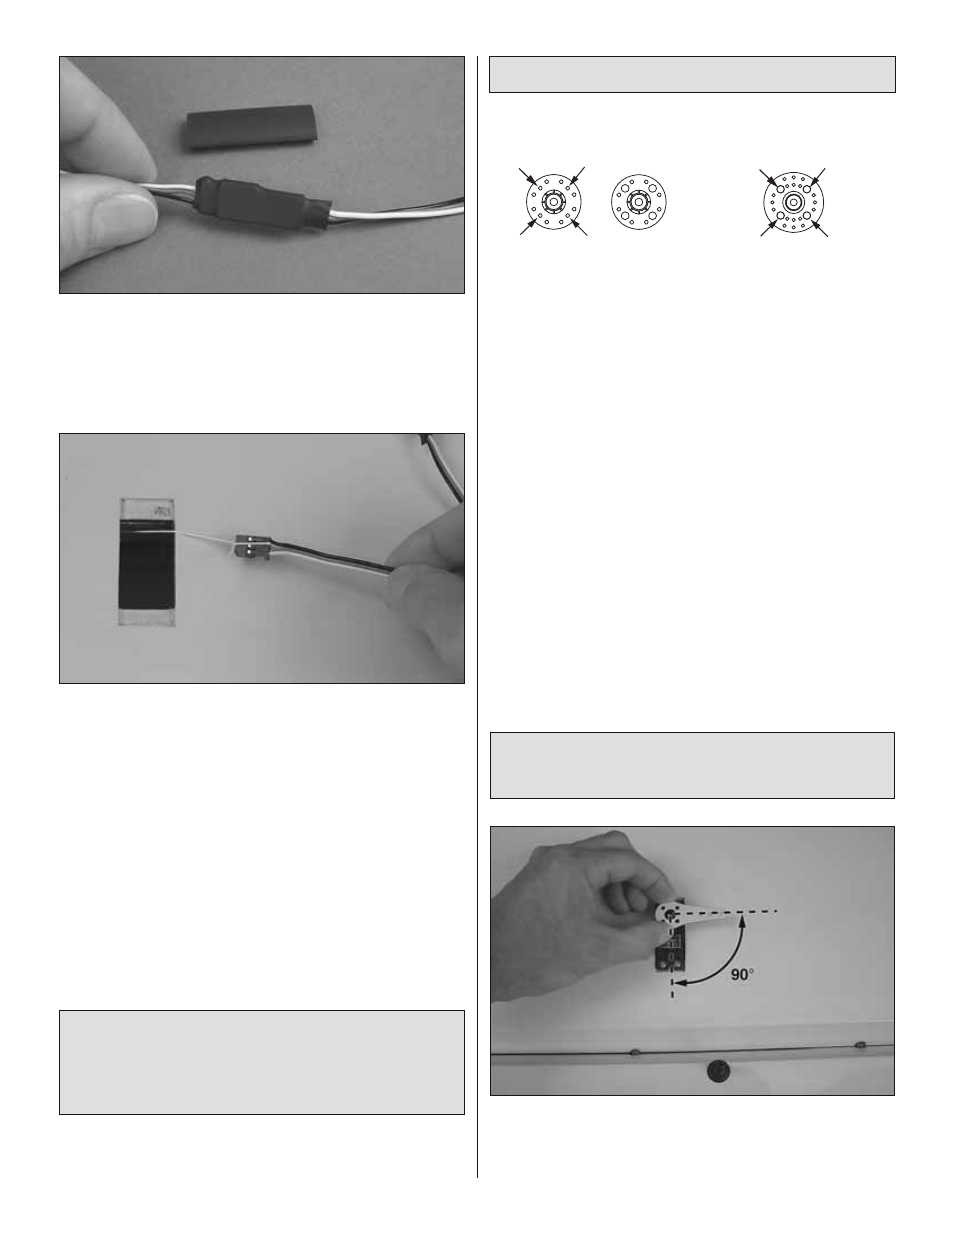
❏
2. Connect one of the aileron servos to your receiver and
turn the system on. Center the trim and position the servo
wheel on the servo so that when the top servo arm will be
mounted to the wheel it will be perpendicular to the servo.