Attach the rudder – Great Planes 38% Extra 330S ARF - GPMA1290 User Manual
Page 11
11
NOW THE WHEELS…
Refer to the illustration while mounting the wheels.
Flat Spot
#8 Flat Washer
3/16" [4.8mm]
Wheel Collars
6-32 x 1/4" [6.4mm]
SHCS (Both Collars)
6-32 x 3/4"
[19mm] SHCS
❏
9. Use a rotary tool with a cutoff wheel to grind a fl at spot
about 1/16" [1.5mm] from the end of both 3/16" x 2" [4.8 x
50mm] bolt-on axles. For perfection, use a small metal fi le to
“square-up” the fl at spots.
❏
10. Mount each axle to the gear with a 5/16-24 lock nut.
Use a 1/2" and 7/16" wrench to tighten the axles and nuts.
❏
11. Mount the wheels to the axles with the hardware
shown—be certain to use threadlocker.
❏
12. Mount the wheel pants to the gear with 6-32 x
3/4" [19mm] SHCS and #6 lock washers (and a drop of
threadlocker on the threads). If necessary, reposition the
wheels on the axles so they do not rub on the pants.
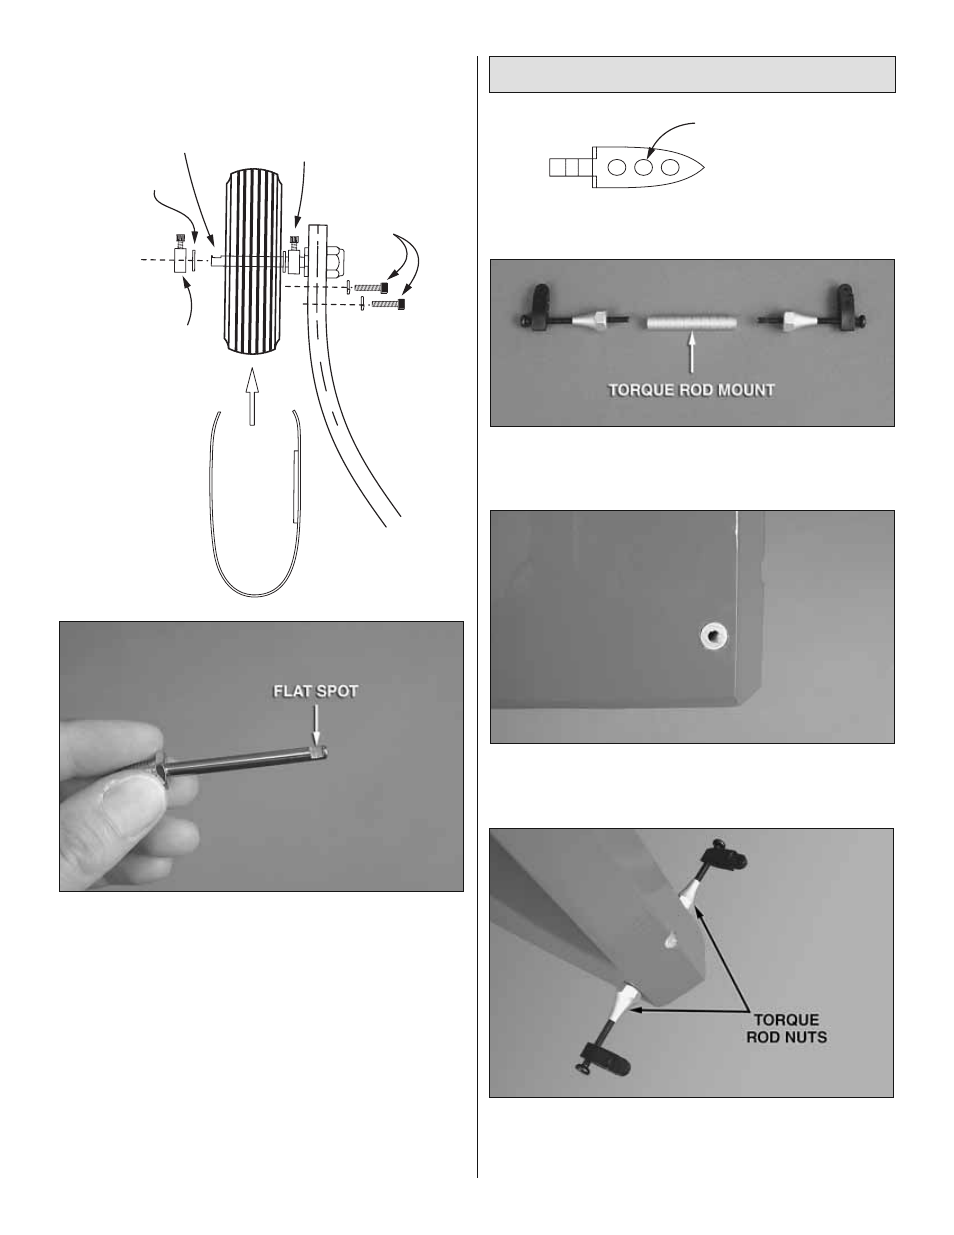
Attach the Rudder
Torque Rod Horn
(For Rudder)
Use the Middle Hole
❏
1. Assemble two rudder torque rod assemblies using
the hardware shown. Note: Install the torque rod in the
middle hole of threaded torque rod horns.
❏
2. Use coarse sandpaper to roughen the aluminum rudder
torque rod mount so glue will adhere. Use epoxy to securely
glue the rudder torque rod mount, centered, into the rudder.
❏
3. Mount the torque rod assemblies to the torque rod
mount in the rudder—be sure to use threadlocker on the
threads. Use two 12mm wrenches to tighten both aluminum
torque rod nuts simultaneously.