Great Planes 38% Extra 330S ARF - GPMA1290 User Manual
Page 16
16
end of the two short tubes. The tubing is pretty hard, so use a
block of wood with a 5/32" [4mm] hole drilled in it to bend the
vent tube. Connect the pickup and fueling/de-fueling lines
(not included) to the short tubes and connect the clunks to
the lines.
Fuel Tank Neck
Fuel Tank Ring
❏
2. Press the fuel tank ring over the neck of the tank.
Then, insert the stopper assembly into the tank and tighten
the screw.
❏
3. Center the plywood fuel tank tray over the mounting
rails in the fuselage. Use the holes in the tray as a template
to drill 3/32" [2.4mm] holes through the rails. Temporarily
mount the tray with four #4 x 1/2" [13mm] screws and
#4 washers. As always, don’t forget to remove the screws
and tray and harden the holes with thin CA.
❏
4. Securely mount the fuel tank to the tray with the included
hook and loop strips and a 4" x 7" [100 x 180mm] sheet of
1/4" [6.4mm] R/C foam rubber (not included) under the tank.
Remount the fuel tank tray in the fuselage with the screws.
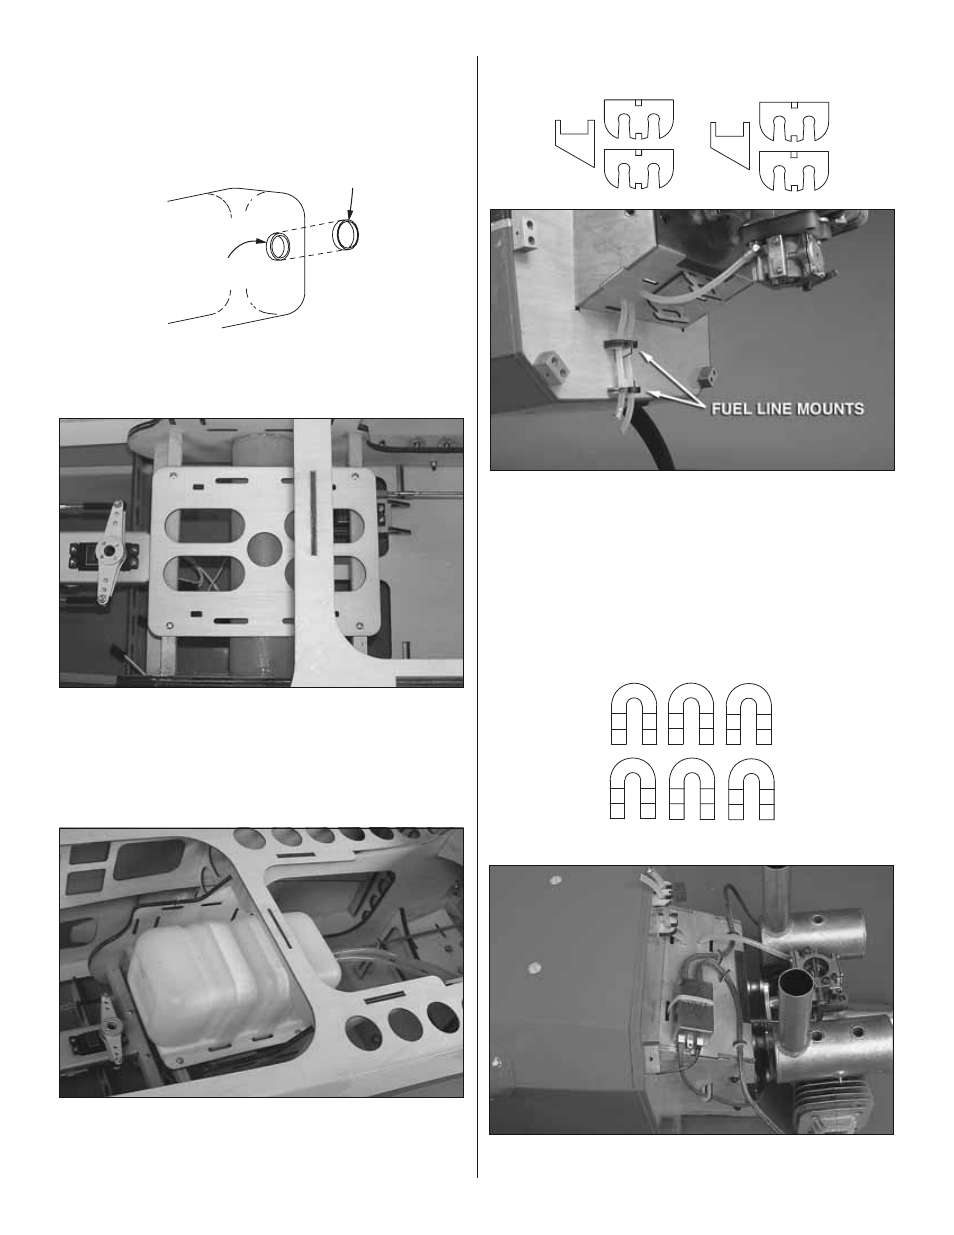
Fuel Line Mounts
❏
5. Drill holes for the fuel lines where necessary and
connect the lines. The included plywood fuel line mounts
may be used to mount the fueling/de fueling and the vent
lines so they come out the bottom of the fuselage.
While we’re still working “under the cowl,” go ahead and
mount the ignition module…
Ignition Wire Guides
❏
6. Mount the ignition module where preferred. There are
slots in the bottom of the “engine box” for hook and loop or