Balance the model laterally, Preflight identify your model, Ground check – Great Planes 38% Extra 330S ARF - GPMA1290 User Manual
Page 22: Range check
22
❏
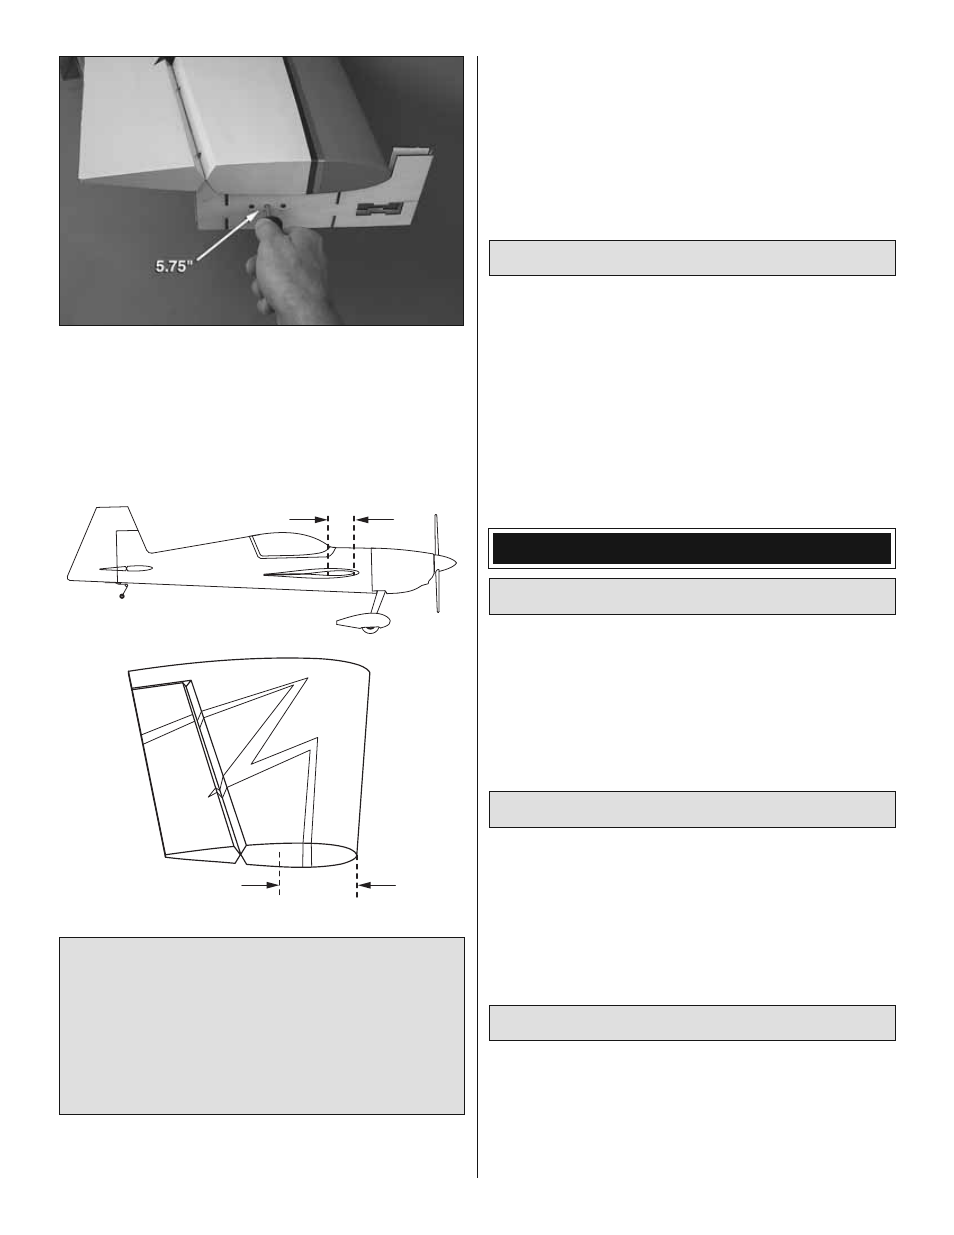
3. Using an assistant, lift the model with the C.G. cradles
under the tips of the wings with screwdrivers in the middle
holes that are marked 5.75".
For initial flights, the plane should balance
5-3/4" [146mm] from the leading edge of
the wing measured at the WING TIPS.
5-3/4" [146mm]
5-3/4" [146mm]
5-3/4" [146mm] (from the leading edge of the wing at the
tips) is the ideal, beginning balance point for your fi rst
fl ights. Balanced here, it has been proven that the model
will be aerobatic, but won’t get you into trouble or react
unexpectedly (provided the control throws are also set
to the high and low rates on page 21). The model could
be fl own balanced at or between the forward (5.0") or
aft (6.5") holes, but for the fi rst few fl ights try to get it to
balance at the recommended 5.75" marks.
❏
4. If, when lifting the model with the C.G. cradles, the
nose pivots downward, the model is nose-heavy. If possible,
shift and remount internal components aft to get the model
to balance and, if necessary, add lead ballast to the tail. If,
when lifting the model with the C.G. cradles, the nose pivots
upward, the model is tail-heavy. If possible, shift and remount
internal components forward to get it to balance and, if
necessary, add lead ballast to the nose.
❏
5. IMPORTANT: Recheck the C.G. after any adjustments
have been made.
Balance the Model Laterally
❏
1. With the wing level, have an assistant help you lift the
model by the engine propeller shaft and the bottom of the
fuselage under the trailing edge of the horizontal stabilizer.
Do this several times.
❏
2. If one wing always drops when you lift the model, it means
that side is heavy. Balance the airplane by adding weight
to the other wing tip. An airplane that has been laterally
balanced will track better in loops and other maneuvers.
PREFLIGHT
Identify Your Model
No matter if you fl y at an AMA sanctioned R/C club site or
if you fl y somewhere on your own, you should always have
your name, address, telephone number and AMA number
on or inside your model. It is required at all AMA R/C club
fl ying sites and AMA sanctioned fl ying events. Fill out the
identifi cation tag on the decal sheet and place it on or inside
your model.
Ground Check
If the engine is new, follow the engine manufacturer’s
instructions to break it in. After break-in, confi rm that the
engine idles reliably, transitions smoothly and rapidly to full
power and maintains full power—indefi nitely. After you run
the engine on the model, inspect the model closely to make
sure all screws remained tight, the hinges are secure, the
prop is secure and all pushrods and connectors are secure.
Range Check
Follow the manufacturer’s instructions that came with your
radio to ground check the operational range of your radio
before the fi rst fl ight of the day—both with the engine off and
with the engine running at various speeds with an assistant
holding the model. If the control surfaces do not respond
correctly, do not fl y! Find and correct the problem fi rst.