Great Planes 38% Extra 330S ARF - GPMA1290 User Manual
Page 10
10
❏
2. Using the nylon straps as a guide, drill 3/32" [2.4mm]
holes for the mounting screws. Mount the tail gear in the
fuselage with the straps and four #4 x 1/2" [12mm] screws—
don’t forget to harden the holes with thin CA.
Now the main gear…
90°
❏
3. Add a few drops of threadlocker to four 8-32 x 1-1/4"
[32mm] SHCS (socket-head cap screws) and mount the
main landing gear to the fuselage with the screws and four
#8 lock washers and fl at washers. Note: The edge of the
landing gear that’s 90° goes forward.
❏
4. Mount the landing gear cover to the bottom of the
fuselage with two 1/4-20 x 2" [50mm] nylon bolts.
❏
5. Slip the fi berglass landing gear fairings over the main gear
all the way to the fuselage. Note: There is right and a left.
❏
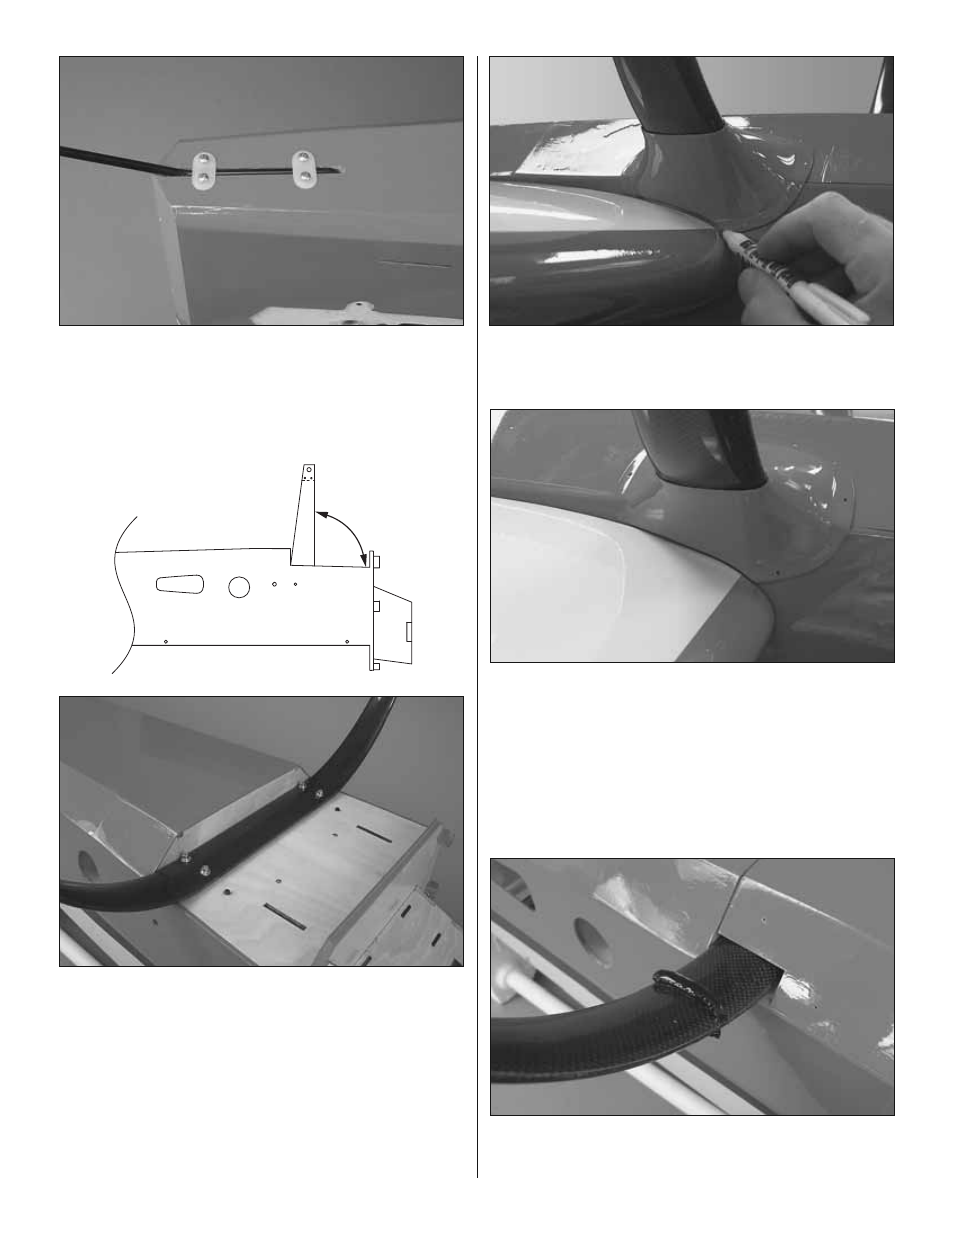
6. Fit both wings to the fuselage with the wing tube. Use a
fi ne point felt-tip pen to mark the outline of the wings directly
onto both fairings.
❏
7. Slide the wings part way off the fuselage and remove
the fairings. Use a rotary tool with a sanding drum to trim the
fairings to the lines you marked. Test fi t and trim the fairings
as necessary for a good fi t. CAUTION: Always wear safety
goggles, a particle mask and rubber gloves when grinding,
drilling and sanding fi berglass parts—wearing a long-sleeve
shirt and working outdoors is also a good idea. Vacuum
the parts and the work area thoroughly after working with
fi berglass parts.
❏
8. Use large beads of RTV silicone rubber to securely, but
not permanently, glue the fairings to the landing gear. This
way, the fairings may be removed if ever necessary.