Futaba 6XHS User Manual
Page 27
you quickly want to get back to the default
100%, press both
DATA INPUT
keys
simultaneously. We suggest using an initial
value of 75%, which will limit the aileron
travel to roughly 7/16” (11 mm).
NOTE: if you set the dual rate to 0%, you will
have ZERO CONTROL AUTHORITY when
the switch is in that position. DON’T DO IT!
26. Elevator dual rate setting: press the
CURSOR
key one time to get the little arrows
above or below the numeral 2. Now set the
elevator dual rates in the same way you set the
ailerons. Adjust the up elevator travel to be
about 15/32” (12 mm) and the down elevator
travel to 17/32” (13 mm).
27. There is an option on the T6XAs/XHs
which allows you to put both dual rate
switches on the aileron D/R switch, or to keep
them on separate switches. This option is the
second item located in the
PARA
menu.
If you choose the ‘
2
’ option as shown, both
dual rates will be operated by the aileron dual
rate switch. If you choose the ‘
1
’ option, the
two D/Rs will operate off their individual
switches. We suggest the ‘
2
’ option as it’s
one less switch to keep track of.
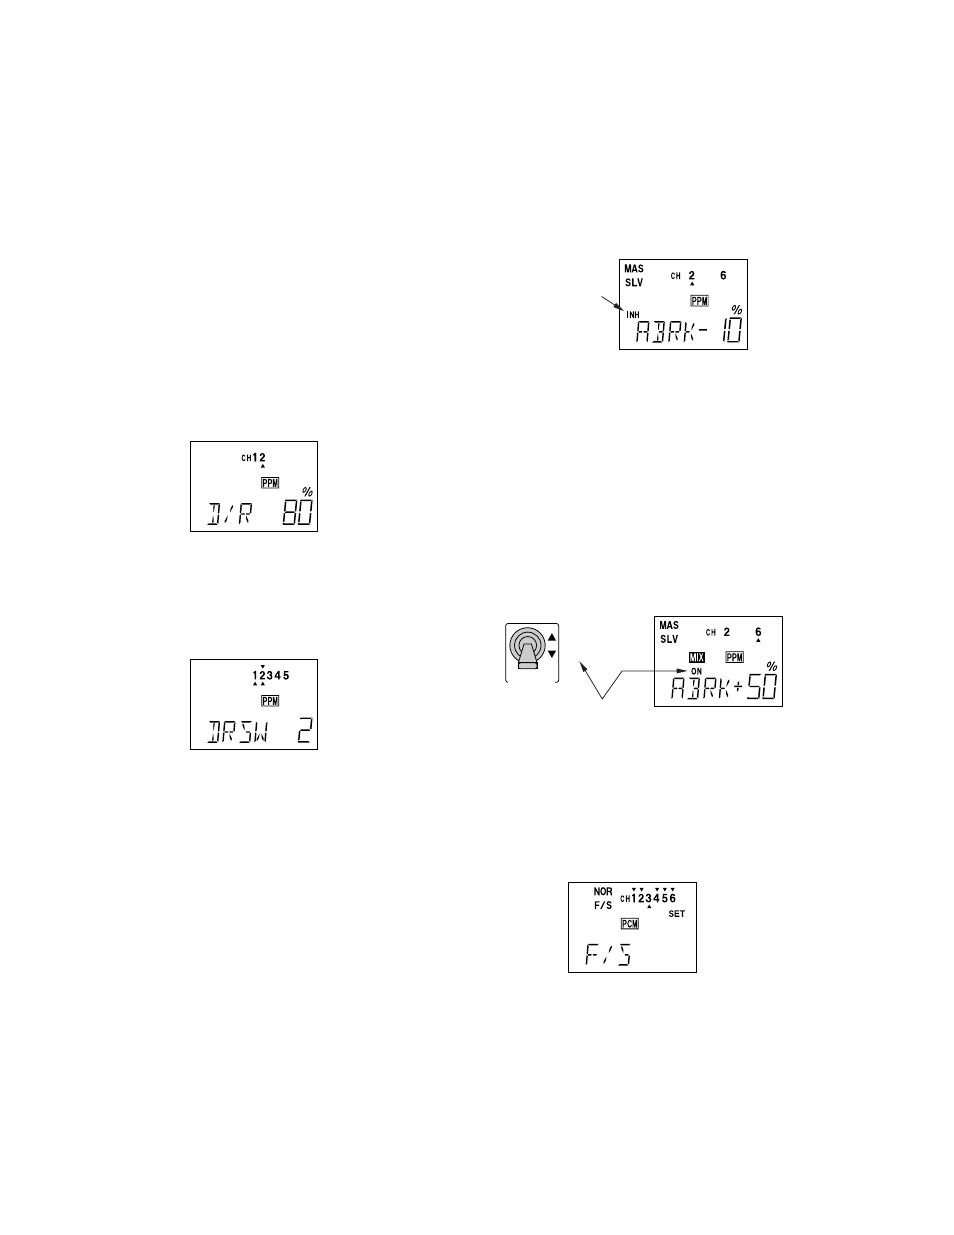
28. Airbrake (
ABRK
, p. 30): an airbrake effect
is obtained by raising both ailerons (or
dropping the flaps) and adding elevator to
trim. This high-drag configuration makes the
landing approach steeper to help make safe
landings in small fields. With this function, it
is possible to lose some aileron effectiveness
so test the airbrake effect at altitude before
trying it on a landing approach. You should
spend some time fine adjusting the elevator
travel so that there is minimal trim change
when the airbrake switch is operated.
Press the
MODE SELECT
button until the
ABRK
window appears, as shown. The default is for
the airbrake mode to be inhibited, as shown.
To activate, press the
CURSOR
key until the
“
INH
” is flashing, then press the (+) key.
Set mode with
DATA INPUT
keys:
+ = Activate
- = Inhibit
Now press the
CURSOR
key one time, and the
percent symbol will flash. You may input the
amount of offset for the elevator (the arrow
should be under the numeral
2
) at this time.
This should be set from -7% to -10% (-10% is
the default setting).
Press the
CURSOR
key one more time, and
you may now input the CH6 setting. The rates
may vary considerably for different models,
but for initial settings choose the flap rate to
be (+)50-55%.
ON
or
OFF
indicates
Airbrake switch position. Increase or decrease
amount of travel with
DATA INPUT
keys
AIR BRAKE
OFF
side
ON
side
29. Failsafe settings: we recommend that you
set the Fail Safe function (
F/S
, p. 37) to move
the throttle to idle if interference is
experienced. Note that the failsafe function
only operates in the PCM transmission mode.
30. 2->6 Mixing: you may couple elevator to
flaps for tighter corners in the elevator-to-flap
mixer (2 -> 6, p. 35). Get to the
2->6
menu,
then activate it by pressing the
CURSOR
key,
then the (+). Pull up elevator and verify that
the flaps go down. If they go the wrong
direction, reverse them by pressing the (+) or
– 22 –