EVCO ECK256J220S001 User Manual
Page 4
4
1 '96
CONFIGURATION
Two levels of configuration are available (level 2 is protected by password):
Level 1
Press
T1
and
T2
simultaneously for more than 4 sec.: label “PA” is displayed.
Press
T1
or
T2
to select a Level 1 parameter to be modified.
Press
MELT
and
T1
or
T2
to change the setting of a selected parameter.
Level 2
From Level 1
Press
T1
or
T2
to select parameter “PA”.
Press
MELT
and
T1
or
T2
to set value “-19”.
Press
T1
and
T2
simultaneously for more than 4 sec.: the first Level 2 parameter is displayed.
Press
T1
or
T2
to select a Level 2 parameter to be modified.
Press
MELT
and
T1
or
T2
to change the setting of a selected parameter.
To exit the configuration mode
Press
T1
and
T2
simultaneously for more than 4 sec.; or do not operate the keyboard for at least 50 sec.
(exit due to time-out); otherwise switch off and on again the unit after approximately
1 second from the last change.
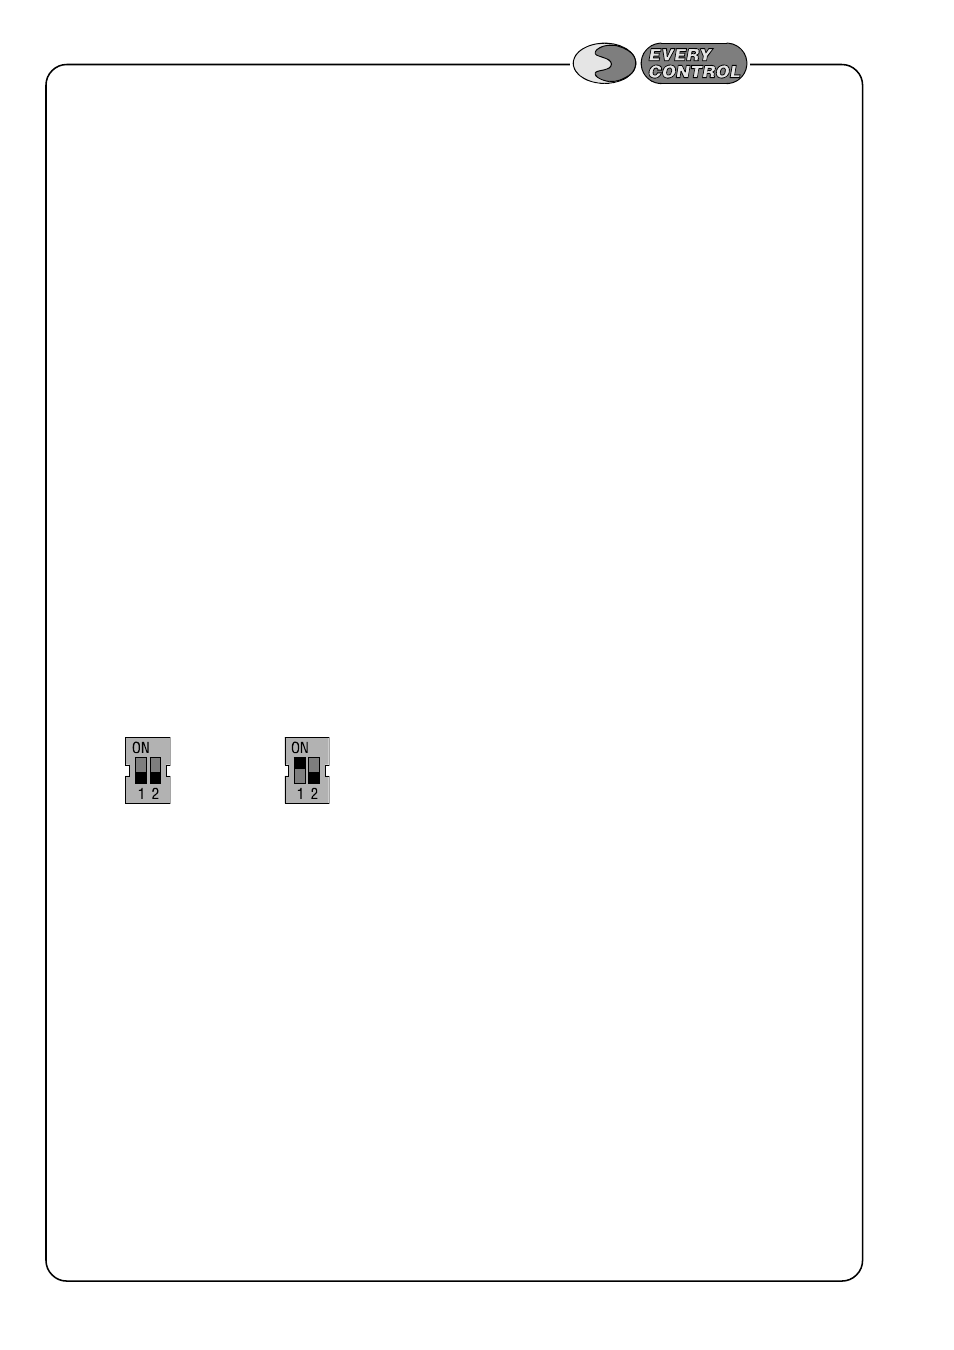
To select the required set of parameters
The unit can be used for the control of both electric and gas deep fryer; the set of parameters which is specific for each type of deep fryer can be
easily set by a dipswitch located at the back of the keyboard.
A = to store the set of parameters of column ST1 in page 5.
B = to store the set of parameters of column ST2 in page 5. It is necessary to restart the
control unit after the dipswitch has been changed to enable the new setting.
INSTALLATION
Refer to the following diagrams for a correct installation.
Make sure that the operating conditions (power supply, ambient temperature and humidity) are within the limits approved for device operation.
Do not overload the output relay beyond maximum limits.
CAUTION: the unit is not designed to provide protection against overload: the output must be provided with adequate protection.
Power supply protection is provided by a fuse included in the unit.
OPERATING TEMPERATURE SETTING
When the unit is not in use the temperature measurement is displayed.
Press and release the T1 key to display the present setpoint value: the LED on the right below the display flashes to indicate that a procedure to
change the setpoint value has been initiated; to change the value, press the T1 or T2 key within 4 seconds from pressing the T1 key.
To exit this procedure do not operate the keyboard for more than 4 seconds (exit due to time-out), or switch off and on again the unit after
approximately 1 second from the last change, otherwise press and release the MELT or the START/STOP key.
When an alarm is present, the buzzer can be turned off by pressing the T2 key.
The temperature setpoint can be selected within the limits set by parameter r1 and r2.
SIGNALS AND ALARMS
Label “E0” flashing on the display and buzzer with intermittent signal indicate one of the following failure modes: wrong type of probe, probe or
probe connection failure, temperature measurement outside the measurement range. Check the value set for parameter /0, the connection between
the probe and the unit and check for the correct probe operation (the output is not active).
Label “E2” flashing on the display and buzzer with intermittent signal indicate a failure in the configuration data memory. Switch the unit off and
on again (the output is not active).
Label “EOC” flashing on the display and buzzer with intermittent signal indicate a failure in the circuit for cold-junction compensation (the output
is not active).
Label “PF” being displayed alternated with the correct temperature value, buzzer with intermittent signal and the unit having automatically switched
to “STOP” status indicate that a long power supply failure has occurred during “START” status. Press the START/STOP key for more than 1 second
to restart the unit in the same condition that it had before the failure.
Label “AL1” being displayed alternated with the correct temperature value and buzzer with intermittent signal indicate that the temperature
measurement is outside the limit set by parameter A1.
A
B