Toshiba IK-DP20A User Manual
Page 30
Attention! The text in this document has been recognized automatically. To view the original document, you can use the "Original mode".
(11) Use a support wire for safety.
(12) The hole that fixes a support wire is on the side. [Note: The support wire
is not attached.]
(IK-DP20Adome base install)
(13) Attach the video cable (included with the dome accessories) to the video
connector of a dome base. [Note; Do not connect a thick coaxial cable to
a dome camera. There is a possibility of
damaging a connector. Be sure to use the
cable included in the dome accessories.]
(14) Communication cables are directly inserted
in the terminal of the dome base.
(15) Tighten the screw to fix the dome base to
the housing. Fig-5 © d) d)
Fig-5
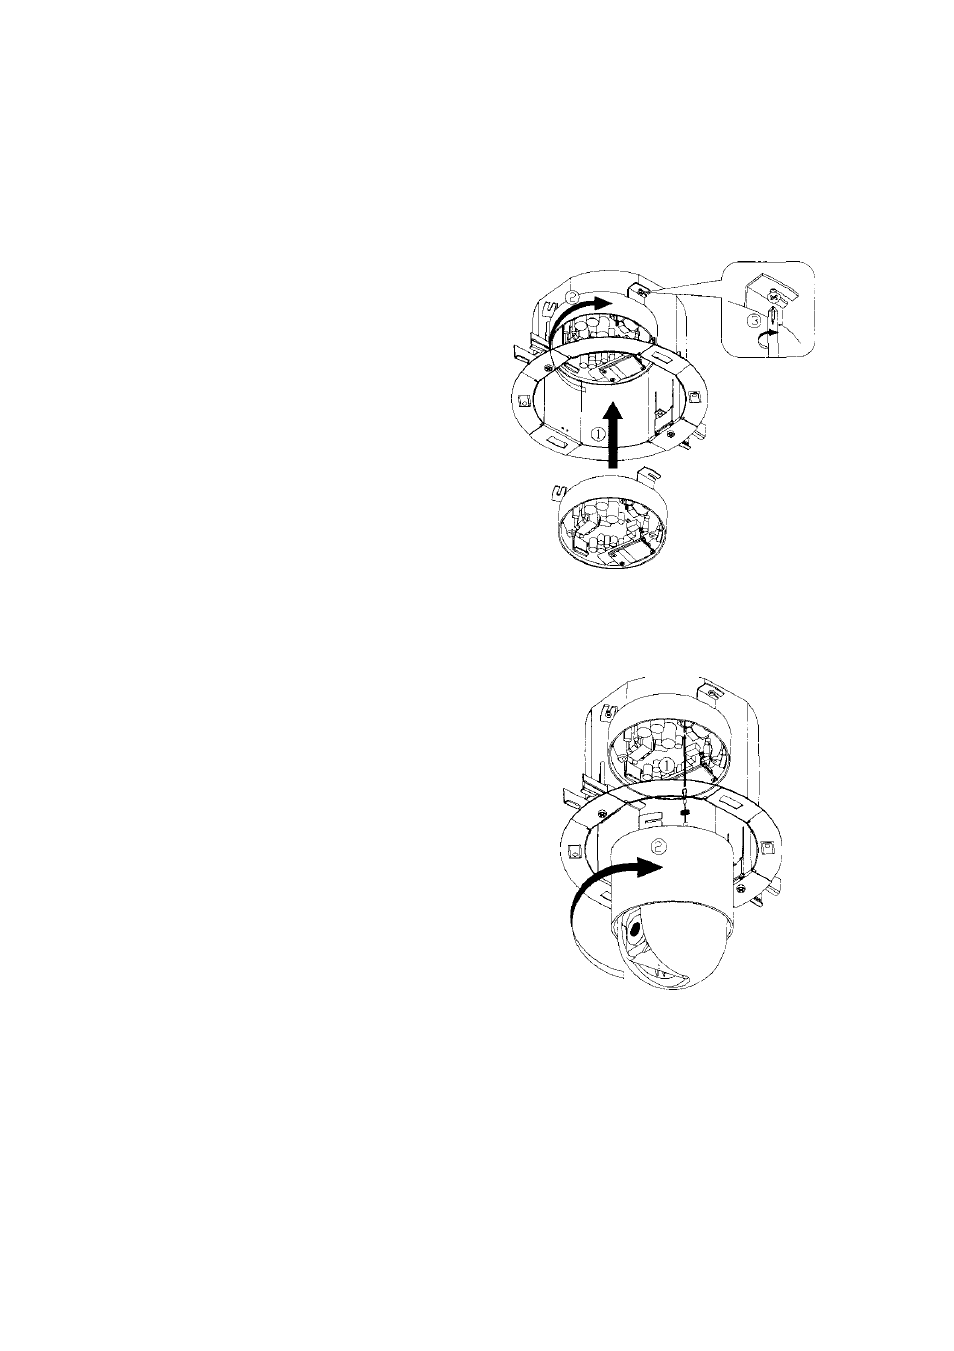
(IK-DP20A dome drive install)
(16) After setting up DIP-SW in the top of the dome
(See 4.switch setting), connect the support wire to
the hook of the dome base. Fig-6 ©
(17) To lock the dome drive to the dome base, line up
the notch with the label and turn to the right with
both hands. Fig-6 (§)
Ensure that the location of the notch (position of yellow
paint) on the dome base and the location of the
installation label on the dome drive are aligned.
Fig-6
■
29
-