Fig-2, Fig-3 – Toshiba IK-DP20A User Manual
Page 29
Attention! The text in this document has been recognized automatically. To view the original document, you can use the "Original mode".
(4) Loosen the lock screw according to ceiling board
thickness for attaching to the ceiling.
(5) The IK-DP20A is temporarily attached to the
topside of the housing using the
screws that were included with the IK-DP20A.
(6) Do not fully tighten the screw.
(JK-H01Atop housing install)
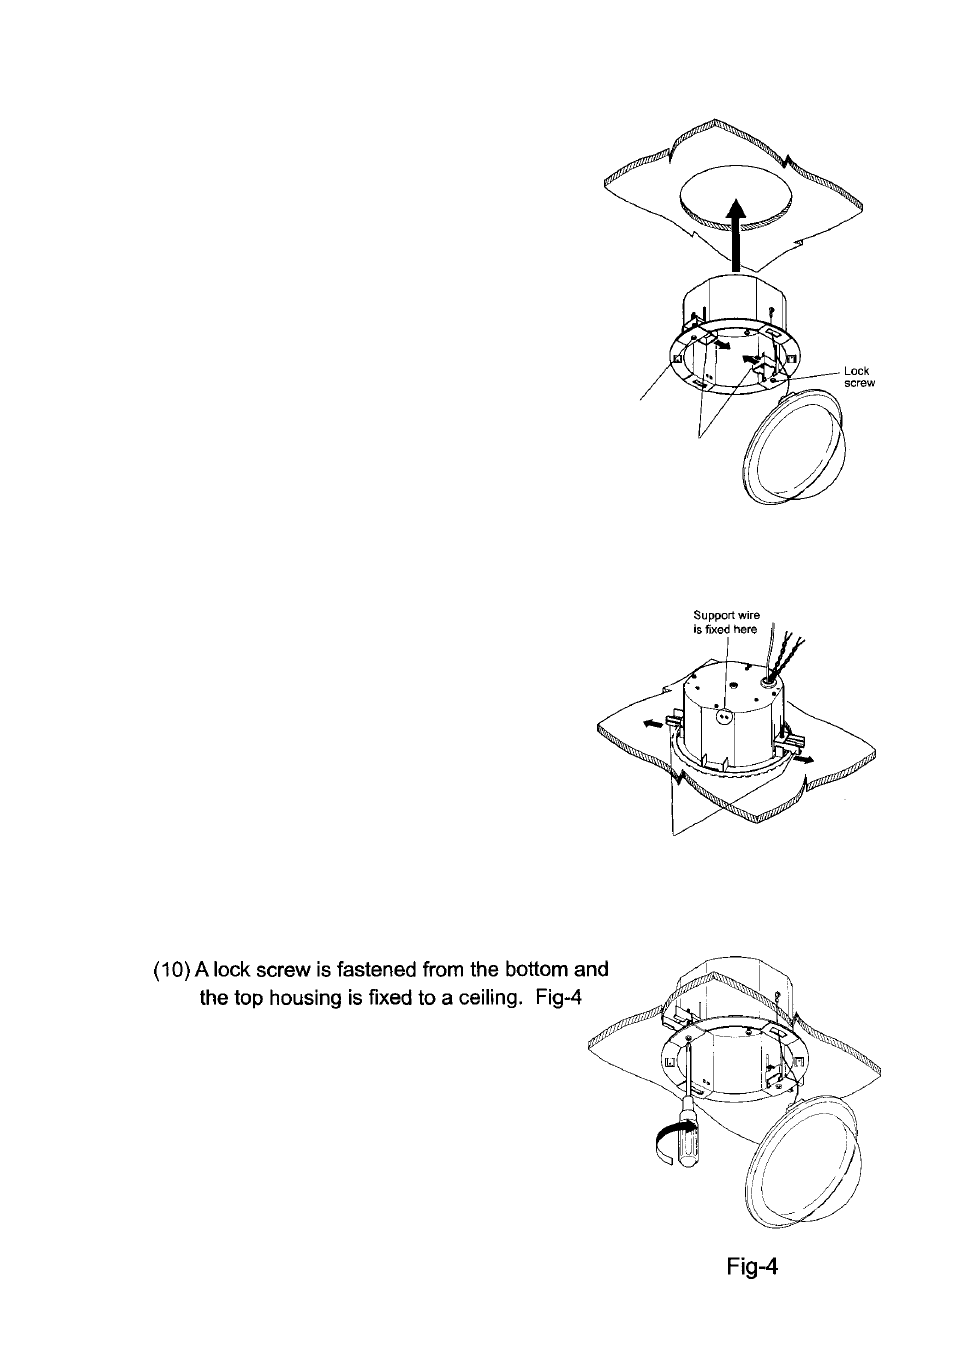
(7) Two support arms are contained inside
and attaches to the ceiling. Fig-2
Lock
screw
Support
Arms
Fig-2
(8) Put the video cable, power cable, and the
communication cable inside the housing from the
hole on the topside. Break a hole in the center of
the housing and let the cable pass through
(9) Push out the support arms so that they
hold onto the ceiling. Fig-3
Support Arms
Fig-3
-
28
-