Setting the date and time, Ев:00сс, 1 2 : 0 0 a m – Sharp VIEWCAM VL-NZ50U User Manual
Page 26
Attention! The text in this document has been recognized automatically. To view the original document, you can use the "Original mode".
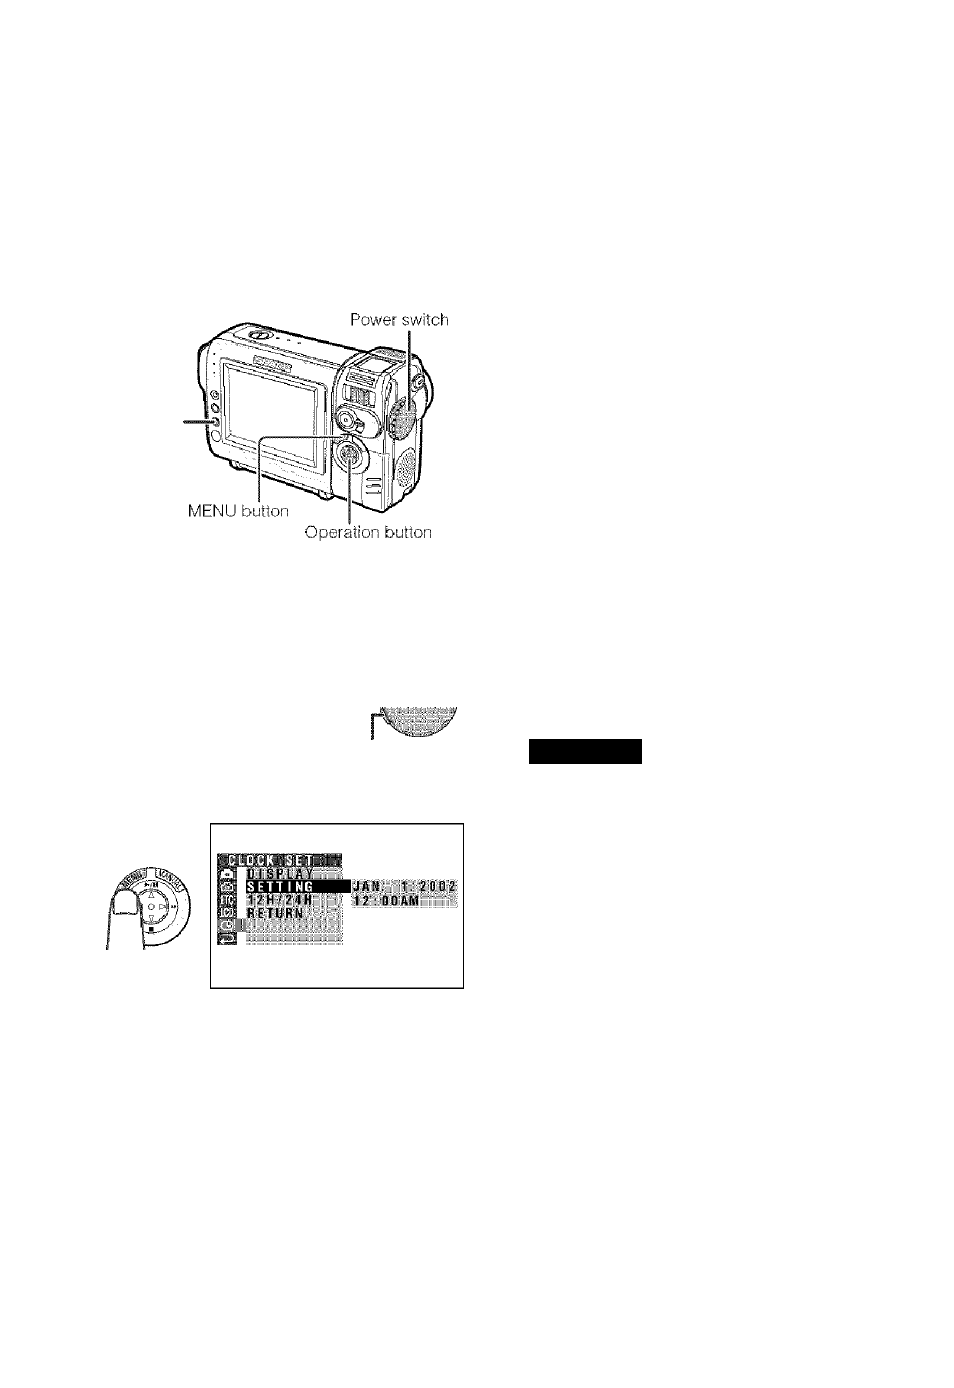
Preparation
Setting the Date and
Time
Example:
Setting the date to June 2, 2003
(JUN, 2, 2003) and the time to 10:30 am
(10:30 AM).
SET button
Note:
• Before performing the steps below, make sure
that the lithium battery has been installed (see
page 11).
1
Hold down the Lock button .
and set the Power switch to
CAMERA.
fi o'
Lock button
Press the MENU button until the menu
screen appears.
4
Press
V
or
Л
to select “JUN” (month),
then press the SET button.
S E T T I N G J U N . П - 2 0 0 2
1 2 : 0 0 A M
5
Press V or
Л
to select “2” (day), then
press the SET button.
S E T T I N G J U N .
2.Ш Б
1 2 : 0 0 A M
6
Press V or Л to select “2003” (year),
then press the SET button.
S E T T I N G J U N . 2 . 2 0 0 3
ЕВ:00СС:
7
Press
7
or
Л
to select “10 AM” (hour),
then press the SET button.
S E T T I N G J U N . 2 . 2 0 0 3
1 0 : [ | E A M
8
Press V or Л to select “30” (minute),
then press the SET button.
• The internal clock now starts operating,
l J U N .
2 . 2 0 0 3
1 0 : 3 0 A M ............
S E T T I N G
9
Press the MENU button to turn off the
menu screen.
Note:
♦ If the date and time have been set, the SETTING
1 screen (O) appears in step 2. Select
“SETTING” in the CLOCK SET screen (©) using
the Operation button and SET button.
3
Press the SET button.
13