Monogramming and embroidering – Brother X L 2010 User Manual
Page 27
Attention! The text in this document has been recognized automatically. To view the original document, you can use the "Original mode".
Monogramming and Embroidering
Pattern
Stitch Length
Foot
Others
4 or 5 or 6
At any position
Remove
Darning plate
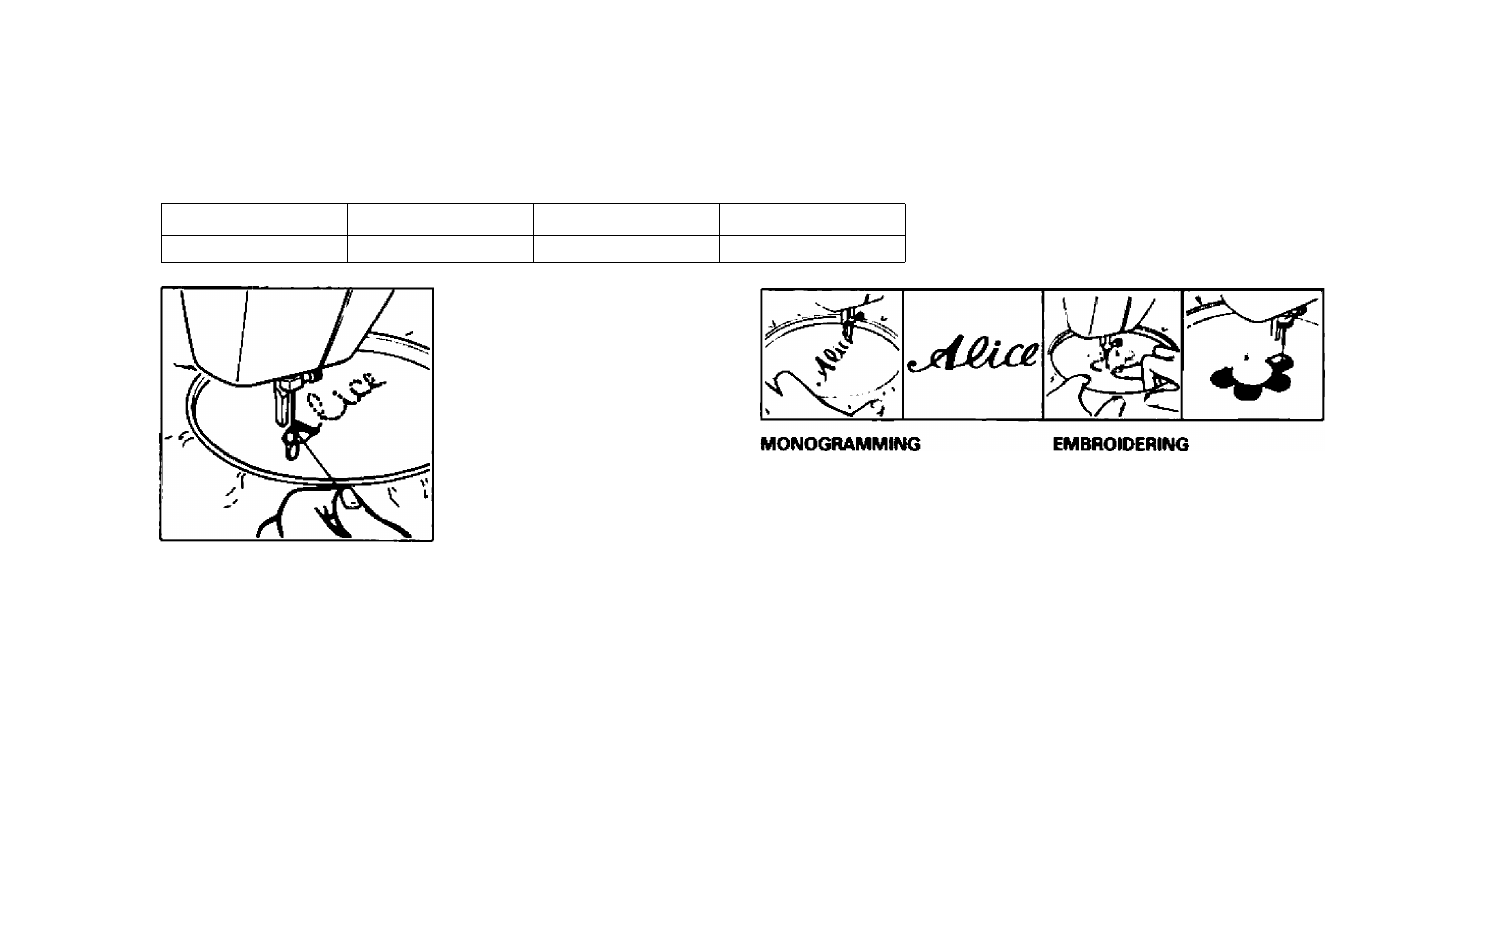
PREPARATION
FOR
MONO
GRAMMING AND EMBROIDER
ING
1, Place the darning plate on the
needle plate.
2. Set your sewing machine as
per the above instructions.
3.
Draw lettering (for mono-
gramming) or design (for em
broidering) on the right side
of the fabric,
4.
Stretch work between em
broidery hoops as firmly as
possible.
5. Place the work under the nee
dle and lower the presser bar.
6.
Pull the lower thread up
through the work at starting
position
by
turning
balance
wheel and make a few hold
ing stitches.
6.
Hold the hoop with thumb
and forefingers of both hands
while pressir^g the fabric with
middle and third fingers and
supporting
the
outside
of
hoop with smaller finger.
1.
Sew, moving hoop slowly
along the lettering at the same
speed.
2.
Secure with a few straight
stitches.
(NOTE: These instructions also
apply to embroidering.)
1. Stitch the outline of the de
sign by moving the embroi
dery hoop accordingly,
2, Fill in design stitch from the
outline of the design to the
inside and from inside to edge
of the outline alternately until
design is completely filled in.
Keep stitching close together.
NOTE: A long stitch is made by
moving the embroidery
hoop rapidly and a short
stitch is made by mov
ing it slowly.
24