Press the recording (• ) button, Prepare the audio source, Set the audio timer – Pioneer CT-W806DR User Manual
Page 30: Set the timer mode switch to the rec position, Insert cassette tapes into deck i and deck ii, Set rev mode button to czd, Perform operations 3-8 above, Ajuste el botón rev mode a o z=), Seleccione el modo dolby nr con el botón dolby nr, Presione el botón de grabación (•)
Attention! The text in this document has been recognized automatically. To view the original document, you can use the "Original mode".
RECORDING AND PLAYBACK
USING AN AUDIO TIMER
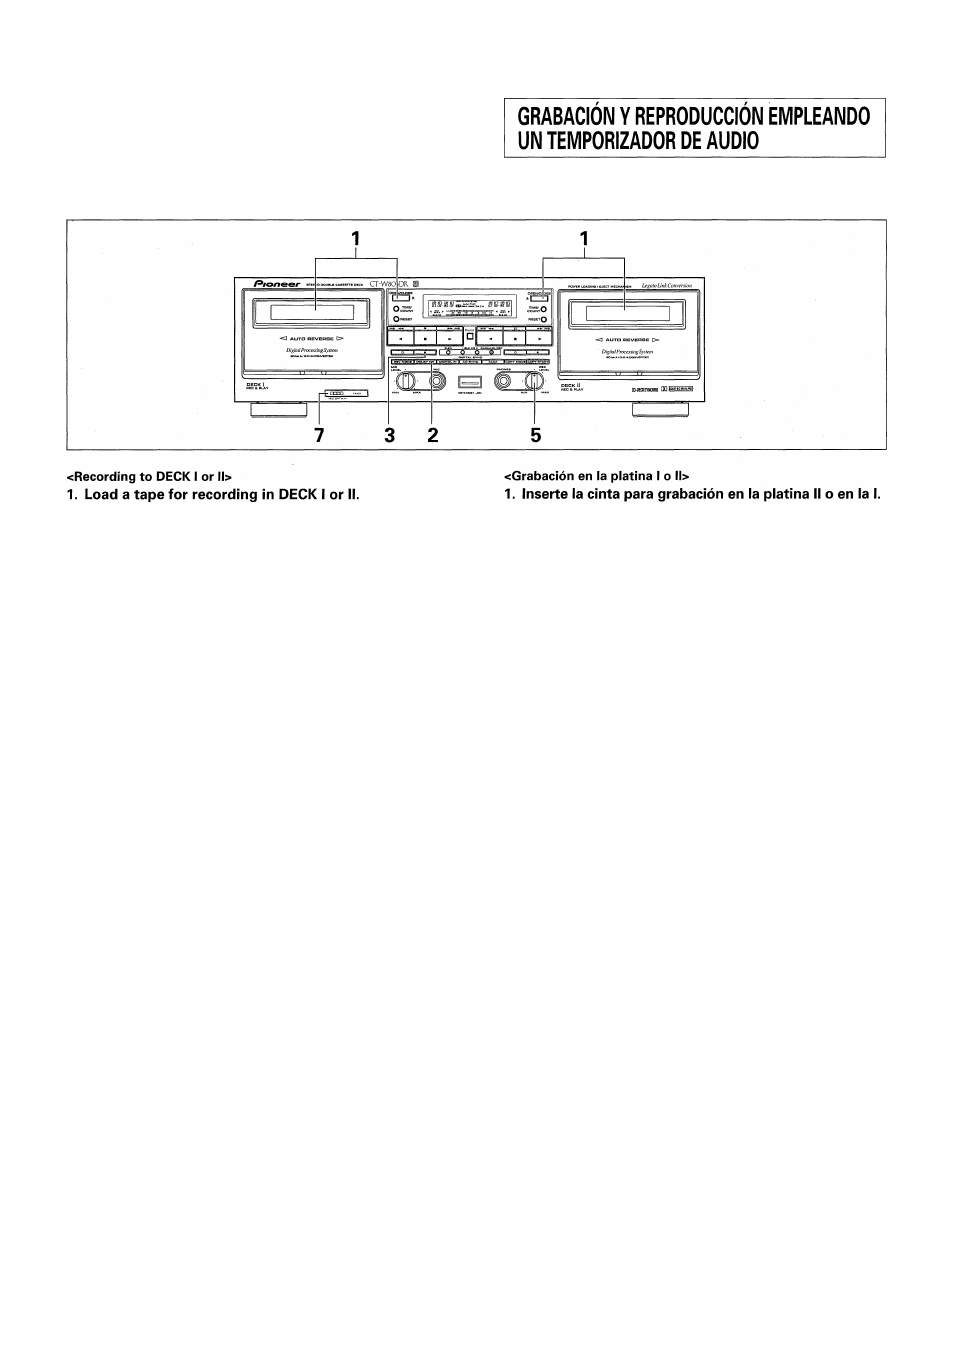
UNATTENDED RECORDING
GRABACION CON TEMPORIZADOR
• Make sure that the tape is properly rewound.
2. Set the REV MODE button to
zz
or
izd
.
3. Set the Dolby NR system by pressing the DOLBY NR
button.
4. Press the recording (• ) button.
5. Prepare the audio source.
• Set the amplifier input selector to tuner, then tune in the
desired station.
6. Adjust the recording level. For details, see the
section "ADJUSTING THE RECORDING LEVEL" on
page 20. (When ALCA system is set to ON, recording
level is adjusted automatically.)
7. Set the audio timer.
• When the timer is set, it will turn off the power of all con
nected components.
8. Set the TIMER mode switch to the REC position.
• At the preset time, the power will be turned on, and re
cording will begin automatically.
1. Insert cassette tapes into DECK I and DECK II.
2. Set REV MODE button to
czd
.
3. Perform operations 3-8 above.
NOTES:
• Digital signal recording cannot be performed in this mode.
• Timer recording will not work if the erasure prevention tabs
of the tape loaded have been removed.
•
Operations depend on the type of audio timer used; be sure
to consult the operating instructions of the audio timer you
actually use.
•
When not performing timer operations, set the TIMER mode
switch to the OFF position. Otherwise, recording might begin
unexpectedly when the power is turned on.
• Turn down the volume of the amplifier if you do not wish to
listen to the program while it is being recorded.
•
The Last Memory function preserves the most recent adjust
ments made with the SUPER AUTO RLE XD function. By us
ing the SUPER AUTO BLE XD function to set the response for
a new tape, you can use the timer recording feature to record
on the new tape at the most recent settings obtained with
SUPER AUTO BLE XD.
30
En/Sp
• Asegúrese de que la cinta esté correctamente bobinada.
2. Ajuste el botón REV MODE a o z=).
3. Seleccione el modo Dolby NR con el botón DOLBY
NR.
4. Presione el botón de grabación (•).
5. Prepare la fuente de audio.
• Ajuste el selector de entrada del amplificador a la posición
del sintonizador y sintonice la emisora deseada.
6. Ajuste el nivel de grabación. Para más detalles, vea
la sección de "AJUSTE DEL NIVEL DE GRABACIÓN"
en la página 20. (Cuando se activa (ON) el sistema
ALCA, el nivel de grabación se ajusta
automáticamente.)
7. Ajuste el temporizador de audio.
• Cuando se ajusta el temporizador, desconectará la
alimentación de todos los componentes.
8. Ajuste el selector del modo TIMER en la posición
REC.
• A I ahora preajustada, se conectará la alimentación y la
grabación se iniciará automáticamente.
1. Inserte las cintas de casete en las platinas I y II.
2. Ajuste el botón REV MODE en
czd
.
3. Efectúe las operaciones 3 a 8 anteriores.
NOTAS:
• La grabación de la señal digital no podrá realizarse en este
modo.
•
La grabación con temporizador no funcionará si la cinta
insertada está desprovista de las lengüetas de protección
contra borrado accidental.
•
Las operaciones dependen del tipo de temporizador de au
dio utilizado; por lo que deberá leer el manual de instrucciones
de su temporizador que utilice.
•
Cuando po efectúe la operación con temporizador, ajuste
siempre el selector de modo TIMER en la posición OFF. De lo
contrario, la grabación o reproducción podrá iniciarse
automáticamente al conectar la alimentación.
• Baje el volumen del amplificador no desea escuchar el
programa mientras se está grabando.
•
La función de memoria de los últimos ajustes conserva los
ajustes más recientes hechos con la función SUPER AUTO
BLE XD. Empleando la función SUPER AUTO BLE XD para
ajustar la respuesta para una nueva cinta, podrá usar la
función de grabación con temporizador para grabar en la
nueva cinta con los ajustes más recientes obtenidos con SU
PER AUTO BLE XD.