Gbic, Gbic slot, Alignment groove – Cisco 7200 VXR User Manual
Page 8: Plug
8
Figure 1
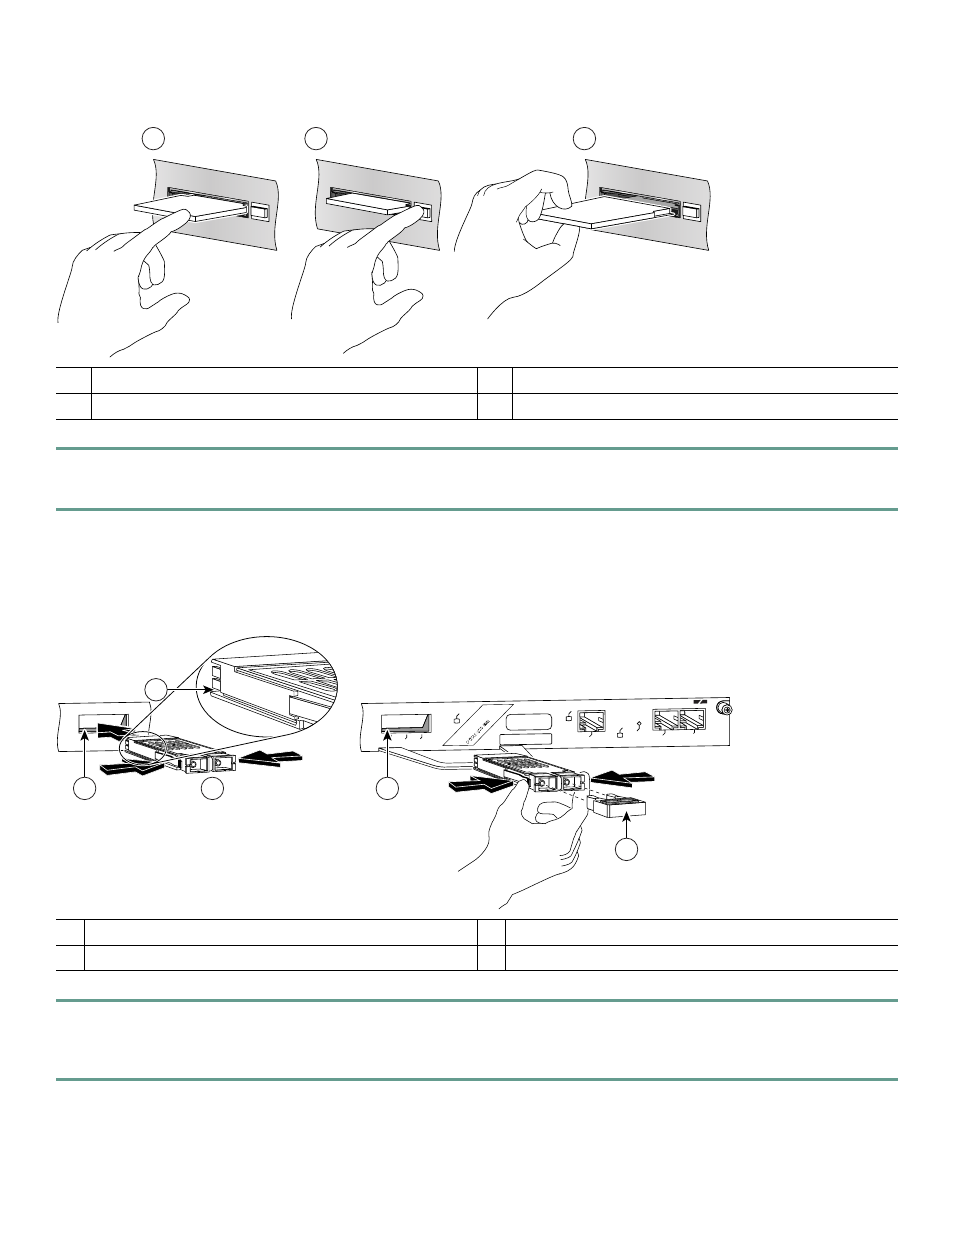
Installing a CompactFlash Disk
Step 1
Turn the CompactFlash Disk so that the label is facing down. It is keyed and cannot be inserted incorrectly.
Step 2
Slide the CompactFlash Disk into the CompactFlash Disk slot.
See the
for more
information about using the NPE-G1 or NPE-G2.
Figure 2
Installing the GBIC in an NPE-G1
Step 1
Insert the Gigabit Ehternet Gigabit Interface Converter (GBIC) in a GBIC slot on the NPE-G1. The GBIC is keyed so
that it can only be inserted correctly.
Step 2
Repeat Step 1 until the GBICs you ordered are installed.
1
Inserting the CompactFlash Disk
3
Removing the CompactFlash Disk
2
Releasing the CompactFlash Disk
1
GBIC
3
GBIC slot
2
Alignment groove
4
Plug
1
3
C O M PACT F
L A S H
ORK PR
OCESSING ENGINE - G1
C O M PACT F
L A S H
ORK PR
OCESSING ENGINE - G1
2
C O M PACT F
L A S H
ORK PR
OCESSING ENGINE - G1
66776
LINK
C
LA
S
S
1
LE
D
P
R
O
D
U
C
T
P
R
O
D
U
K
T
M
IT
K
LA
S
S
E
1
LE
D
P
R
O
D
U
IT
A
V
E
C
V
O
YA
N
T
D
E
L
D
E
C
LA
S
S
E
1
P
R
O
D
U
C
T
O
LE
D
D
E
C
LA
S
E
1
ETHERNET GIGABIT ETHERNET INPUT/OUTPUT CONTROLLER
CONSOLE
AUX
E 0
LINK
GE 0
RX
TX
CPU
RESET
IO PW
R
OK
1
2
57017
4
3
3