Hangar 9 3.1m Sukhoi SU-26MM ARF (3 Boxes) User Manual
Page 12
12
Hangar 9 3.1m Sukhoi SU-26MM ARF Assembly Manual
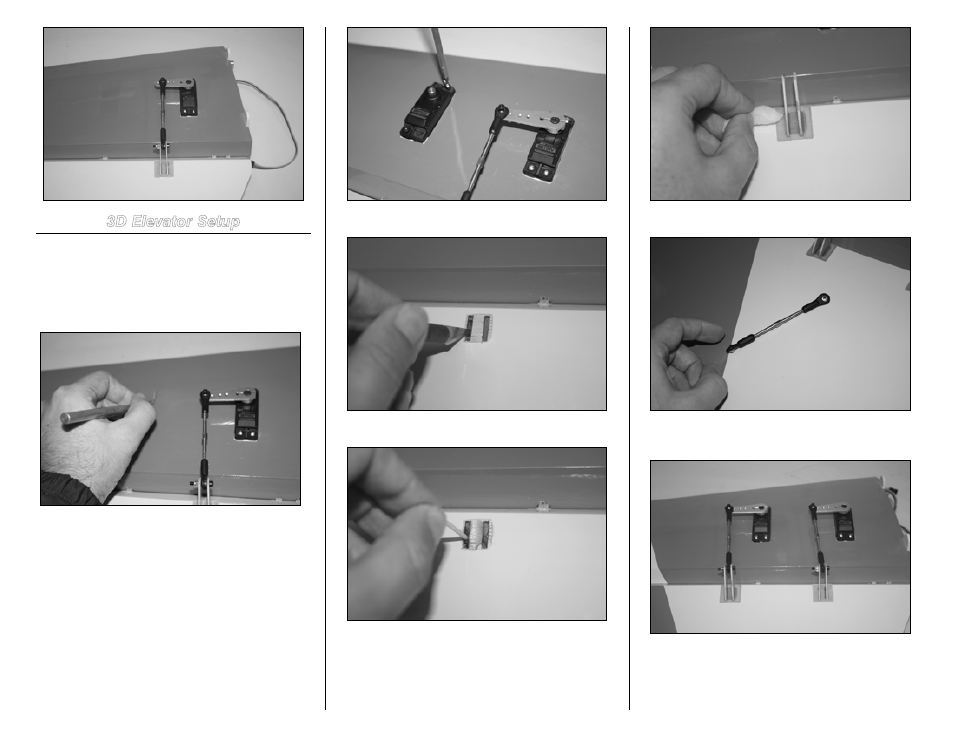
3d Elevator Setup
1. The second servo bay needs to be opened and
control horns and plate need to be glued using 15- to
30-minute epoxy. This step is also very similar to Aileron
Servo Installation in 3D section. Follow the same steps and
make sure to line up the control horn pivot point to the
elevator hinge line.
2. Mount the servo screws and back them out. Apply
some CA to harden the wood. This step is the same as steps
2 and 3 in the elevator precision setup section.
3. Mount the servo once the glue is dry.
4. Remove the covering to mount the control horns.
5. Mix 30-minute epoxy and fill the control horn slots.
6. Install the control horns and plate, make sure to
line up the control horns hole and elevator hinge line. Clean
excess epoxy using alcohol swabs.
7. Prepare the ball link and pushrod for installation.
8. Install the ball links at the 1.5-inch hole on the arm.
Use threadlock on the center servo arm screw.
9. MatchBox is installed in the stab root. Apply a piece
of masking tape to the bottom of the MatchBox and using CA
glue a piece of hook and loop to the MatchBox.