Hangar 9 3.1m Sukhoi SU-26MM ARF (3 Boxes) User Manual
Page 11
11
Hangar 9 3.1m Sukhoi SU-26MM ARF Assembly Manual
Elevator Servos Installation
Required Parts
Elevator panel
4-40 screws (8)
Locknuts (8)
Ball link (8)
Control horns (4) (3D elevator setup only)
2
7
/
16
-inch elevator pushrod (4)
Required Parts (not included)
JR 8911HV or similar digital servo (2) or (4)
JR 1.5-inch servo arm (2) or (4)
JR heavy-duty servo extension, 48-inch (2)
Required Tools and Adhesives
Pin vise
Iron
Thin CA
Phillips screwdriver: #1
Drill bit: 1/16-inch
30-minute epoxy
String (Dental floss)
Masking tape
Adhesive-backed hook and loop
3/32-inch ball driver
Hobby knife
2.5mm ball driver
Note: Elevators will be set up for both precision and 3D
flying. Due to extra demand in power and deflection of
3D flying, two servos will be used for that style.
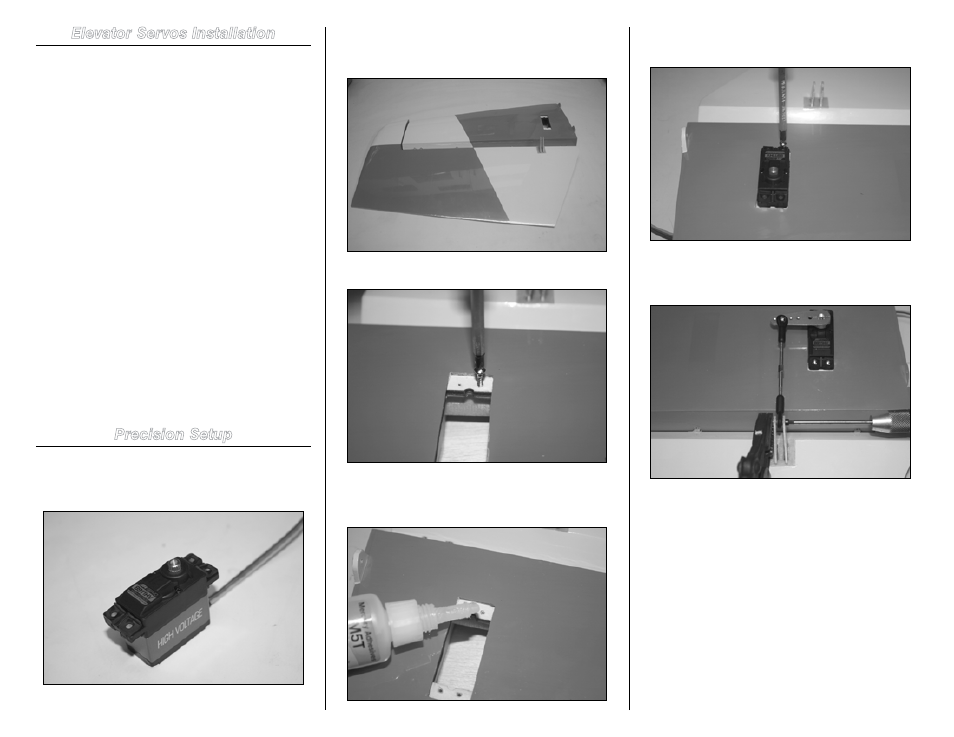
Precision Setup
1. For precision setup one servo per elevator is used.
Prepare the servo by installing the rubber grommets and
brass eyelets.
Servo needs to be installed in such way that output shaft is
towards the leading edge of the stab. The servo arm needs
to be 1.25 inch; if in case of using a JR aluminum servo
arm, this would be the third outermost hole.
2. Mount the servo screws and back them out.
3. To harden the servo mounting holes in the bay
apply some thin CA in the hole. Wait until CA is dry before
installing the servo.
4. Mount the servo so the output shaft is towards the
leading edge of the stab.
5. Prepare the ball link and pushrod. Attach the ball
link to the control horn using a 2.5mm ball driver and hold
the locknut with help of a vise grip or nut driver.
6. Connect the ball link to the 1.25-inch hole on a JR
aluminum servo arm. This would be the third outermost hole
from the center of the arm. Mount the servo arm parallel to
the elevator hinge line. Use threadlock on the center servo
arm screw. Use a 48-inch JR Heavy-Duty extension from
elevator to receiver.