Friction wheel replacement – Cub Cadet Medium Frame 3 Stage User Manual
Page 47
700 Series 2-Wheel Track-Drive System
43
Friction Wheel Replacement
To remove/replace the Friction Wheel:
1.
Remove the Hex Drive Shaft by following the proce-
dures described in the Hex Drive Shaft section of this
chapter.
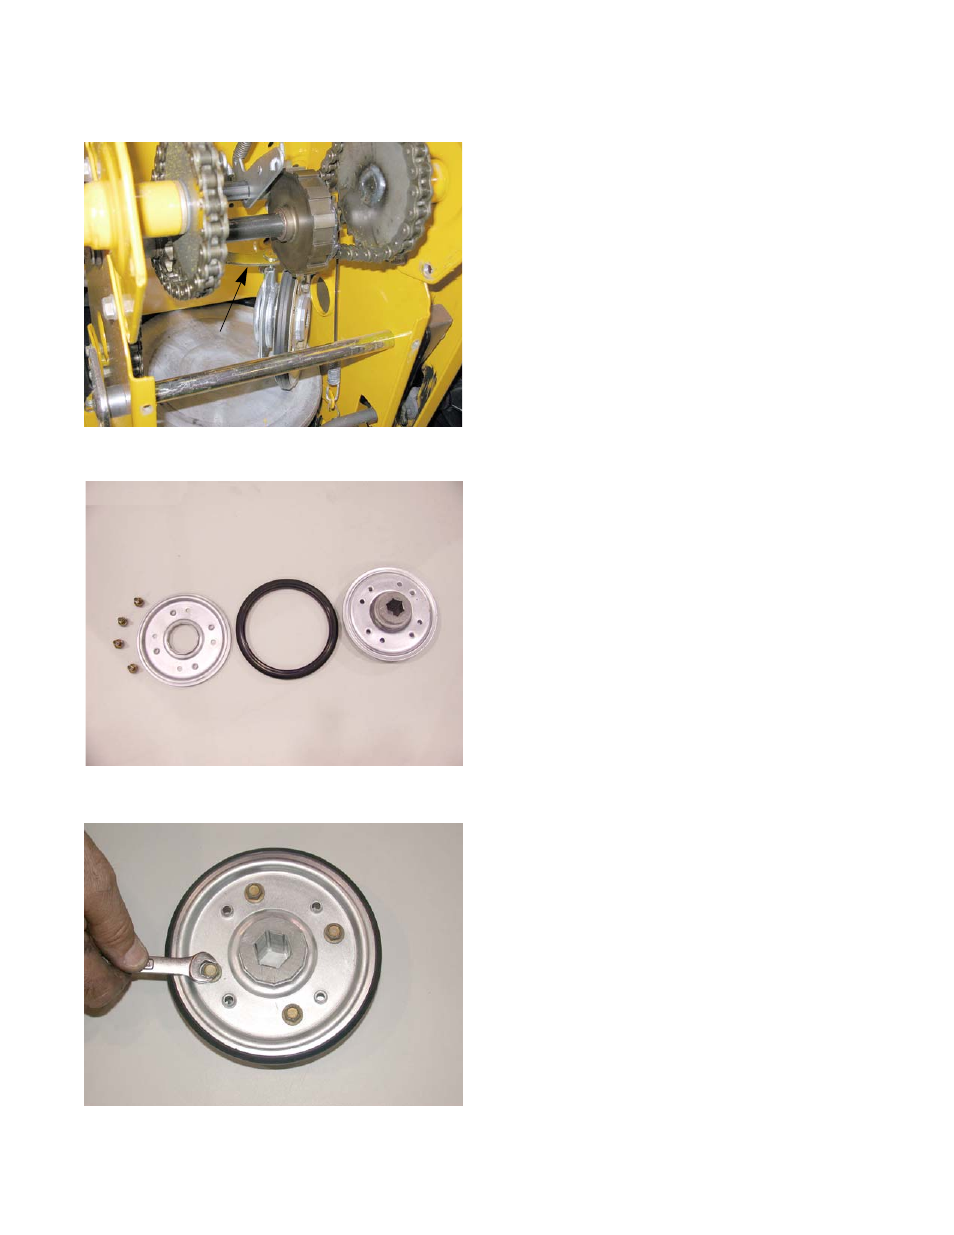
2.
Slide the Friction Wheel Assembly off of the pin on
the Shift Arm. See Figure 5.15.
3.
Remove the four screws that hold the Friction Wheel
Assembly together, using a 1/2” wrench.
NOTE: Earlier production units require a 3/8” wrench for
the four screws.
4.
Separate the Friction Wheel Assembly.
5.
Examine the removed parts.
NOTE: If it failed because of something other than normal
wear, identify and correct the cause before return-
ing to service. See Figure 5.16.
6.
Inspect the parts for damage or wear.
7.
Install the rubber Friction Wheel following the previ-
ous steps in reverse order.
NOTE: Tighten the screws in a star pattern. See Figure
5.17.
NOTE: The torque for the 1/4”-20 screws is 72 - 108 in lbs
(8 - 12 Nm).
NOTE: The torque for the 5/16”-18 screws is 115 - 145 in
lbs (13 - 16 Nm)
NOTE: Make sure the rubber ring is secure within the
wheel assembly before installing it in the unit.
NOTE: Place a small amount of 3-in-1, or similar oil, on a
rag. Wipe a light coating of oil on the Hex Drive
Shaft.
8.
Test run the snow thrower before returning it to ser-
vice.
Figure 5.15
Shift Arm
Figure 5.16
Figure 5.17
1
2
3
4