Cub Cadet Medium Frame 3 Stage User Manual
Page 36
Medium Frame 2 & 3 Stage Snow Throwers
32
6.
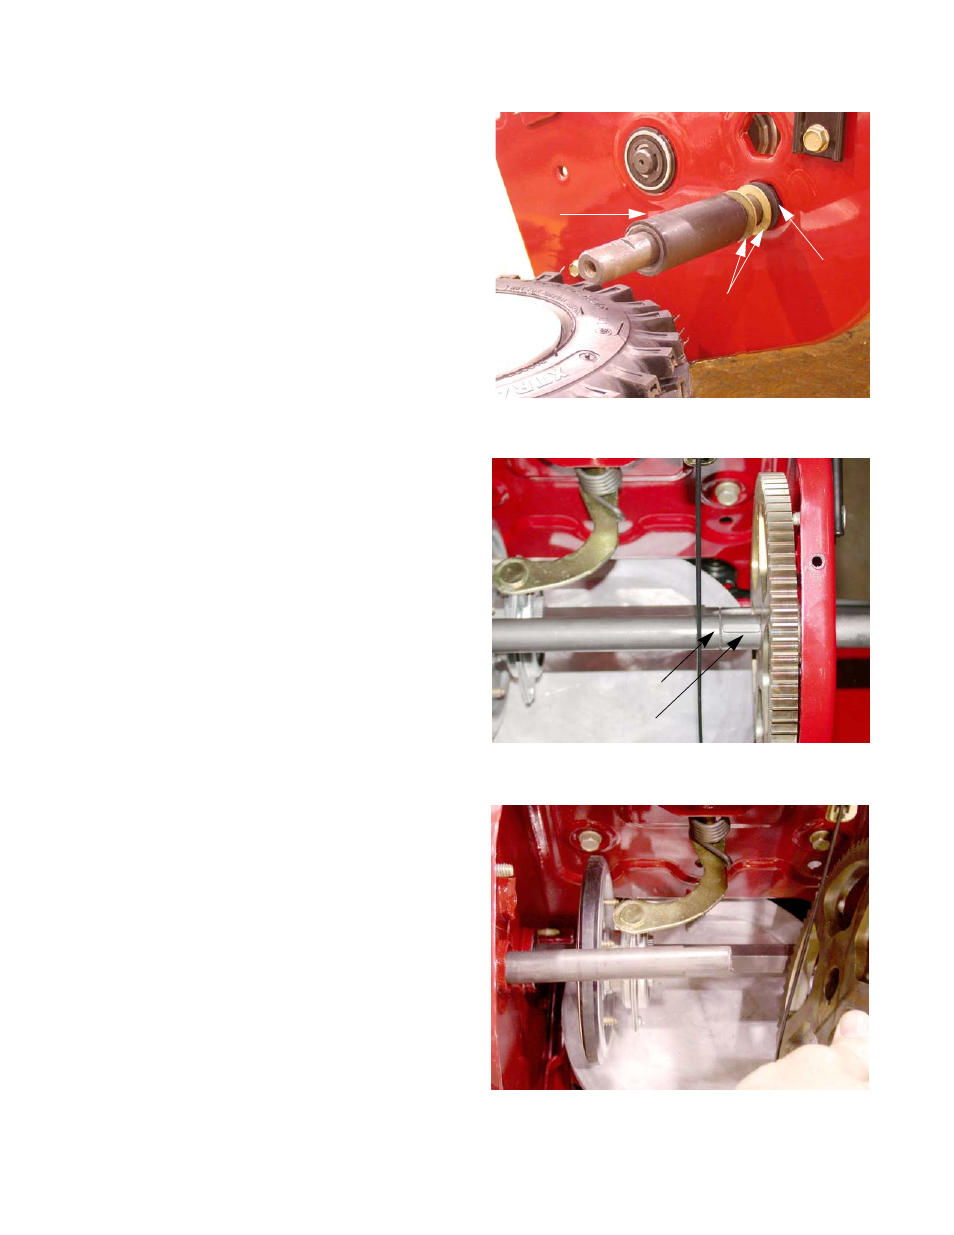
Slide the spacers and washers off of the axle. See
Figure 4.3.
NOTE: There are usually 2 washers on the left side
and only 1 on the right side.
7.
Remove the E-rings from the axle shaft.
NOTE: Starting in 2013, the E-rings were removed
and replaced with a 7” long split spacer.
8.
Slide the axle to the left until the woodruff key in the
axle is fully exposed. See Figure 4.4.
9.
Remove the woodruff key.
10.
While holding the large drive gear, remove the axle
shaft from the left side.
NOTE: The washers will drop as the axle is
removed.
11.
Lift the large drive gear and washers out of the
machine. See Figure 4.5.
12.
Remove the hex flange bushings.
NOTE: Anytime it is necessary to remove bushings,
carefully inspect them for normal wear and
replace them if the wear is excessive.
13.
Install the axle by following the previous step in
reverse order.
14.
Test run the snow thrower before returning it to ser-
vice.
Figure 4.3
Spacer
Washers
Bushing
Hex
Figure 4.4
Woodruff Key
E-ring groove
Figure 4.5