Auger cable adjustments (2-wheel track drives) – Cub Cadet Medium Frame 3 Stage User Manual
Page 19
Belts and Cables
15
Auger Cable Adjustments (2-wheel Track Drives)
Check the adjustment of the auger control:
1.
When the Auger Control Lever is released, in the
disengaged or “up” position, the cable should have
very little slack. It should not be tight.
2.
In a well-ventilated area, start the snow thrower
engine.
3.
While standing in the operator’s position, behind the
snow thrower, engage the auger.
4.
Allow the auger to remain engaged for approxi-
mately ten seconds before releasing the auger con-
trol. Repeat this several times.
5.
With the throttle control in the FAST (rabbit) position
and the auger control in the disengaged or “up”
position, walk to the front of the machine.
6.
Confirm that the auger has completely stopped
rotating and shows no signs of motion.
IMPORTANT: If the auger shows any signs of rotating, return to the operator’s position and shut off the engine
and wait for all moving parts to stop before readjusting the auger control.
To adjust the Auger Control Cable:
1.
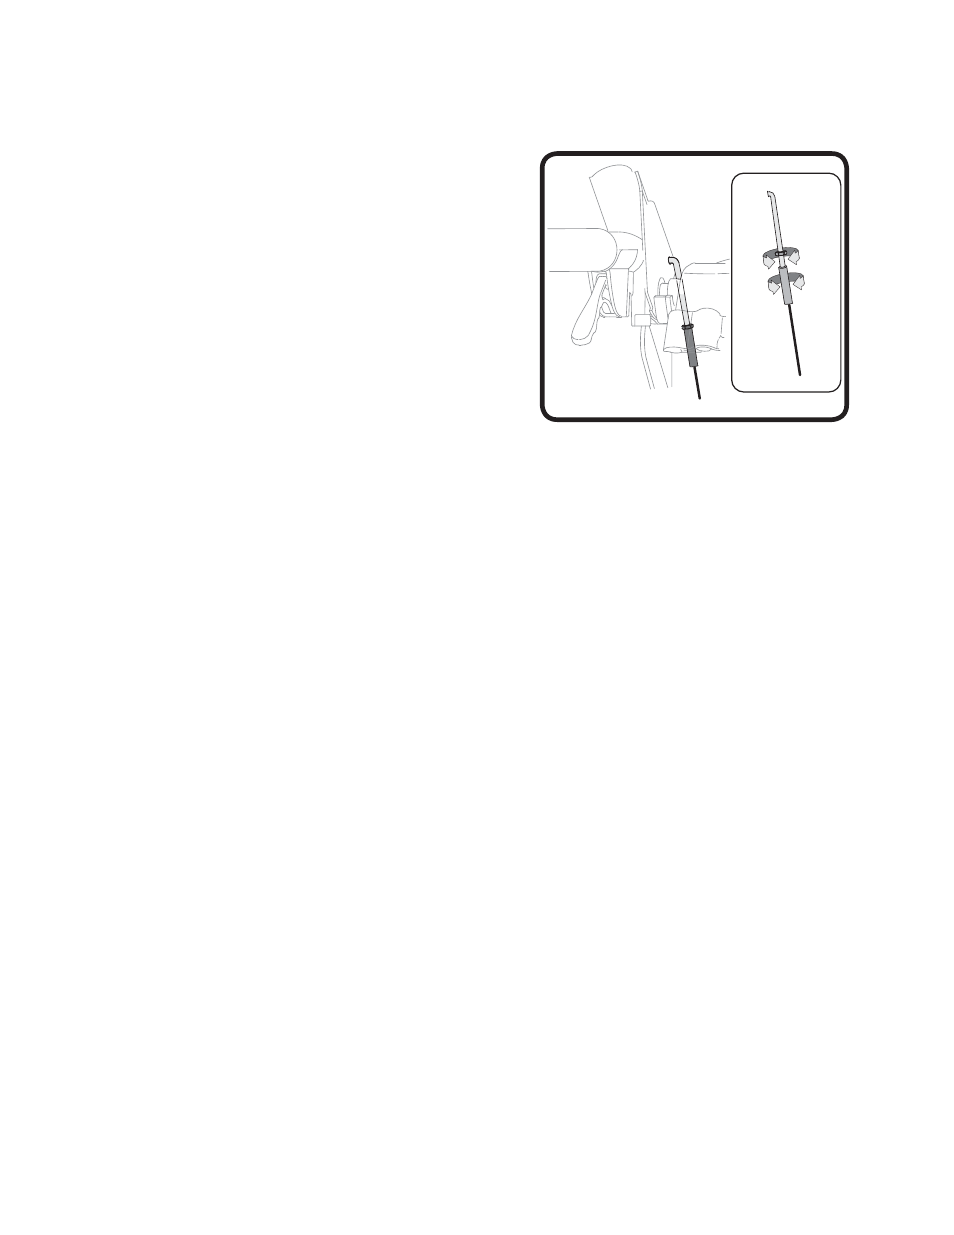
Loosen the hex jam nut on the Auger Control Cable “Z” fitting. See Figure 2.17.
2.
Without turning the cable, thread the ferrule up or down the “Z” fitting until there is no slack in the cable with-
out pulling on the auger idler pulley..
•
Hold the flats on the ferrule with pliers and tighten the jam nut against the ferrule.
•
Do not over-tighten the cable.
3.
Repeat steps 2 through 6 above until proper adjustment has been achieved.
Drive Cable Adjustments (2-wheel Track Drives)
Check the adjustment of the drive control by:
1.
With the Drive Control Lever released, in the disengaged or “up” position, push the snow thrower gently for-
ward. The unit should roll freely.
2.
Engage the drive control and gently attempt to push the snow thrower forward. The tracks should not turn and
the unit should not roll freely.
3.
Release the drive control and move the shift lever back and forth between the R2 position and the F6 position
several times. The shift lever should move easily.
If any of the above tests failed, the drive cable is in need of adjustment. Proceed as follows:
1.
To adjust the drive, loosen the hex jam nut on the auger control cable “Z” fitting. See Figure 2.17.
2.
Thread the ferrule without turning the cable onto the “Z” fitting until there is no slack in the cable.
•
Hold the flats on the ferrule with pliers and tighten the jam nut against the ferrule.
•
Do not over-tighten the cable.
3.
Rotate the coupling end of the cable counterclockwise to loosen the tension or clockwise to increase the ten-
sion on the cable.
4.
Tighten the hex jam nut.
5.
Re-check the adjustment of the Drive Control Cable, as described above, to verify proper adjustment has been
achieved.
Figure 2.17