Discharge chute and controls (electric) – Cub Cadet Medium Frame 3 Stage User Manual
Page 143
Discharge Chute and Controls (Electric)
139
11.
Install the motors by following the previous steps in
reverse order.
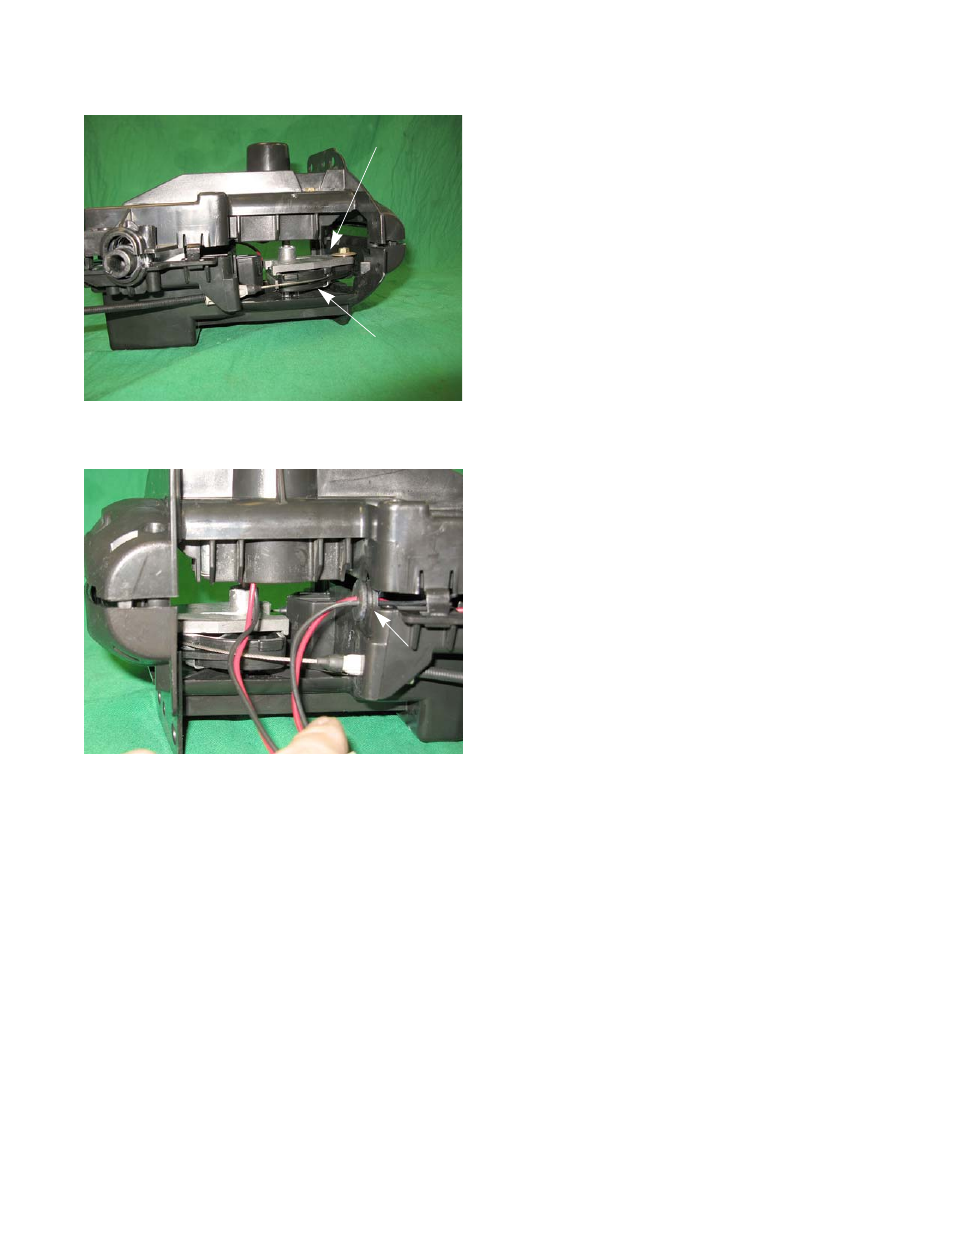
NOTE: Make sure the Chute Pitch Adapter engages the
Cable Guide as the housings are brought together.
See Figure 11.54.
NOTE: Tighten the screw that was removed in step 9 to a
torque of 15 - 25 in lbs (2 - 3 Nm).
NOTE: Make sure the Rotation Motor Harness Grommet is
seated in the notch in the housings.
NOTE: Make sure both motor harnesses are routed to the
rear of the assembly as the housings are brought
together. See Figure 11.55.
NOTE: Tighten the three housing screws to a torque of 10
- 20 in lbs (1 - 2 Nm).
12.
Install the Chute Control Assembly by following the
procedures described in the previous section of this
chapter.
13.
Test run the unit in a safe area before returning it to
service.
Figure 11.54
Cable Guide
Chute Pitch Adapter
Figure 11.55
Grommet