Cub Cadet Medium Frame 3 Stage User Manual
Page 32
Medium Frame 2 & 3 Stage Snow Throwers
28
10.
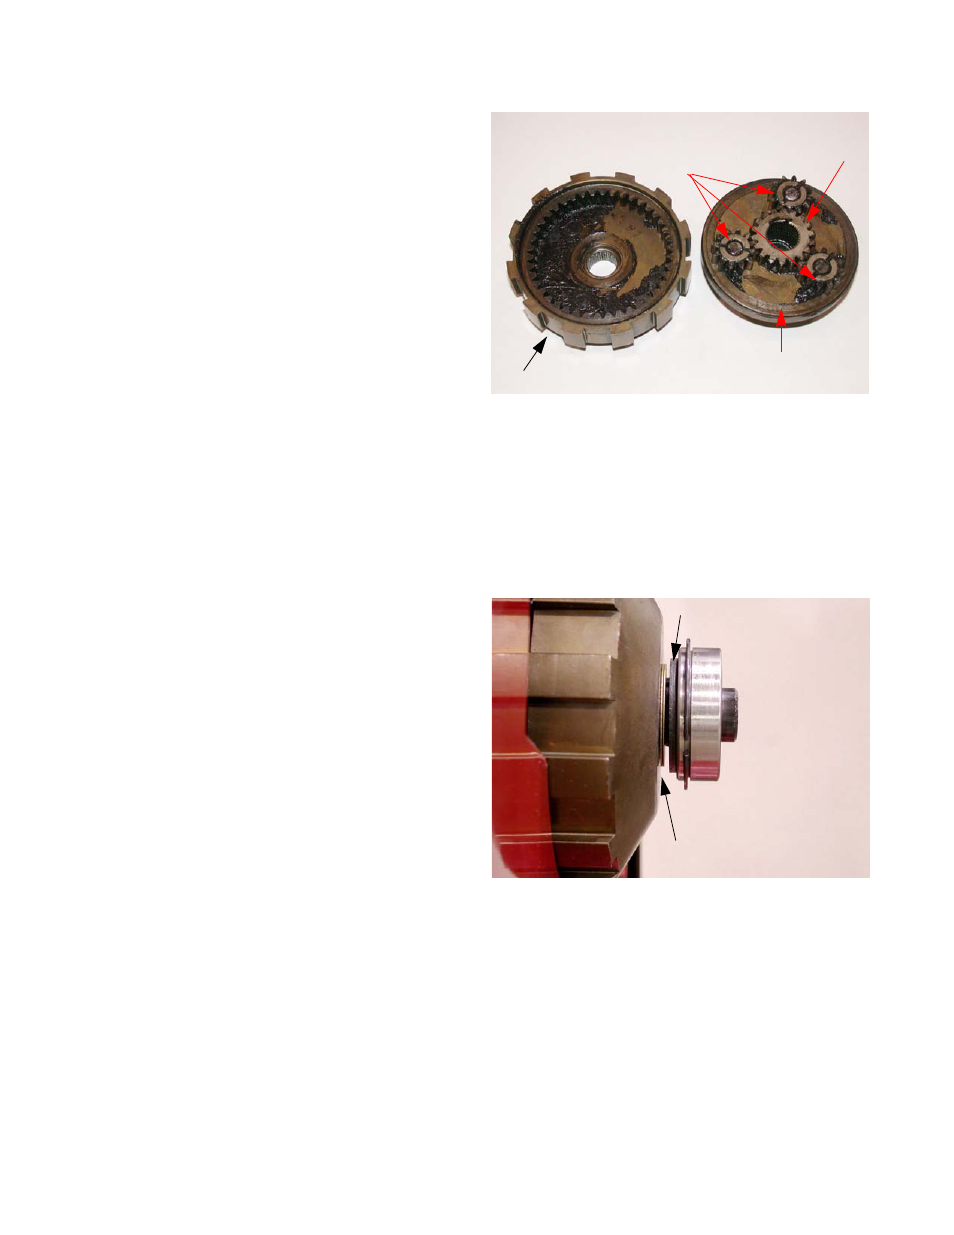
Inside of each planetary gear set is a series of plan-
etary gears that rotate around a sun gear and rotate
inside of the ring gear. See Figure 3.13.
NOTE: The groves are grease grooves.
11.
Although the planetary gears rarely have any ser-
vice issues, a good working knowledge is important.
•
The hex shaft transfers torque from the rubber
drive disc to the sun gear on each end of the
hex drive shaft.
•
The sun gear drives the planetary gears.
•
When unlatched (trigger squeezed) the ring
gear is allowed to spin freely.
•
When the ring gear spins freely it will not drive
the planetary gear carrier.
•
When the trigger is released and the ring gear
is latched (prevented from rotating). The planet
gears drive the carrier in the opposite direction
of the sun gear, but at greater speed.
•
The drive gear attached to the carrier transfers
power each side of the split axle.
NOTE: Examine all the gears: If one or more of the
gears failed because of something other
than normal wear, identify and correct the
cause before returning the snow thrower to
service.
NOTE: Starting with the 2013 production year, the
needle bearings in the ring gear, were
replaced with ball bearings. Seals were also
added.
12.
Install the gears by following the previous steps in
reverse order
13.
Apply a generous coating of Arctic Grease (737-
0318-CRTG) to the inside of the ring and planetary
gears.
NOTE: When installing the bearing, remember that
the wide side faces outward. See Figure 3.14.
14.
Repeat on opposite side.
15.
Test drive the snow thrower in a safe area before returning it to service.
Figure 3.13
Ring Gear
Sun Gear
Planetary gears
Planetary gear carrier
Figure 3.14
Washer/spacer
Shims