Net traversal configuration, 2 wan – COP-USA CD55HD-IP User Manual
Page 2
Step 2:
Open the IE Browser and input the default address of IP-CAM and confirm. The IE browser
will download Active X control automatically.
Step 3:
After downloading Active X control, the login dialog box will pop up.
Step 4:
Input user name and password. Click “OK” button to enter into the live interface.
4. NET Traversal Configuration
You can access to network without dynamic domain name and port forwarding by enabling
net transit.
Step 2:
Input www.upnpipc.com in IE address bar, download and install Active X control. Then a login
window pops up as shown below:
Step 3:
Input the only device ID of the IP-CAM(the serial number of the device) , user name and password
Step 1:
Enter into Config→Network Config→NET traversal Config. Check the “Transit enable”. Then
save the setting.
The default user name and password are “admin” and “123456" respectively.
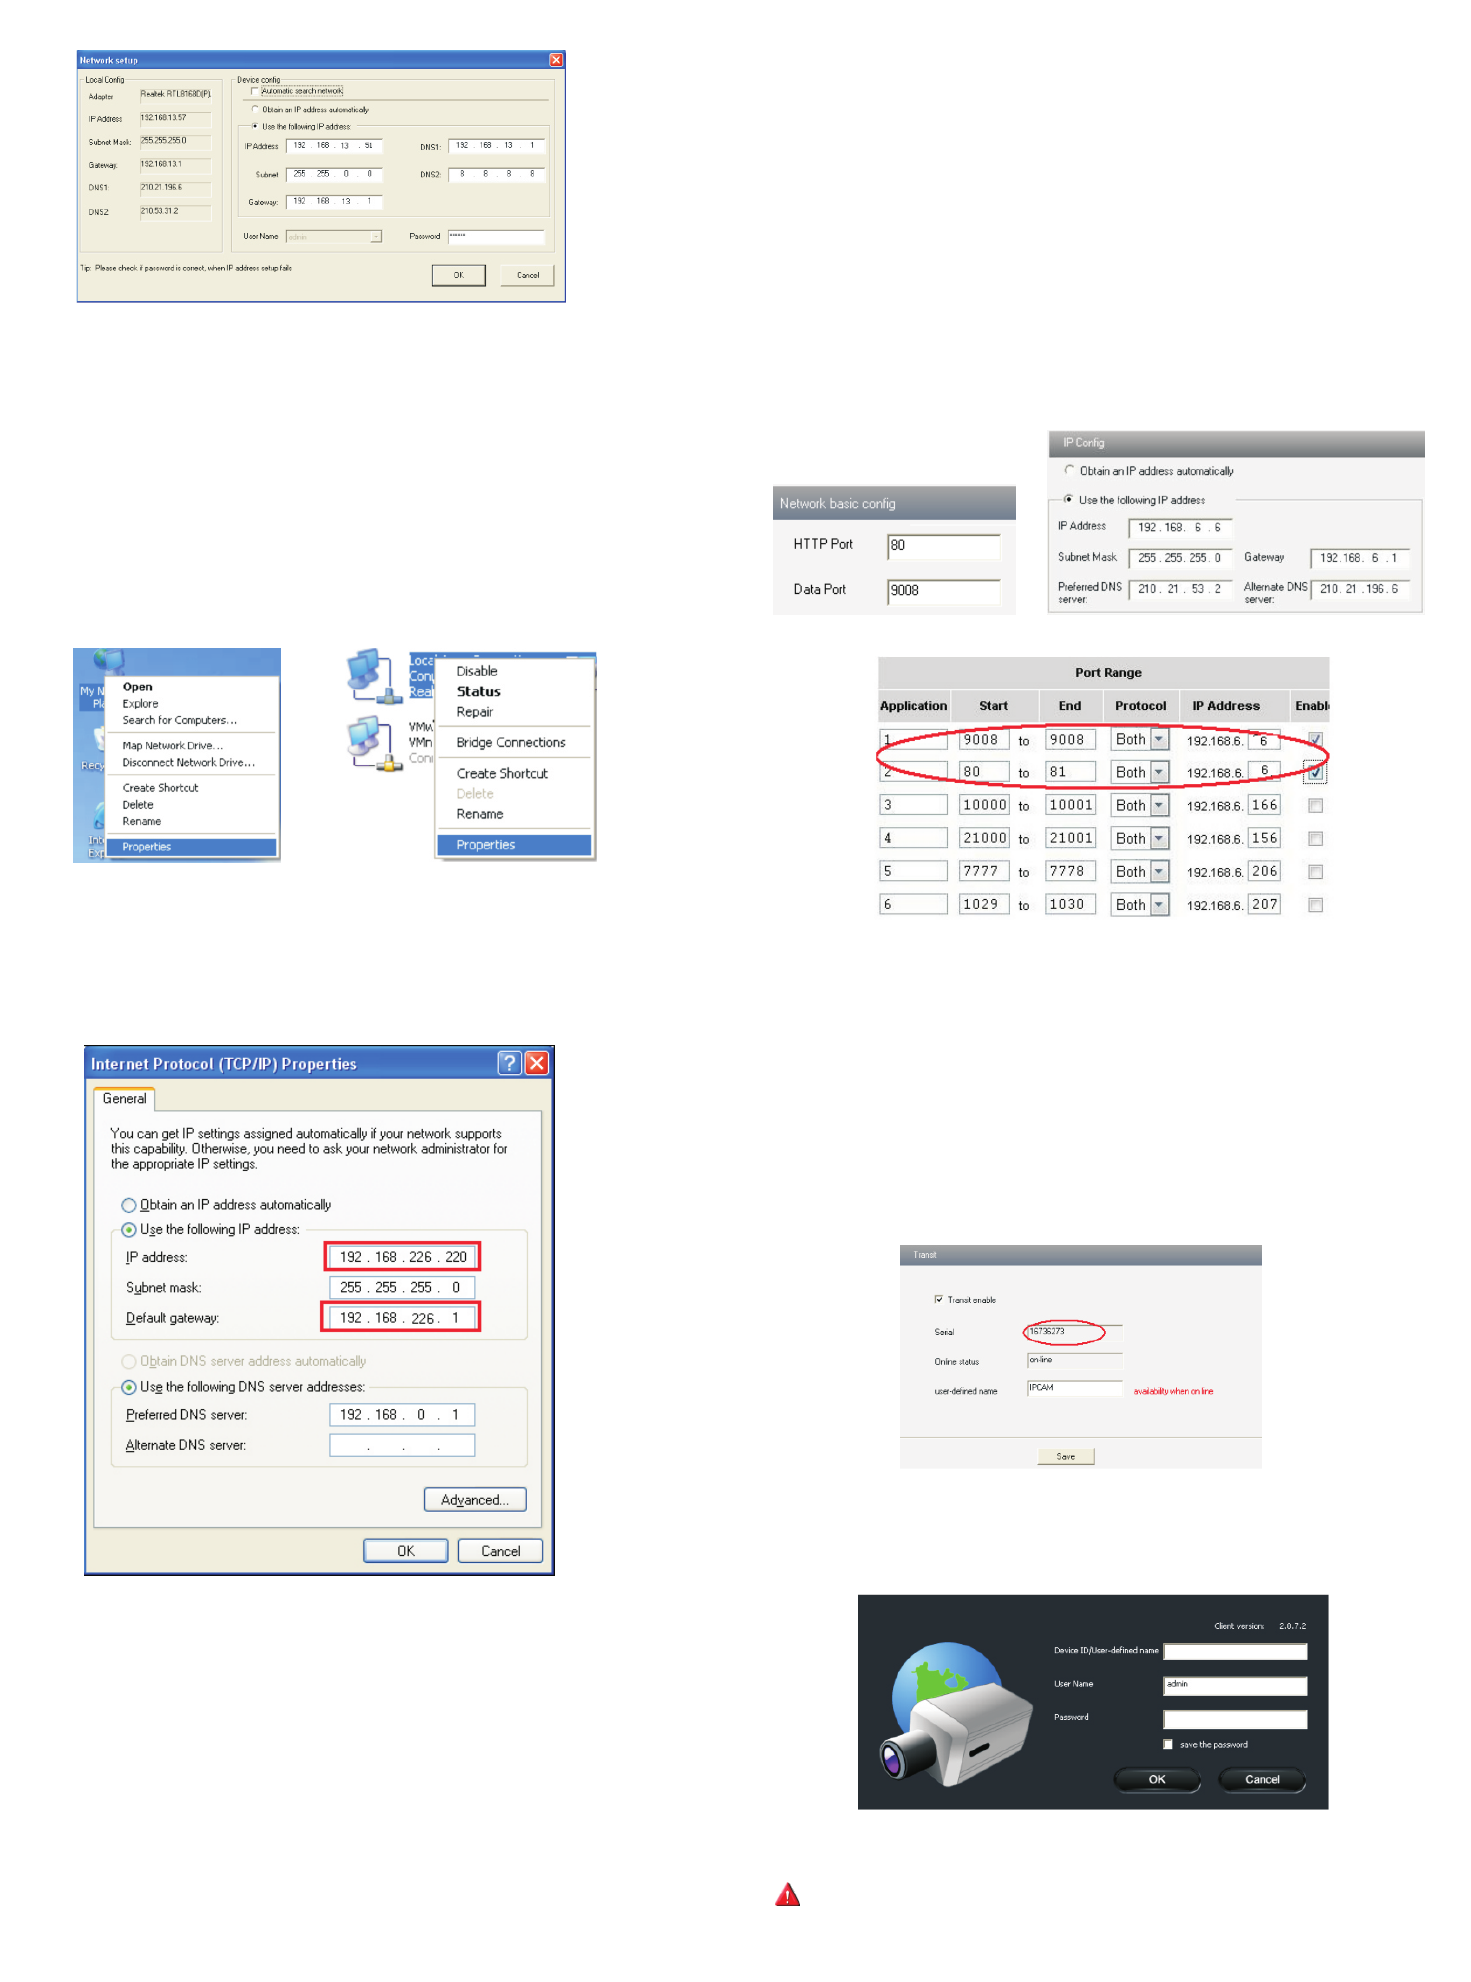
3.2 WAN
Access through router or virtual server
Step1:
Connecting according to above steps in LAN. Enter into the System Congfig→Network Config
→Port to set up the port number. Please refer to fig 3-1:
Step 2:
Enter into System Config→Network Config→Wired to modify the IP address. Please refer to
fig 3-2:
Step 3:
Enter into the router’s management interface through IE browser to forward the IP address and
port of IP-CAM in the “Virtual Server”.
Step 4:
Open the IE browser and input its WAN IP and HTTP port to access the IP-CAM. The following
steps are as same as step 3 and 4 of Chapter 3.1.2 .
Fig 3-1 Port Config
Fig 3-2 IP Config
Fig 3-3 Router Config
3.1.2 Directly access through IE
The network service is default as shown below:
IP address: 192.168.226.201 HTTP:80
Subnet Mask: 255.255.255.0 Data Port:9008
Gateway: 192.168.226.1
The first time you used the IP-CAM, please connect the device with the above default settings.
Select “internet protocol(TCP/IP)” in the “General” tabs. Click “Properties” and input network
address information of the PC in the popup window.
Step 1:
Manually setup the IP address of the PC and the network segment should be as the same
as the default settings of IP-CAM. Right click “My Network Places” icon on the desk top. Select
“Properties”as shown in the left figure. Right click “Local Area Connection” at the popup window,
and then select “Property” as shown in the right figure.