Checkline ETMPX User Manual
Page 8
– 8 –
5.0 DAMPING MODE
The tension meter is equipped with an electronic damping that ensures steady readings
when tension flucutates. This is achieved by averaging the measured values at the preset
update rate.
5.1 Switching On the Damping Mode
NOTE: Before switching on the damping mode, it is recommended that you measure
the first values without damping enabled.
1. Insert process material as described in Sec. 4.1.
2. Press and hold the DAMP key. The DISPLAY shows the currently set damping
factor.
3. Release the DAMP key. The DISPLAY shows DAMP below
the currently measured value.
5.2 Switching Off the Damping Mode
1. Press and release the DAMP key. If the DISPLAY shows only
the currently measured value, damping is off.
5.3 Changing the Damping Factor
The tension meter is factory preset to a damping factor of 12. The tension values are
thereby averaged for the display in the following way:
12 old values + 4 new values
16
The damping factor can be modified in 15 steps from 01 = low damping:
1 old value + 15 new values
16
to 15 = high damping:
15 old values + 1 new value
16
1. Switch on the tension meter
2. Press and hold the DAMP key. The DISPLAY shows the set damping factor.
3. You can now increase the damping factor by pressing the MEM key and
decrease it by pressing the RECALL key.
4. Release the DAMP key to return to the measuring mode.
NOTE: The damping factor stays stored in memory even after the gauge is turned off.
22.1
D cN
22.1
D
cN
– 29 –
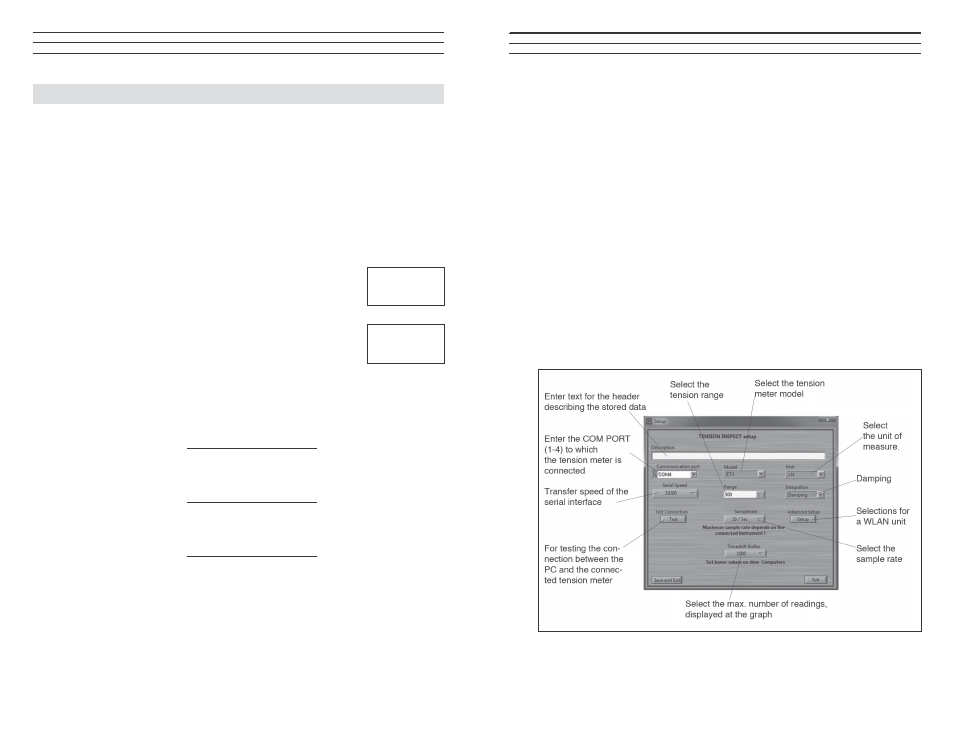
3.1 Basic Settings
NOTE: The tension meter to be used must be connected to the PC.
To edit the settings:
1. Click the SETUP button.The setup dialog box opens. You can now either keep
the default values preset in the input boxes or customize them for your specific
requirements.
The figure below shows the factory-preset defaults for a tension meter model ETX-500.
15 Button
LOAD
Section 3.4
16 Display
STATISTICS DIAGRAM
Display the statistical values, shown
currently at the graph.
17 Button
CLEAR ALL DATA
Clear all measuring values
18 Display
READINGS ON SCREEN To adjust the number of measuring
values, shown at the display
19 Display
TENSION
Readings as graph
20 Button
GENERATE
Section 3.3
21 Button
EXPORT SCREEN
Section 3.3
22 Button
EXIT
Close Tension Inspect 3