Checkline ESM301 User Manual
Page 4
Model ESM301 / ESM301L Version 2 Test Stand
User’s Guide
4
2 MECHANICAL SETUP AND SAFETY
2.1 Safety / Proper Usage
Typical materials able to be tested by the ESM301 include many manufactured items, such as springs,
electronic components, fasteners, caps, films, mechanical assemblies, and many others. Items that
should not be used with the ESM301 include potentially flammable substances or products, items that
can shatter in an unsafe manner, and any other components that can present an exceedingly hazardous
situation when acted upon by a force.
1. Using Grips & Fixtures with the ESM301
Ensure that the grip or fixture is positioned to ensure axial load with respect to the loading shaft of
the force gauge.
When using a grip, ensure that it secures the sample in such a way that it is
prevented from slipping out during a test, preventing a potential safety risk to the operator and
others in the vicinity. If using a grip or fixture from a supplier other than Mark-10, ensure that it is
constructed of suitably rugged materials and components.
2. Mounting
Place the stand on a clean, flat and level work area free from vibration. If desired, the stand can
be secured to the work area with 1/4-20 screws fastened into the underside of the base. Failure
to properly mount the test stand may make it more vulnerable to tipping, causing a hazardous
situation.
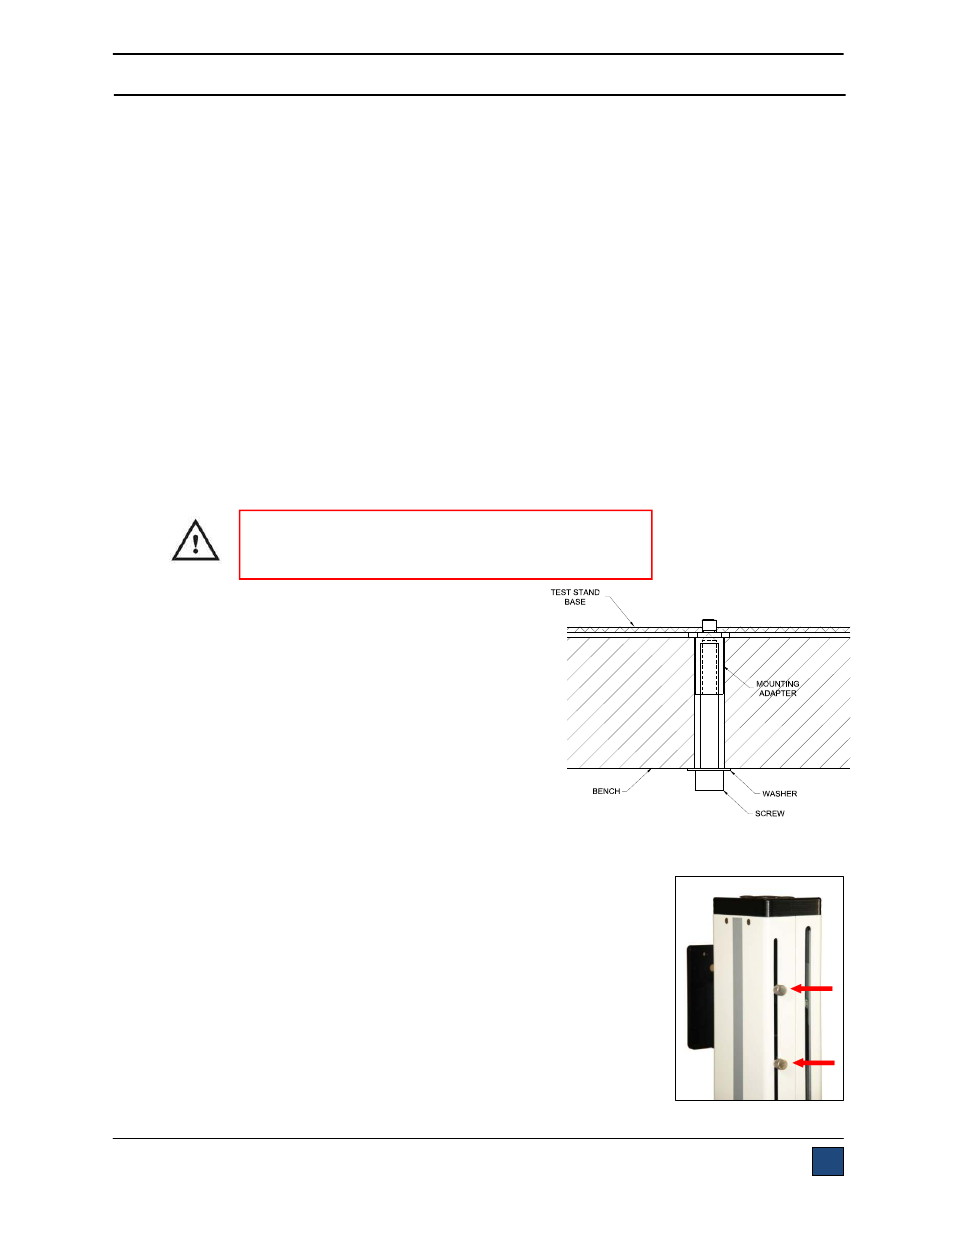
The test stand can also be mounted using the
ESM301-003 mounting kit. Screws of various
lengths are supplied with this kit to accommodate a
range of bench thicknesses. Refer to the following
illustration at right proper assembly:
In general, the ESM301 can be mounted at any angle, although extra care should be taken during
installation and operation.
Once the test stand is in a stable and secure position, install a force
gauge with four thumb screws (provided). Mark-10 gauges mount
directly without adapters. Grips can be mounted onto the force gauge
and test stand base.
3. Installing the limit switches
Upper and lower limit switches are provided to stop crosshead travel at
user-designated positions. Each limit switch consists of an internal
block riding along a rail, and an external thumbscrew. The
thumbscrews are shipped in a separate bag to avoid damage in transit.
Refer to the illustration at right for proper installation:
IMPORTANT: Do not fasten any screws more than
0.25 in [6 mm] into the base of the test stand, or
damage to internal components can occur.