Brookfield CAP2000 Viscometer User Manual
Page 22

Brookfield Engineering Labs., Inc.
Page 22
Manual No. M02-313-G0812
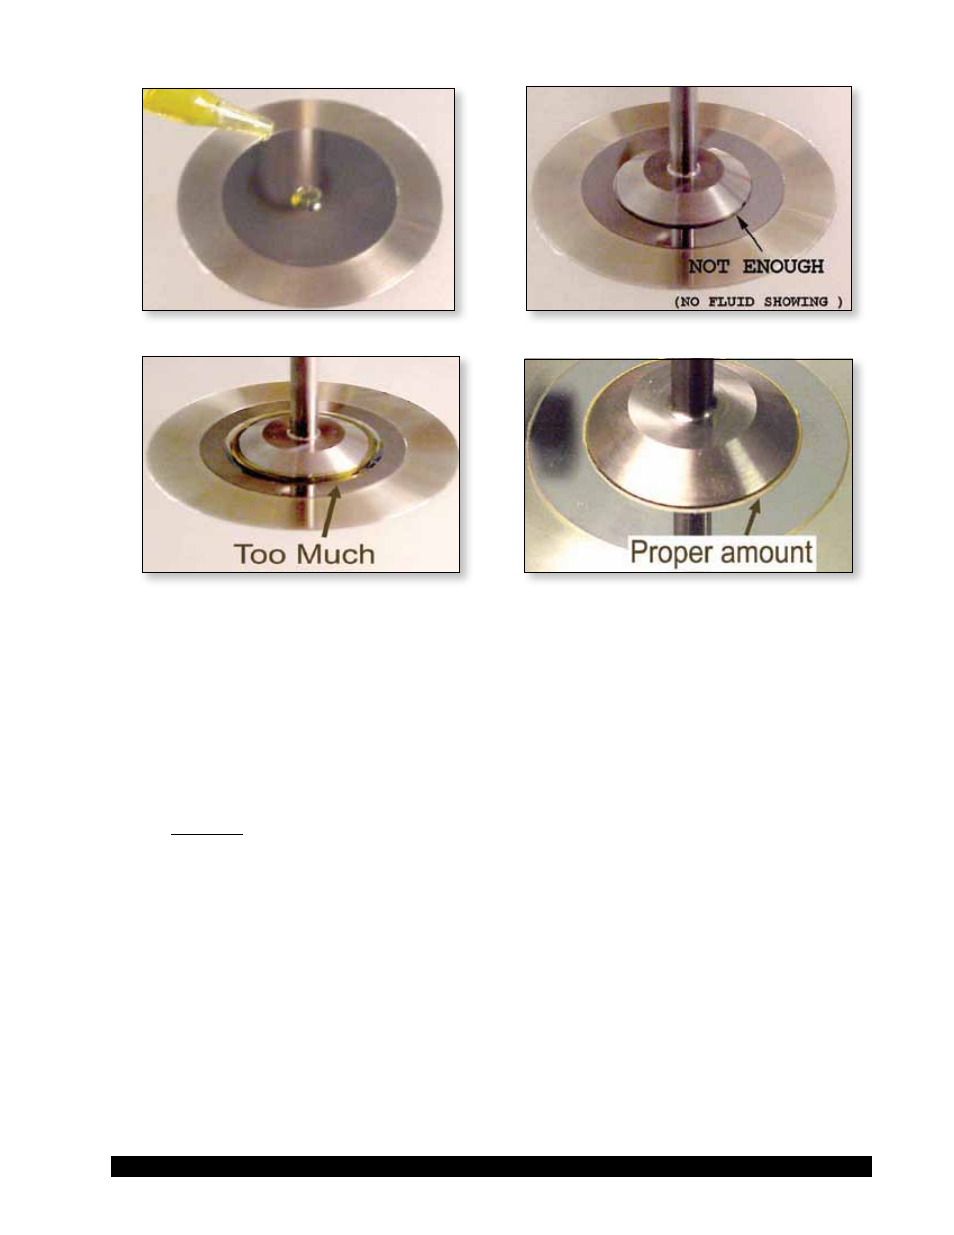
Figure III-1a
Figure III-1b
Figure III-1c
Figure III-1d
4. Run a viscosity test and record the viscosity value when the reading has stabilized.
5. Compare the recorded viscosity to the actual value of the standard and verify that it falls
within the accuracy limits stated in Tables III-3 and III-4. The allowable accuracy is
calculated by adding 1% of the value for the viscosity standard fluid to the product of (%
accuracy x FSR) for the spindle/speed in use. This combined value (in Poise or cP) gives
an allowable window around the actual viscosity value of your standard. If your measured
viscosity falls within this window, the verification passes.
Example:
CAP-03 spindle on High Torque Low Temp CAP Viscometer running at 900 RPM.
Viscosity standard has nominal value at 25ºC of 354 cP or 3.54 P; 1% = 3.54 cP or
0.0354 P. FSR = 8.33 P from Table III-2; use 2% accuracy calculation from Table III-4
since viscosity standard < 50% of FSR. Accuracy for viscometer with CAP-03 spindle
is therefore 2% X 8.33 P = 0.1666 P. Add 0.0354 P to 0.1666 P to determine the allow-
able accuracy ± 0.2020 P. The measured viscosity value with CAP-03 spindle must be
within ± 0.202 P or 20.2 cP of the viscosity standard to pass calibration.
6. If the test fails, repeat again to make sure that every step was performed correctly. If the
test fails again, perform a cone calibration according to the procedure in Section III.4.
