Iy (for windows xp, 8 click automated printer setup, Note – Panasonic KX-CL500 User Manual
Page 21: Setup
Attention! The text in this document has been recognized automatically. To view the original document, you can use the "Original mode".
Setup
6-iy
(For Windows XP^
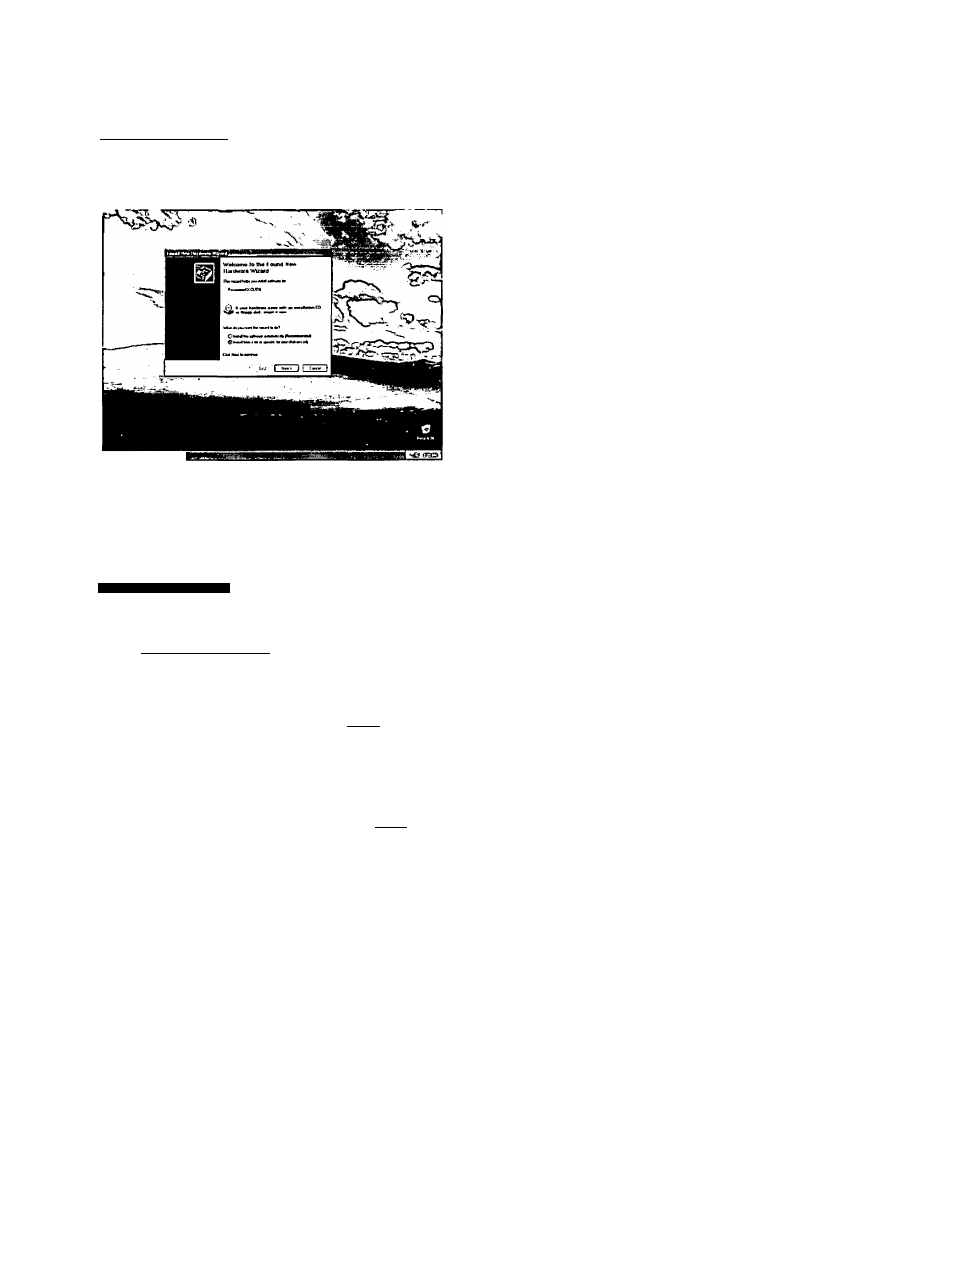
(1) Click on the Install from a list or specific iocation
(Advanced) check button and click [Next>].
(
2
)
h/rrwri n Click on the Search for the best driver in these iocations check button and Inciude this iocation in the search check box and remove the check mark of check box and click [Browse]. Found New Hordware Wizard Pteote choose you loeich and installalion options. ffilSMteh lot ^ best itivw si these locationsj Uie the check, bones below to imil oi expand the défaut seatch, which indudes Vxaf □ Seaich temovabte media (Sopw. CD-ROM...) Q Inditde this (gcebon the seatch. ZMCX-a500\Wri [»J [ Browse I OG wi T seaich I wi choose thedtivei to inslat Choose this option to select the device diivei ftom a list. Windows does not guarantee that [ < Back II tjext > | | Cancel | (3) (4) ( 6 ) (7) Select PCL folder [D (CD-ROM drive ROM drive letter);\WinXP\ENGLISH\PS]. Click [OK], Click [Next>]. If the Hardware Installation window is displayed, click [Continue Anyway]. 7 on page 21. 7 To install utilities software, double click My computer icon, then double click the drive (example D:) for CD- ROM. The Panasonic Setup window is displayed. 8 Click Automated Printer Setup. 9 If the Purchase Information window is displayed, select the shop where you purchased the printer and the printer, select Other and click [Next >]. The License Agreement window is displayed. 10 Click [Yes]. The Select Printer window is displayed. NOTE: • If you cannot find the printer on your network, the Warning message will be displayed. Click [OK] to continue. 11 Click on the Choose the current port myself (LPT / USB) check button and click [Next>]. The Select Printer Port window is displayed. 12 Click on the USB port (Ex. USB001) and click [Next >]. The Installed Device window is displayed. 13 Click on check box of the installed options in your printer, then click [Next >]. The Installer starts installing the Printer Driver and Utilities by this condition. installation. The InstallShield Wizard Complete window is displayed. 14 Click [Finish]. 21
the Search removabie media (fioppy, CD-ROM...)
paths and retnovabla meda. The best diivei found wl be insisted.
the diivai you choose wi be the best match tot your haithaaie.
(5)
letter):\WinXP\ENGLISH\PCL] or PS folder [D (CD-
Click [Finish].
Proceed to step
click [Next >].
• If you cannot find the shop where you purchased
Follow the instruction on the screen to complete the