Setup, Setting up the printer, Installing the toner cartridges – Panasonic KX-CL500 User Manual
Page 13: Installing the print cartridges
Attention! The text in this document has been recognized automatically. To view the original document, you can use the "Original mode".
Setup
Setting up the Printer
Installing the Toner Cartridges
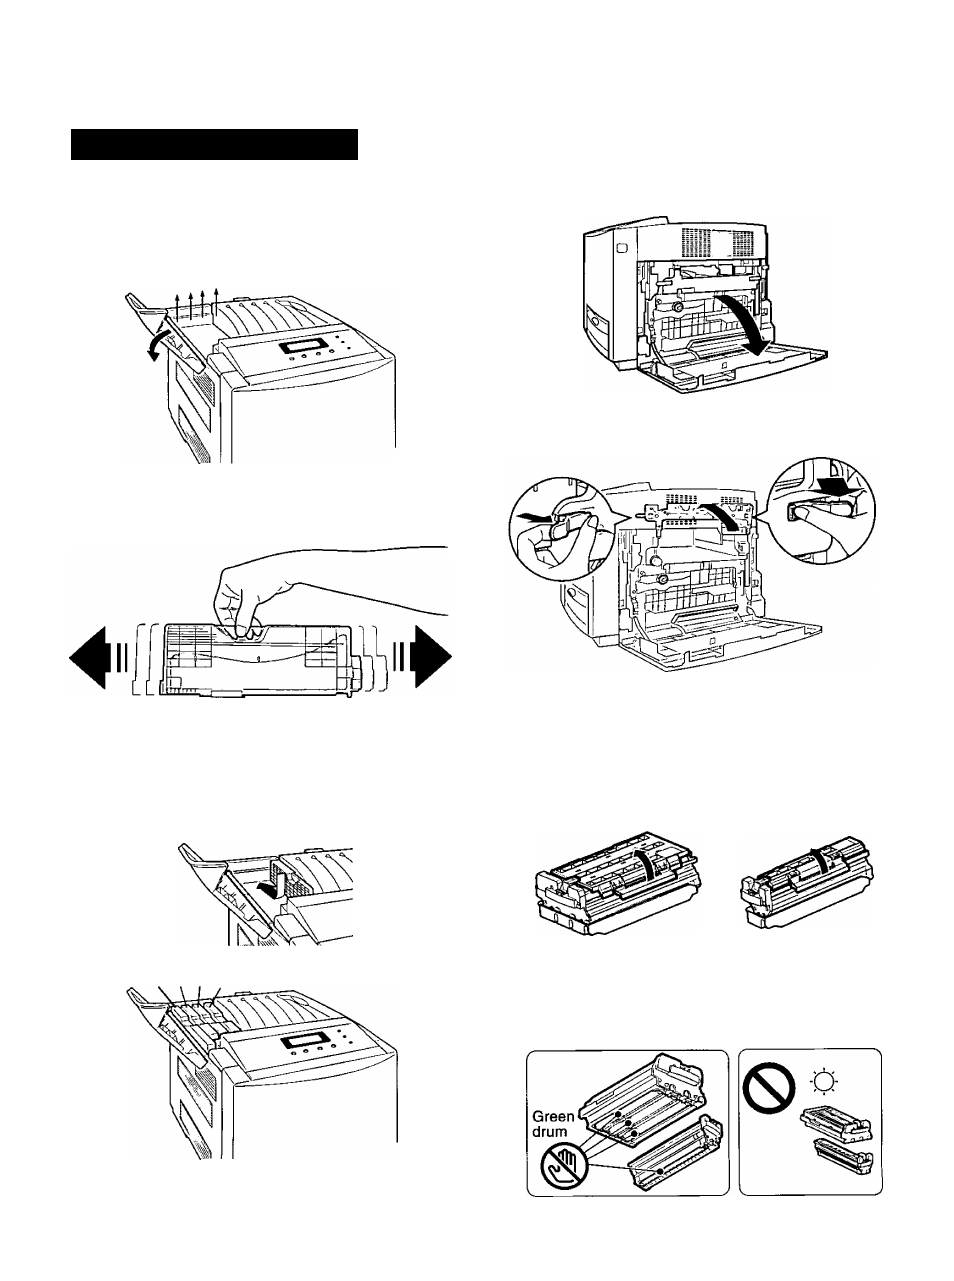
1
Open the toner door and remove the sealing tapes.
2
Open the plastic bags and take out the toner
cartridges. Shake the toner cartridges several times.
3
Insert the toner cartridges in the appropriately labeled
slots. From right to left, the order of the color toner
cartridges is BLACK (1). CYAN (2), MAGENTA (3),
YELLOW (4).
(4) (3) (2) (1)
4
Close the toner door.
Installing the Print Cartridges
1
open the right side door.
2
Unlock and open the print cartridge holder.
3
open the plastic bags and take out the print
cartridges.
4
Remove the upper seal covers.
^olor print cartridge ^ (Black print cartridge ^
NOTE:
To prevent damage to the print cartridges,
• Do not touch the green drum surface.
• Do not expose to light for more than 45 seconds.
• Do not expose to direct sunlight.
13