3} assembling thé side panels, Montage, 3f assemblage des panneaux – Yamaha CN-1000 User Manual
Page 23: It montaje de los paneles
Attention! The text in this document has been recognized automatically. To view the original document, you can use the "Original mode".
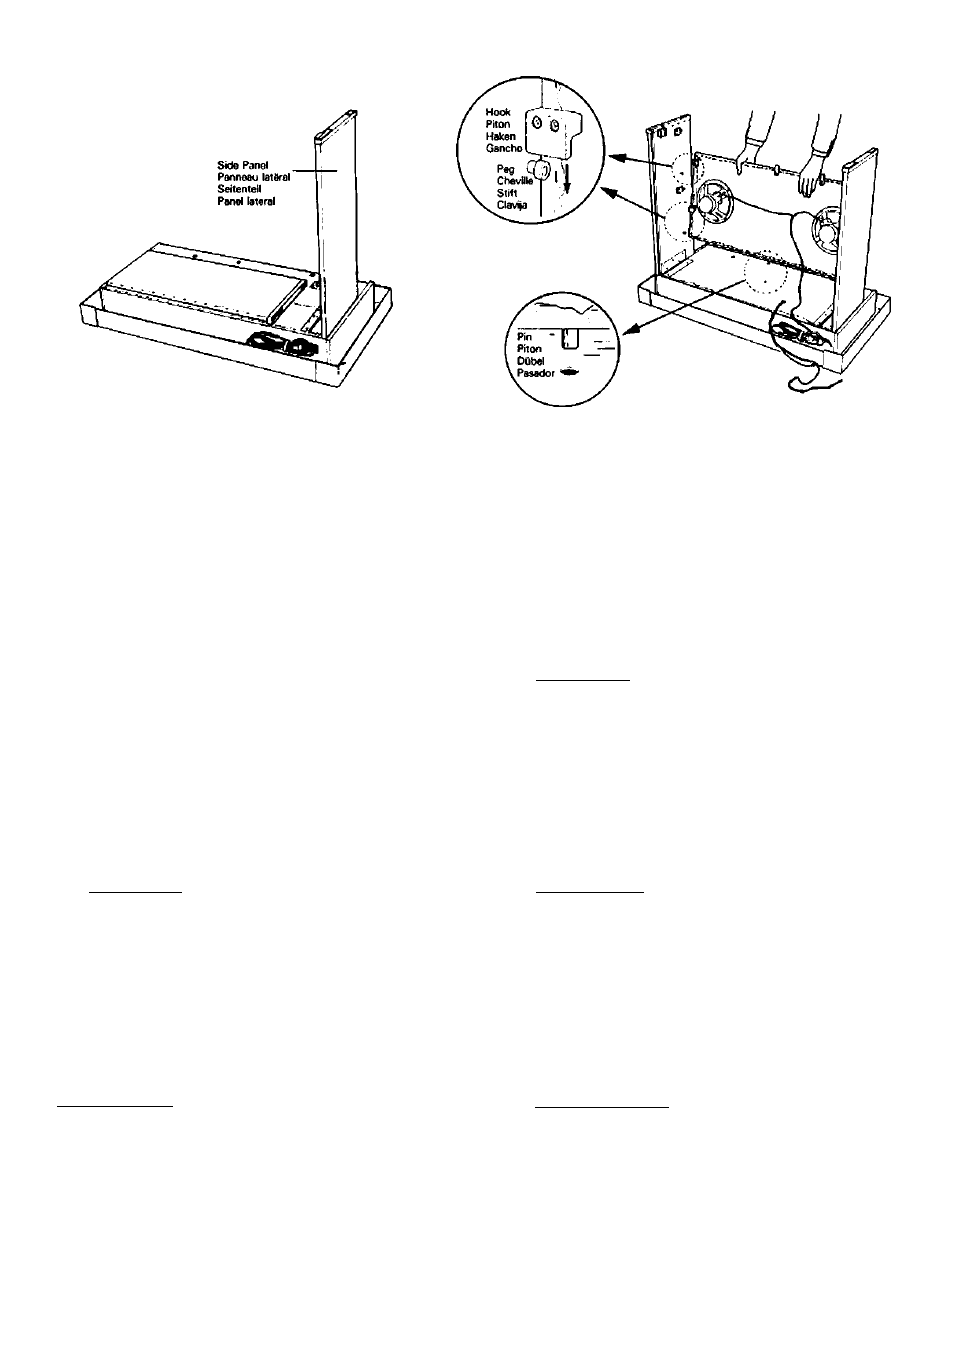
3} ASSEMBLING THÉ SIDE PANELS
4) ASSEMBLING THE FRONT PANELlAj
Remove the side panel cover and raise both the
right and left side panels.
Hook the front panel over the right and left panel
pegs, and insert the front-panel pin into the cor
responding hole in the shelf panel as shown in
the illustration.
Finally, insert the lock unit into the lock block
until it iS locked firmly.
3) MONTAGE DER SEITENWANDE
"57
MONTAGE
PLATTE [A]
15ER—IIÄOTSPRECHER-
Enifernen Sie die Verpackung der Seitenteile.
Richten Sie das rechte und linke Seitenteil auf.
Haken Sie die Laulsprecherplatte über die Stifte
am rechten und linken Seitenteil ein und stecken
Sie den Zapfen der Lautsprecherplatte wie in der
Abbildung gezeigt in das Loch der Spiellischein-
heit (Unterseite).
Schieben Sie zum Schluß die ßefestigungseinheit
in den ßefestigungsblock, bis sie fest verbunden
sind.
'3F ASSEMBLAGE DES PANNEAUX
LATERAUX_____________________
4)
assemblage
du
PANNEAU
FRONTALI Al_________________
Prendre les 2 panneaux latéraux et les mettre
debout après avoir retiré les caches latéraux.
Accrocher le panneau frontal sur les chevilles
droite et gauche et insérer le piton du panneau
frontal dans la cavité correspondante située sur
la tablette, comme indiquée sur le schéma.
Insérer enfin Tunité de verrouillage dans le bloc
de verrouillage jusqu'à ce qu'il se bloque con
venablement.
IT MONTAJE DE LOS PANELES
_ LATERALES__________________
Extraiga la cubierta, de los paneles laterales y alce
ambos paneles.
4) MONTAJE DEL PANEL
___DELANTERO ÍA]
Enganche el panel delantero en las clavijas de los
paneles laterales derecho e Izquierdo, e inserte el
pasador del panel delantero en el orificio corres
pondiente del estante como se ilustra.
18