In order to get the best picture quality, Screen, Lamp – Panasonic PT-AE1000 User Manual
Page 6: Liquid crystal panel, Front, back and top view, Battery compartment, Note, About your projecto, 10 - e, Pic.m
Attention! The text in this document has been recognized automatically. To view the original document, you can use the "Original mode".
About Your Projecto
In order to get the best picture quality
• Draw curtains or blinds over any windows and turn
off any lights near the screen to prevent outside light
or light from indoor lamps from shining onto the
screen.
Do not touch the surfaces of the lens with your bare
hands,
• If the surface of the lens becomes dirty from
fingerprints or anything else, this will be magnified
and projected onto the screen. Moreover, when not
using the projector, cover it with the lens cover.
Screen
• Do not apply any volatile substances which may
cause discolouration to the screen, and do not let it
become dirty or damaged.
Lamp
• The lamp may need to be replaced earlier due to
variables such as individual lamp characteristics,
usage conditions and the installation environment,
especially when the projector is subjected to
continuous use for more than 10 hours or the power
is frequently turned on and off.
Liquid crystal panel
• Do not project the same image for long periods of
time, as this may remain as an afterimage on the
liquid crystal panel,
• The liquid crystal panel of the projector is built with
very high precision technology to provide fine picture
details. Occasionally, a few stuck pixels may appear
on the screen as fixed points of blue, green or red.
Please note that this does not affect the performance
of your LCD.
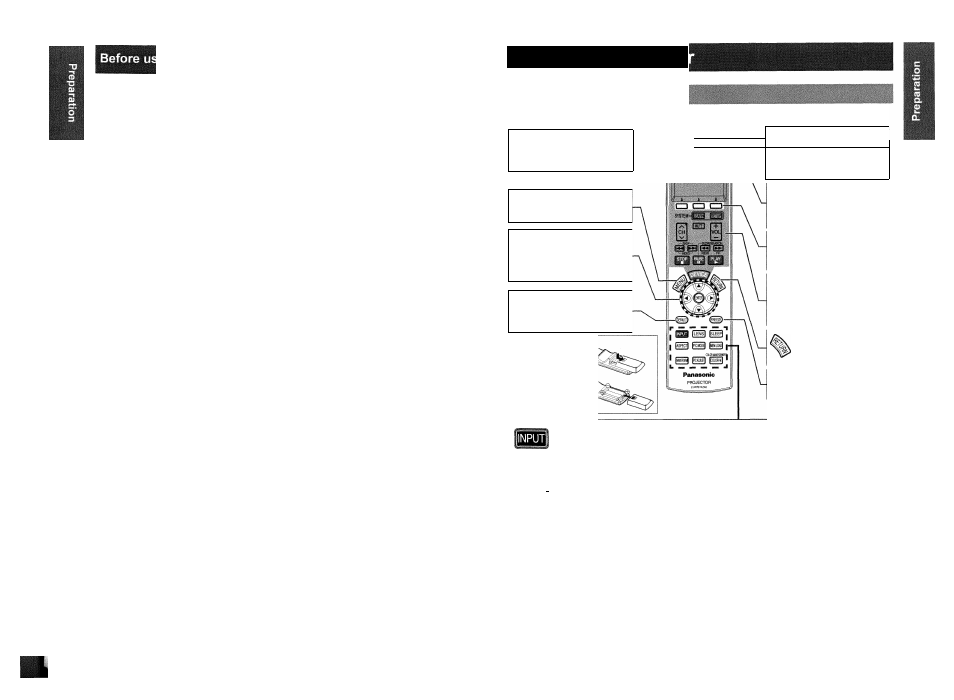
Front, back and top view
m
While
the
MAIN POWER
is
on, switch between stand
by mode and project mode,
(page 20)
W
Display the
Main menu.
Return to the previous
menu, (page 29)
^0(4.
Navigate through the
1
menus with
A T ►
and activate the menu
item with
ENTER,
(page 28)
y — R e s e t some of the
ftEFAUOT settings to the factory
^ default settings.
(page 22)
Battery compartment
1. Press the tab and lift
up the cover.
2. Insert the batteries
according to the
polarity diagram
indicated inside.
Remote control signal emitter
1
rg* 1
J
Ç—{Qh-
—
(Q
)—
Turn the button
backlight of
Remote
control
on/off.
(page 22)
Function buttons
Assign the frequently used
functions from the option for
shortcut, (page
39)
Learning Remote control
buttons and
LCD
Programme and operate other
devices. See “Remote Control
Operate Guide”.
Return to the previous
menu, (page 28)
Capture the projected
[FREEZE!
image as a still
picture, (page 22)
Switch to cycle through
the input method.
(page 23)
ASPECT
Switch to cycle through
the aspect ratio.
(page 23)
^ Display the input
WAVEFORM waveform, (page 24)
Adjust the focus and
size of the image,
(page 25)
|PIC.M
0
DE
Switch to cycle through
the
PICTURE MODE
(page 25)
PIC,ADJUST
Display
the
PICTURE
menu, (page 25)
(
—% Turn off the
POWER
SLEEP automatically by setting
* the duration, (page 22)
MEM,LOAD
Display
the
MEMORY
LOAD
menu, (page 25)
COLOR M,
Display the
COLOUR
MANAGEMENT menu,
(page 26)
NOTE:
• Do not drop the
Remote control.
• Avoid contact with liquids or moisture.
• Remove the batteries if not using the
Remote control
for a long period of time.
• Do not use rechargeable batteries.
• Do not keep pressing the
Remote control
buttons as this may shorten battery life.
10 - E
nglish
E
nglish
-11