Less bluish, 32 - e, Picture menu – Panasonic PT-AE1000 User Manual
Page 17: Nglish
Attention! The text in this document has been recognized automatically. To view the original document, you can use the "Original mode".
PICTURE Menu
PICTURE Menu
You can adjust the sharpness of the projected image.
Less
More
sharp
sharp
• Setting range is vary according to the selected input
signal
You can adjust the white balance of the projected
image.
From the
ADVANCED MENU,
you can perform more
detailed image adjustment manually.
■ GAMMA
You can adjust linear intensity at 3 levels. Press
► to increase/decrease 1 point.
Less
bluish
Setting range: -6 to
+6
Less
reddish
You can switch automatic adjustment of the lamp and
the lens iris on/off.
• ON:
Automatic adjustment
• OFF:
No adjustment
You can monitor the luminance level of the input signal
is in the recommended range by displaying it in
waveform. If the waveform is not in the range, adjust it
for the best quality. See “Adjusting the waveform of the
input signal” on page 24.
Levels
:
Default setting
GAMMA HIGH
0
GAMMA MID
0
GAMMA LOW
0
• Setting range:
-8
to +8
■ CONTRAST
You can adjust the amount of contrast in RGB
colours individually. Press ◄ ►
to
increase/decrease 1 point.
RGB
Default setting
CONTRASTR
Ü
CONTRASTG
0
CONTRASTB
0
• Setting range: -32 to +32
■ BRIGHTNESS
You can adjust the brightness in RGB colours
individually. Press ► to increase/decrease
1 point.
RGB
Default setting
BRIGHTNESS R
Q
BRIGHTNESS G
0
BRIGHTNESS
B
0
style.
2, Press
ENTER
to select.
•
The
WAVEFORM MONITOR
will be
displayed.
3. Adjust the
WAVEFORM MONITOR.
•
See “Adjusting the waveform of the input
signal” on page 24.
• Setting range: -16 to +16
■ COLOUR MANAGEMENT
You can manage your own defined colour settings.
See “Setting your own colour profile” on page 26.
■ NR (Noise Reduction)
You can switch the automatic noise reduction
system on/off. Press ◄ ► to select the required
setting,
• ON:
Automatic noise reduction
• OFF.
No noise reduction
NOTE:
• Applying noise reduction may affect image quality.
MPEG NR
You can switch the automatic noise reduction
system for MPEG format images on/off. The
system minimises block noise and mosquito noise
to eliminate jagged edges, providing an overall
smoother image. Press -4 ► to select the required
setting.
• ON:
Active
• OFF:
Deactive
NOTE:
• MPEG NR
is
for MPEG
images
only.
• MPEG NR
is not available with
PC
and
HDMI
(VGA60)
signals.
CINEMA REALITY
You can switch the automatic image synchronizer
on/off for 24 frames a second images, such as
movies. Press ◄ ► to select the required setting.
• ON:
Active
• OFF:
Deactive
You can save the adjusted
PICTURE
settings with up to
3 in each of 2 signal groups.
1. Adjust the different items of the
PICTURE
menu.
2. Select
MEMORY SAVE
and press
ENTER.
3. Select
MEMORY1 - 5
to save and press
ENTER,
•
The confirmation screen is displayed.
•
In use
t'r: Not in use
•
Select ALL
DELETE
to clear all the saved
settings.
4. Select
OK
and press
ENTER.
•
To cancel, select
CANCEL
and press
ENTER,
or press the
RETURN
button.
NOTE:
• CINEMA REALITY
is available with interlace
signals only.
• If the
CINEMA REALITY
is different from the
required setting of the image, select
OFF,
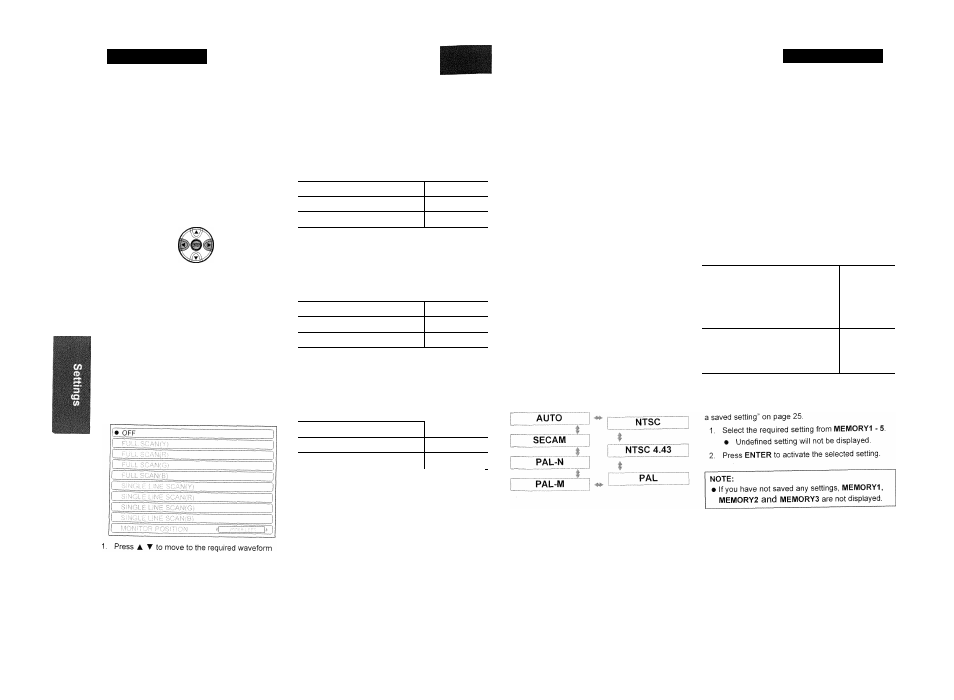
■ TV-SYSTEM
When the video signal is changed, the setting switches
automatically.
You can switch the setting manually to match the video
data. Press ◄ ► to cycle through the options.
VIDEO, S-VIDEO, COMPONENT,
HDMI (not including VGA60),
1 125 (1
080)/50i, 1 125 (1 080)/60i,
1 125 (1 080)/50p and
1 125 (1 080)/60p signals in PC
connection
MEMORY1 - 5
VGA60 in HDMI connection, PC not
including 1 125 (1 080)/50i,
1 125 (1 080)/60i, 1 125(1 080)/50p
and 1 125(1 080)/60p
MEMORY1 - 5
You can access saved settings instantly. See “Loading
The current selected signal is displayed when
PC/COMPONENT/HDMI
equipment is connected.
NOTE:
• See “List of compatible signals" on page 45.
32 - E
nglish
E
nglish
- 33