Installation instructions using blind fasteners – WEATHER GUARD Model 225-3 Accessory Cross Member, Compact User Manual
Page 4
4
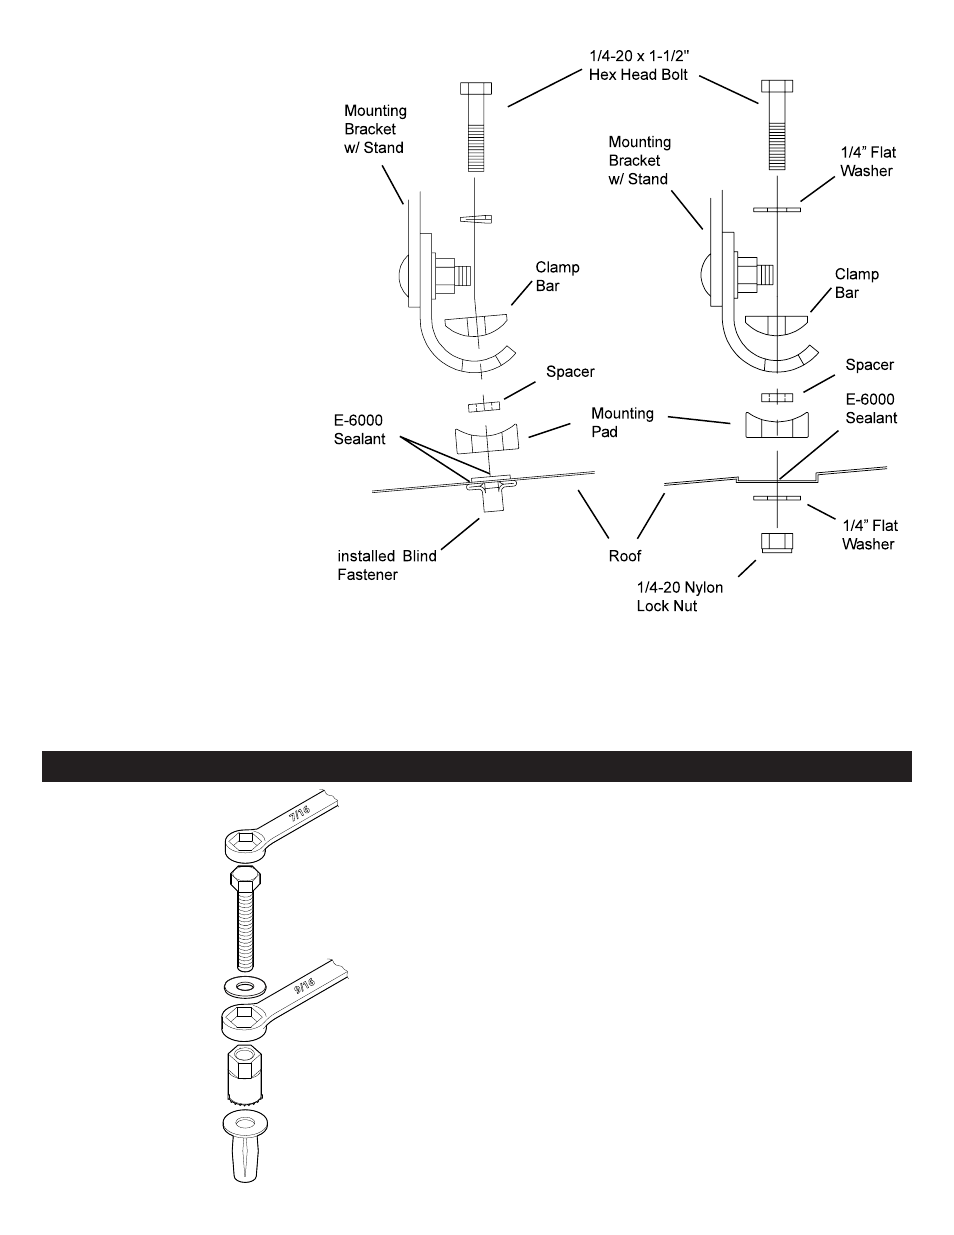
Flat Washer
9/16” Wrench
Installation Tool
Blind Fastener
Black Ox
ide Bolt
7/16” Wrench
(Or 7/16”
Socket)
INSTALLATION INSTRUCTIONS USING BLIND FASTENERS
STEP 1. Place a drop of oil on the black oxide bolt before assembling.
STEP 2. Place the Blind Fastener in the hole and use a 7/16" wrench to tighten black
hex bolt until the blind fastener is fully seated.
NOTE: When setting black hex bolt, it will start out hard. As the Blind Fastener
"bulbs" out it will get easier, until it bottoms out or sets. Make sure the Blind
Fastener and Installation Tool do not turn during installation.
WEATHER GUARD
®
PRODUCT REFINISHING PROCEDURES
All WEATHER GUARD
®
products are finished with a polyester powder coating, and
it is important to follow these procedures to get proper adhesion. As Knaack LLC
cannot control the finishing of the products, the warranty for WEATHER GUARD
®
Products on paint is not applicable on refinished products.
STEP 1. Sand the surface to be painted with 180-200 grit sand paper to rough up the
surface. This should be followed by wet sanding with a 400 grit wet or dry paper.
STEP 2. Wipe down the sanded surface with ketone based thinner. This removes the
dust and softens the powder coating for better paint adhesion.
STEP 3. Wipe sanded area with a tack rag to remove loose dust and particles before
painting.
NOTE: Do not use a lacquer over the powdered coating.
STEP 9. Place the straight board across the Crossmembers on one side of the rack. Raise the 225-3 Crossmember
up to the board, then tighten the Mounting Bracket to Stand bolts on that side. Repeat this for the other side of the
rack.
STEP 10. To adjust the Adjustable Clamp(s), loosen the Adjustable Clamp(s) bolts. Open the Rear Clamp, and place a
ladder on the rack. Close the Rear Clamp. Adjust the Adjustable Clamp forward or back to capture the nearest ladder
rung. Tighten the bolts.
Step 8 for Astro / Safari
STEP 8. Drill the marks with a 13/32"
bit. Apply E-6000 Sealant to the
roof around each hole. Install Blind
Fastener following the installation
instructions on the back page. Once
installed, fill the top of the Blind
Fastener holes with E-6000 Sealant.
Fasten the rack as shown in Figure 5.
Step 8 for Ford Windstar
STEP 8. Drill the marks with a 9/32"
drill bit. Apply E-6000 Sealant to the
roof around each hole. Fasten the
Rack to the roof as shown in Figure
6.