WEATHER GUARD Model 225-3 Accessory Cross Member, Compact User Manual
Page 3
3
STEP 3. Loosely fasten the Stands to the Crossmembers.
STEP 4. Adjust then tighten the Stand Assemblies to the following dimensions:
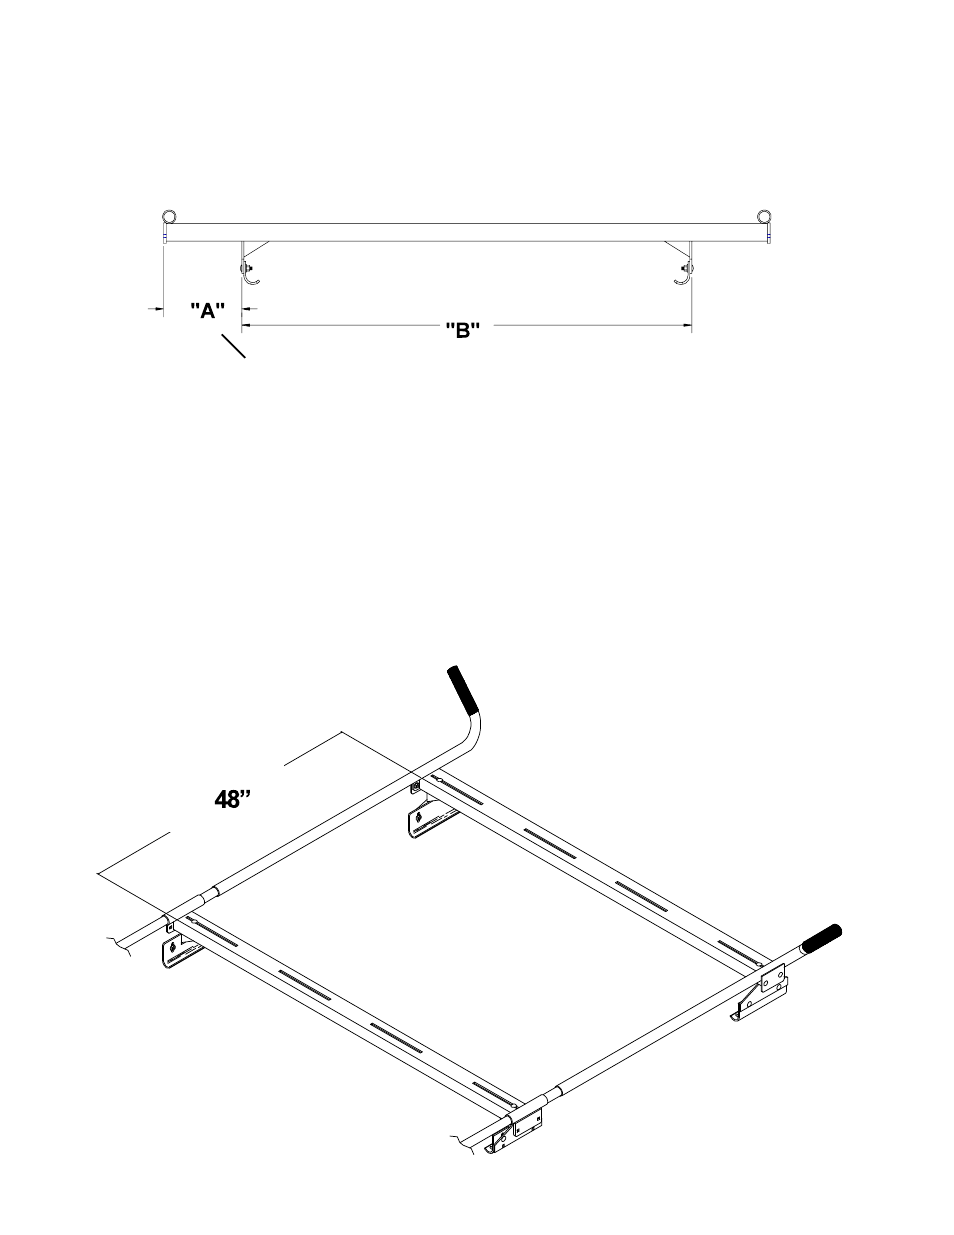
Chevy Astro/GMC Safari: "A" - 1-1/16"
Ford Windstar: "A" - 7-5/8"
"B" - 56-7/8"
"B" - 43-3/4"
STEP 5. (Only if relocating the Ladder Guide and Adjustable Clamp Assembly) Place a ladder in position on the 225-
3 Crossmember, on a side with an Adjustable Clamp. Place a Ladder Guide in the Crossmember slot, 1/2" from the
ladder side. Fasten the Ladder Guide. Repeat this for the other side of the 225-3 if applicable. If you will be carrying a
step ladder, you may want to wait until the rack is completely installed before mounting the Ladder Guide(s), to ensure
proper Ladder Guide location due to the taper of the ladder sides.
STEP 6. Slide the 225-3 Crossmember Assembly onto the rear side rails. Refasten the front side rails to the rear side
rails and front Crossmember.
STEP 7. Move the 225-3 Crossmember to the dimension shown in Figure 4. Mark through the obrounds in the
Mounting Brackets at the point where the Mounting Bracket radius meets the roof. Move the rack rearward so the
marks are accessible.
Figure 1. Parts Identification
Figure 2. Stand Assembly
Figure 3. Stand Adjustment
Dimension "A" should center the Stands side to side.
Adjust both Stands accordingly if they are not even.
221-3 Stand
221-3 Center
Mounting Bracket