WEATHER GUARD Model 225-3 Accessory Cross Member, Compact User Manual
Page 2
2
STEP 1. Remove the two #10-24 Screws that hold the front and rear side rails together. Unbolt and remove both front
rails from the front Crossmember. Unbolt the Adjustable Ladder Clamp and corresponding Ladder Sway Brace from
the front Crossmember if you plan on moving them to the 225-3 Crossmember.
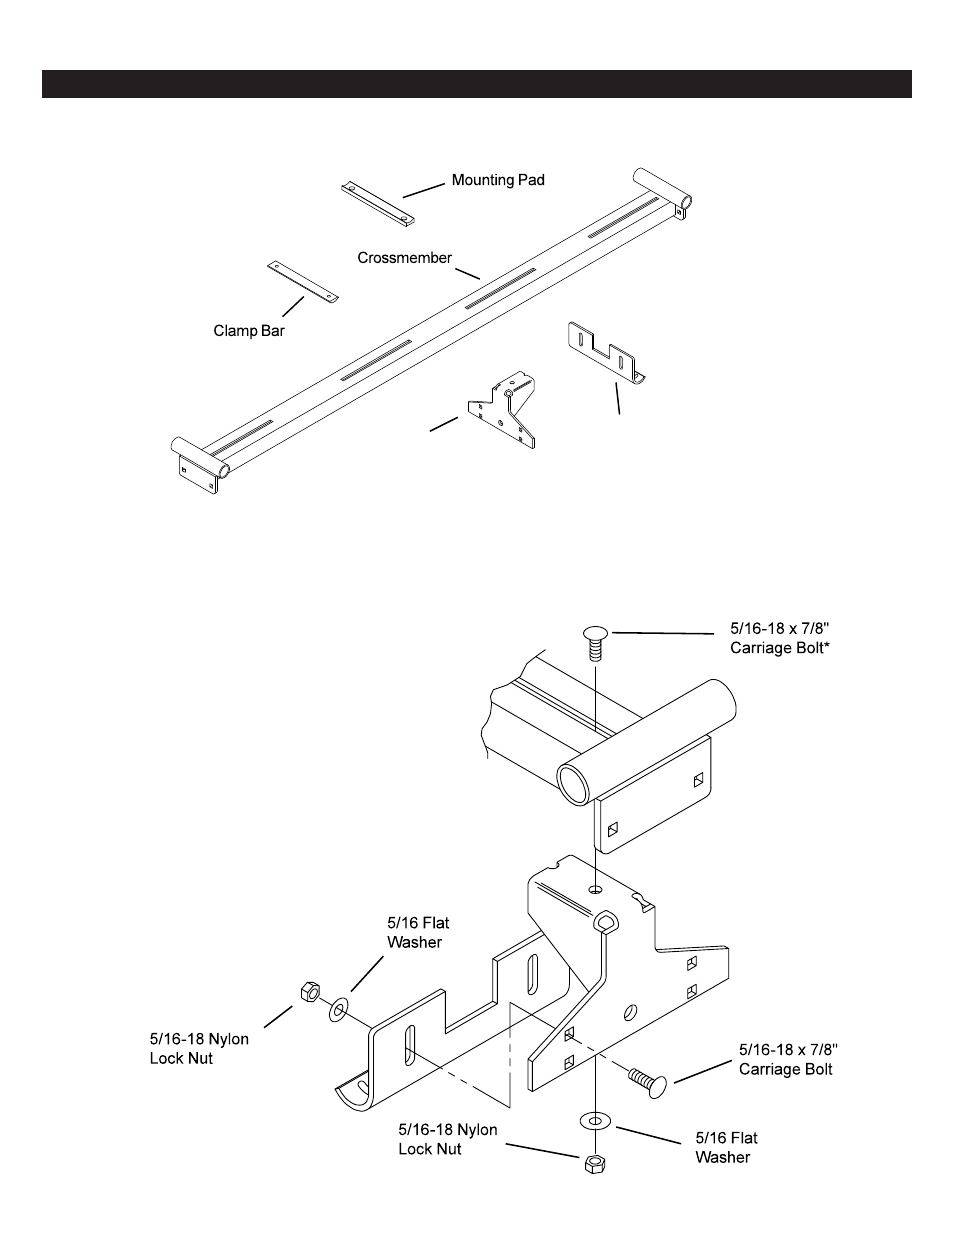
STEP 2. Fasten the Mounting Brackets to the Stands just loose enough so the Mounting Brackets will pivot on the
bolts (see Figure 2.).
INSTALLATION INSTRUCTIONS
NOTE: This instruction sheet is designed for vehicles with the van rack already installed. If installing the 225-3 while
installing a 223-3 or 224-3, follow those instructions, which will refer you back to this instruction sheet when necessary.
*NOTE: If installing the rack on a
Windstar van, use the 5/16-18 x 1-1/4"
Carriage bolt (removed from the front
Crossmember/Stand) in place of the
5/16-18 x 7/8" Carriage Bolt if
fastening the Stand and an Adjustable
Clamp Assembly to the Crossmember.
Use a 5/16- 18 x 7/8" carriage bolt
from the 225-3 bolt kit to replace the
5/16-18 x 1-1/4' carriage bolt used for
the 225-3.
Figure 1. Parts Identification
Figure 2. Stand Assembly
Figure 3. Stand Adjustment
Dimension "A" should center the Stands side to side.
Adjust both Stands accordingly if they are not even.
221-3 Stand
221-3 Center
Mounting Bracket
Figure 1. Parts Identification
Figure 2. Stand Assembly
Figure 3. Stand Adjustment
Dimension "A" should center the Stands side to side.
Adjust both Stands accordingly if they are not even.
221-3 Stand
221-3 Center
Mounting Bracket