Warning – WEATHER GUARD Model 216-5 All-Purpose Rack, Steel, Full-Size, 3 Cross Member User Manual
Page 4
If you have any questions, please give us a call. Call Toll Free 1-800-456-7865
WEATHER GUARD® products are protected by one or more of the following trademarks:
U.S. - 842268, 1661625, 1663369, 1750034, 2228051, 1643535; Canada - 282725; U.K. - 1400720;
N.Z. - 296049; Aus. - 761964 other trademarks pending.
KNAACK MANUFACTURING COMPANY
420 E. TERRA COTTA AVENUE - CRYSTAL LAKE, ILLINOIS, USA 60014
©2005 Knaack Manufacturing Company
-NOTICE-
Any modification or unintended use of this product shall immediately void all manufacturers warranties.
Manufacturer disclaims all liability for injuries to persons or property resulting from any modification to, or
unintended use of this product.
WARRANTY WILL BE
VOID IF SEALANT IS
NOT APPLIED TO ALL
SEAMS AND CREVICES
WARNING
Ladders must be secured per
ANSI standard A142.2-1990
paragraph 8.4.4. Ladder dam-
age will occur from road shock
and vehicle vibration if the lad-
der is not properly secured to
the ladder rack. Bouncing and
side to side motion of a im-
properly secured ladder will
cause wear and weaken the
ladder. Using a damaged ladder
could lead to a structural col-
lapse and could result in a seri-
ous injury or death.
Step 4. Sealant
Seal all seams and crevices, such as
socket tube ends.
Step 5. Tie Down Loop and
Ladder Stop.
Secure the Tie Down Loop to the
Crossmember after determining where
you want it to hold your ladder. With a
Ladder on the rack, locate the Ladder
Stop inside of the ladder and then se-
cure. Insert a strap through the loop on
the Ladder Stop and on the front
Crossmember. Refer to the warning
decal on the Ladder Stop.
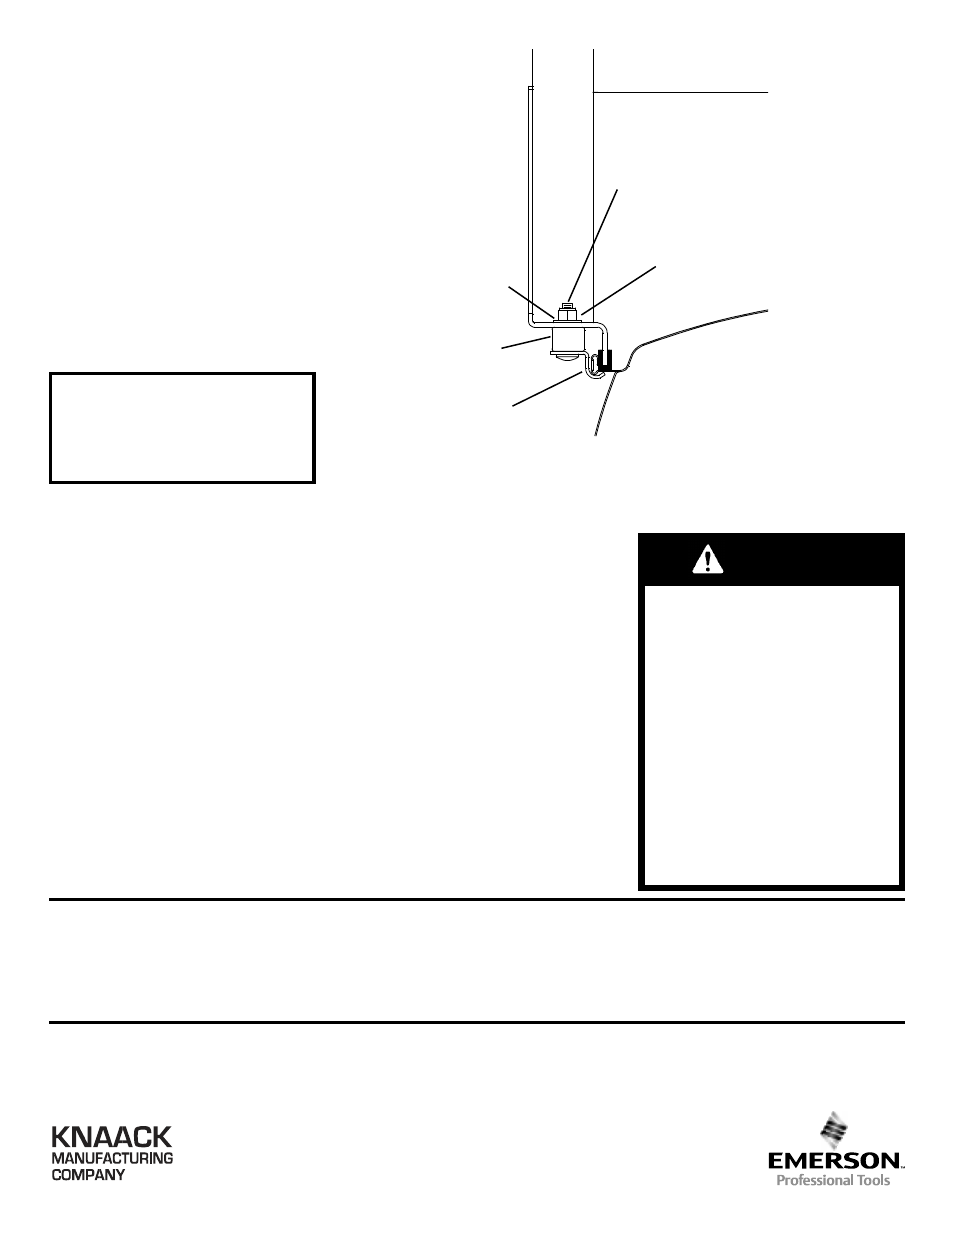
Clamp,
Universal
Figure 9. Clamping to a Ford or Dodge
1/4-20 Nylon
Lock Nut
1/4-20 x 1-1/2"
Carriage Bolt
1/4" Flat
Washer
Spacer,
Clamp
All other applications: The Stand
must contact the vans gutter and in-
stalled as shown in
Figure 9. A Spacer
will need to be installed between the
Clamp and the Stand.
At the end of the first week of use,
check all of the fasteners for proper
tightness and then check every three
months thereafter.
- Model 216-3 All-Purpose Rack, Steel, Full-Size, 3 Cross Member Model 2056-5 Accessory Cross Member, High-Roof, full size van Model 2056-3 Accessory Cross Member, High-Roof, full size van Model 205-5 All-Purpose Rack, Steel, Full-Size, 2 Cross Member Model 205-3 All-Purpose Rack, Steel, Full-Size, 2 Cross Member