Caution warning – WEATHER GUARD Model 9452-3-01 EZ-Cube Shelf Unit, 42 in x 51 in x 14 in User Manual
Page 3
PAGE 3
IF YOU HAVE ANY QUESTIONS, PLEASE CONTACT US TOLL-FREE AT .800.456.7865
CAUTION
WARNING
All floor mounting bolts near the fuel tank area should be installed
from the underside of the vehicle, to guard against the fuel tank
being punctured in the event of a collision. This would mean not
using Blind Fasteners in this area. Holes in this area should be 5/16".
Ensure ample space in roof ribs and sidewall ribs for mounting
screws so as not to puncture exterior roof or wall.
Prior to drilling, so as not to cut or puncture fuel tanks, fuel lines,
brake lines, electric wires, etc., check behind or underneath drilling
and mounting locations.
To keep debris out of your eyes when checking the underside of
the vehicle, or when drilling, always wear protective eyewear.
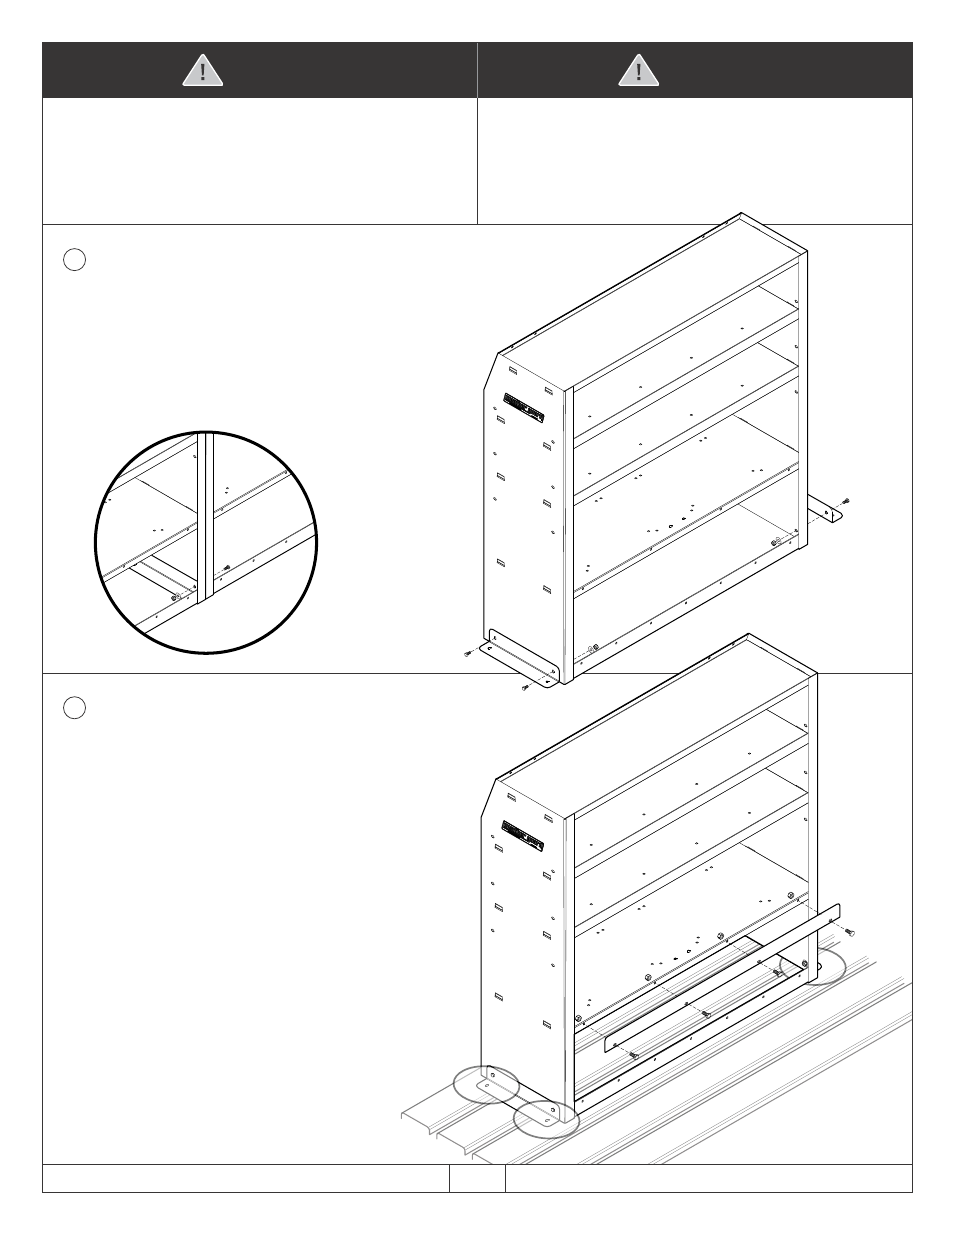
1
Attach the Floor Mounting Brackets to both
ends of the Welded Shelf using four (4) 1/4-
20 x 3/4" Hex Head Bolts, 1/4" Flat Washers
and 1/4-20 Nylon Lock Nuts.
NOTE: Floor Mounting Brackets can be
installed on the outside or inside ends of the
Welded Shelf. When installing two Welded
Shelves side by side or connected to a
Bulkhead, only one Floor Mounting Bracket
is required and should be installed inside.
2
Fasten the lower Shelf Lip to the Welded
Shelf using four (4) 1/4-20 x 5/8" Hex Head
Bolts and 1/4-20 Nylon Lock Nuts.
Place the Welded Shelf into your selected
position in the van, as close to the wall as
possible. Mark the four floor mounting holes.
Remove the Welded Shelf and pre-drill the
floor mounting locations with an 1/8" drill
bit, then re-drill the hole with a 5/16" drill bit.
If there is a floor mat, then Floor Mounting
Spacers are required. Cut the floor mat
around the 5/16" holes with the 1" hole saw,
allowing Floor Mounting Spacers to rest
against the metal floor.
DO NOT DRILL
THROUGH THE VAN FLOOR WITH THE
HOLE SAW.